Overview
Just like in Photoshop
Like in many other digital art applications, in Infinite Painter you can build your artwork using multiple overlapping layers.
A layer is a separate RGBARGBAEncoding of RGB color space with transparency (the “A” stands for “alpha channel”). Technically a RGBA image consists of four channels, three of them encoding the RGB color of each pixel plus the “alpha” channel encoding opacity of each pixel. image (usually) of the size of the canvasCanvasThe rectangular area of a defined size that contains the artwork. All and only the canvas will be exported or printed.. Layers can be stacked on top of each other. There are also special kinds of layers, like adjustmentAdjustment layerA special, non-editable layer that works as a real-time adjustment or filter for all the underlying layers. There are various types of adjustment and filter layers.Learn more and filter layersFilterA filter, in digital image editing and digital art, is a predefined function or digital effect that may be applied to an image in order to change its appearance in certain way. Filters may change colors, structure or style of the image.Learn more layers, which are not bitmaps, but add specific contents to the artwork or modify the layers beneath.
Layers can have special properties and features, but fundamentally, they are simply digital images stacked on top of each other.
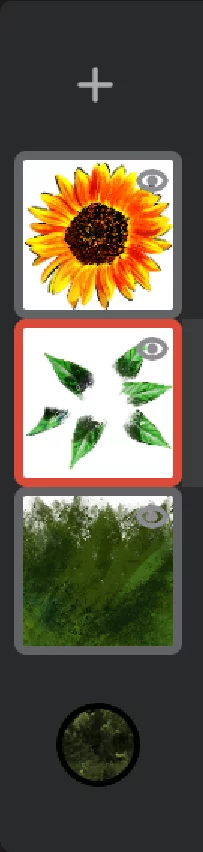
Layers and their representation in the Layer panel (see Layer panel — overview)
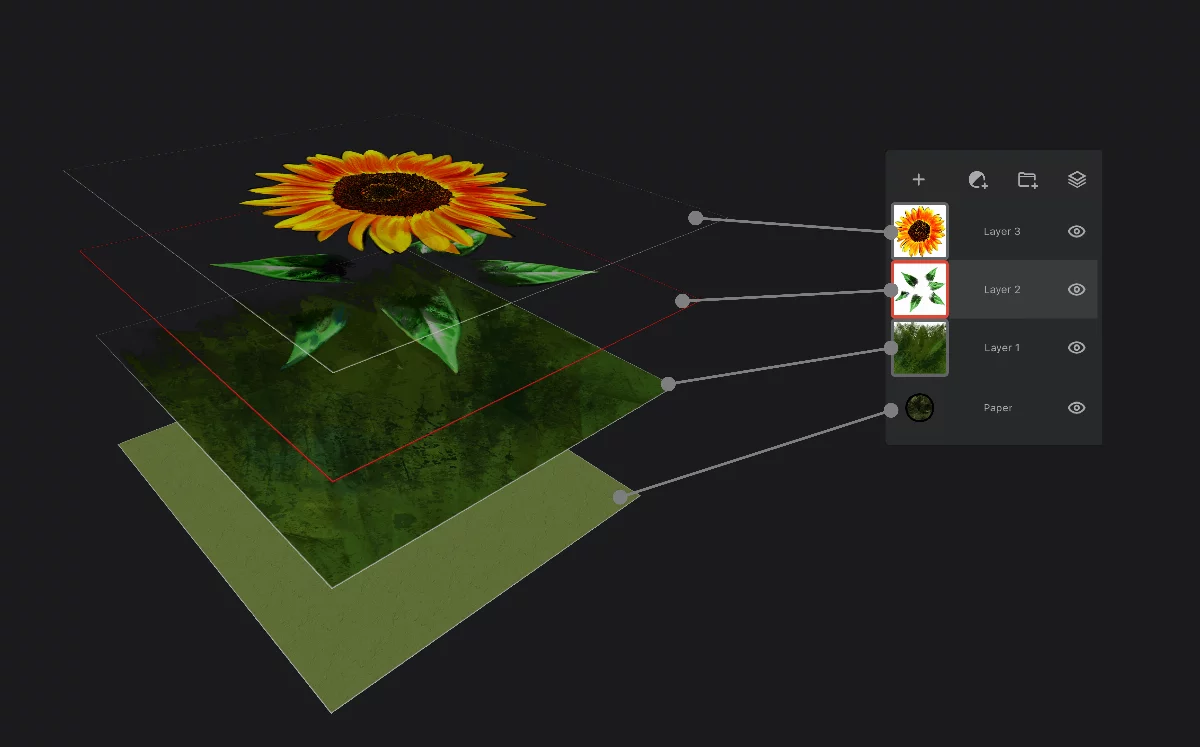
Inactive layer
ActiveActive layerIt is the layer which is currently edited. In Infinite Painter, only one layer may be “active” at a time (except for the Transformation tools, where you can select a number of layers to be transformed simultaneously). layer
(its thumbnail is marked with the red frame)
Inactive layer
Paper layer
“Paper” is a special background layer. You may change the color of it and add a texture to it, but not paint on it. Learn more in Paper layer.
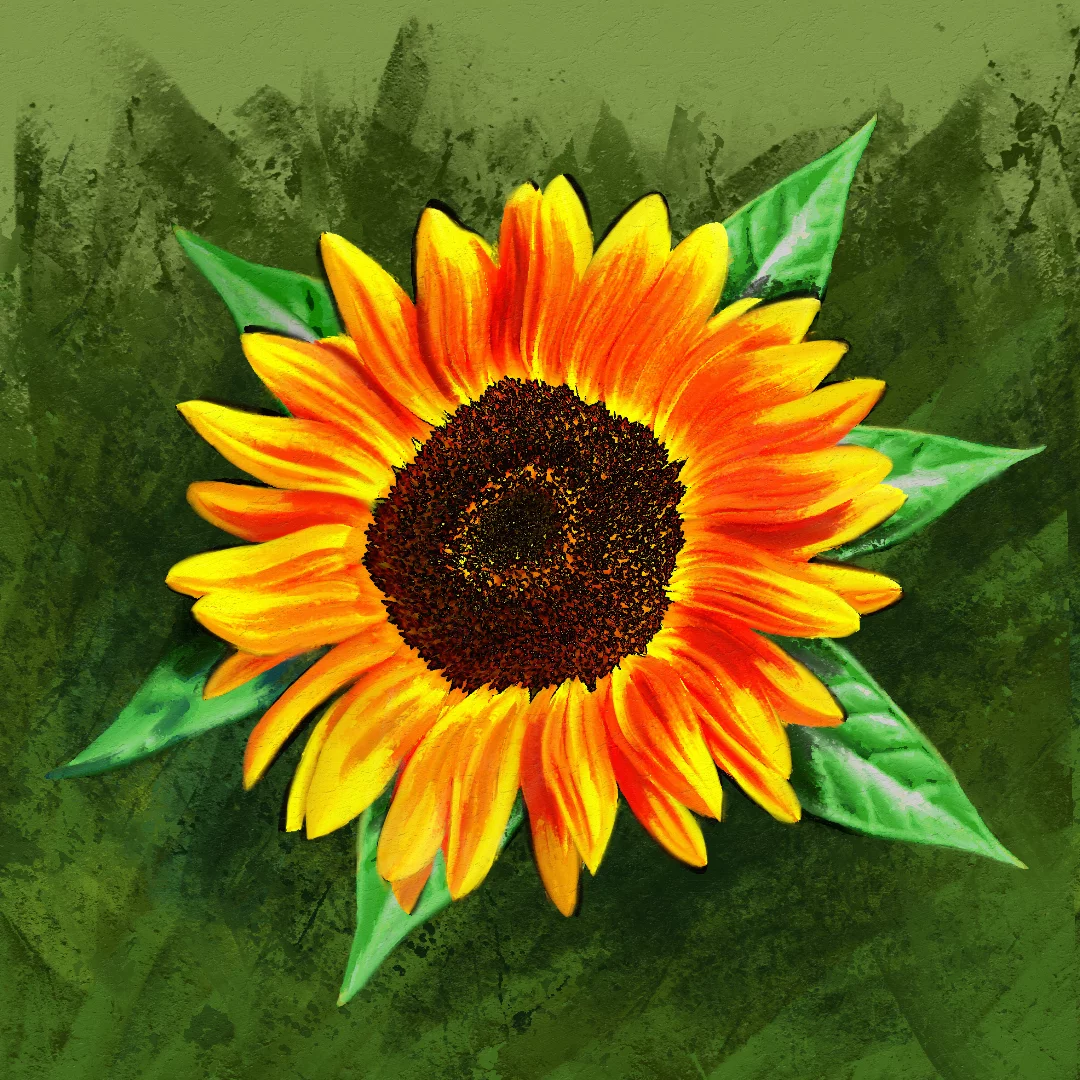
Resulting image
The number of layers available in a project is limited only by the available memory on your device. You don't have to use multiple layers; but you can.
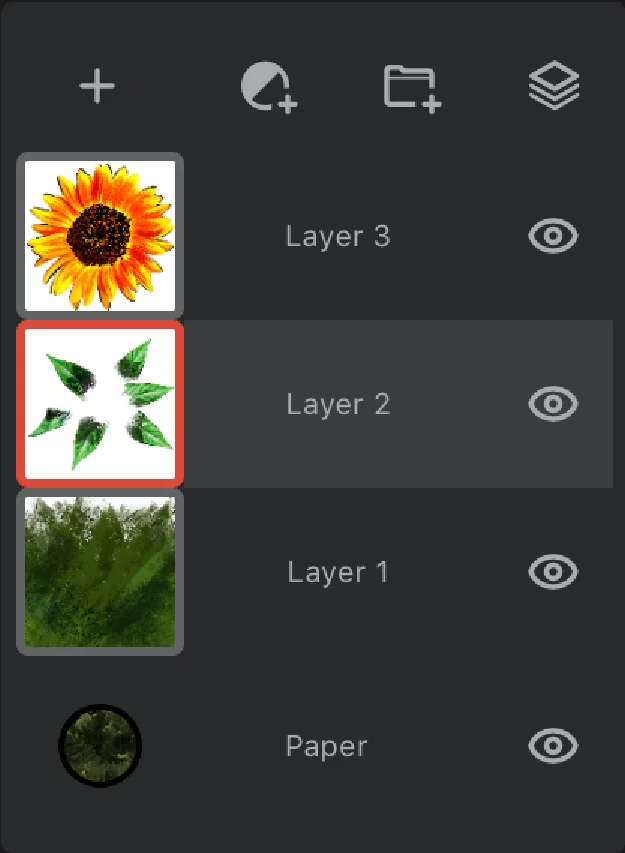
Layer panel — overview
Larger or smaller, always useful
![]()
Open the Layer panel with the icon on the top bar. You can close (hide) the panel the same way.
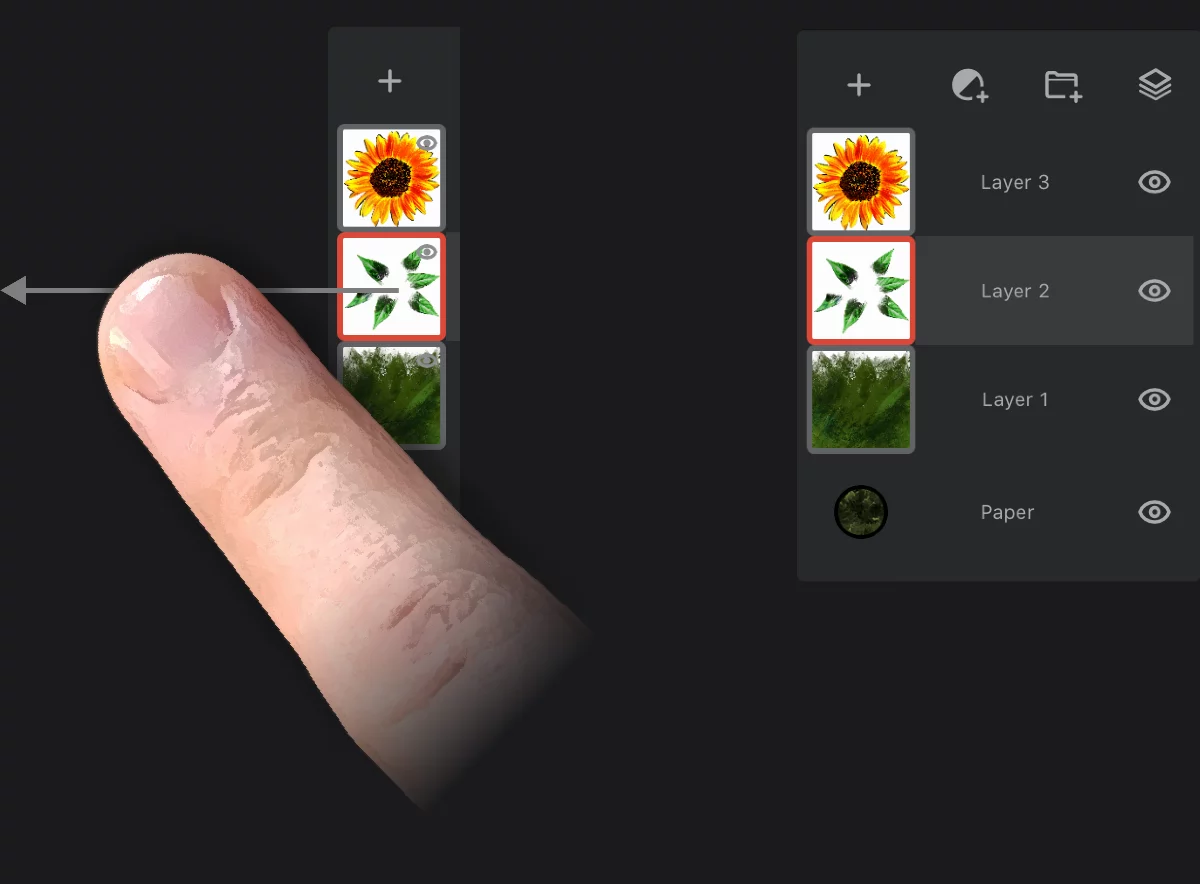
Collapsed vs expanded Layer panel
The Layer panel opens usually in its collapsed (compact) form (in order to save the screen space). You can expand the panel to its full form by sliding to the left.
Layer panel (expanded view)

PaperPaperA special layer at the bottom of the layers’ stack: the background of the artwork. The Paper can have a solid color fill and (optionally) a texture.Learn more layer
More in Paper layer.
![]()
Active layer
The one you are painting on (even if it is not on top).
![]()
Inactive layer
Tap on its thumbnail to make it active.
The Layer panel can be collapsed to save the screen space.
Collapsed Layer panel
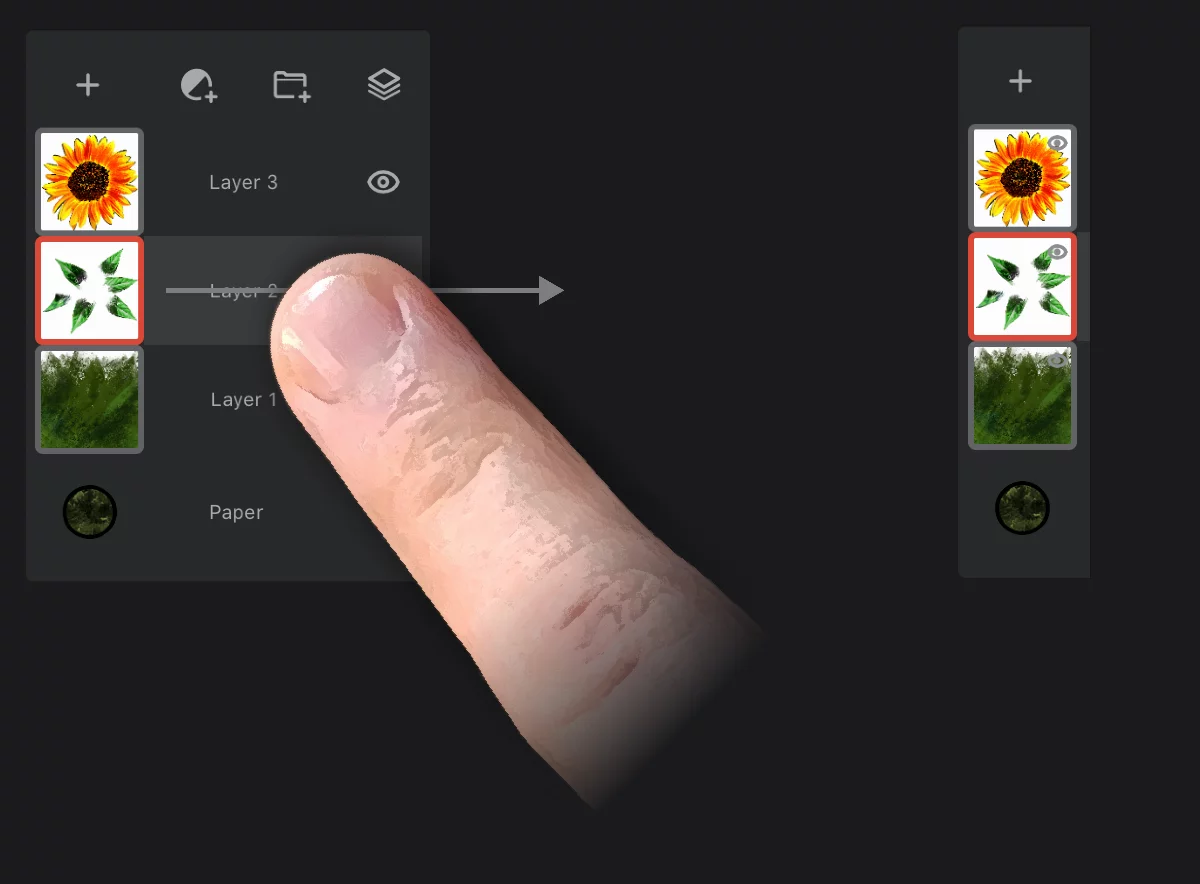
Slide to the right to collapse the panel.
In the collapsed view you can still do a lot; see below.
Layer panel — collapsed view
Save the screen space
Collapsed layer panel still offers a lot of functionality.
![]()
Add a new layer
button
![]()
Tap the tiny eye icon
to toggle the layer's visibility (hide or show given layer)
Tap the thumbnail to make the layer active
Tap again to open the layer options pop-up (more in Layer options)
Long-press and drag to move layer up or down
more in Reorganizing the layers.
(The long press temporarily expands the panel)
Pinch layers to group them (more in Grouping layers with a gesture).
Layer panel — controls
Layer control center
![]()
Add layer (adds a new empty LayerLayerA layer is a separate RGBA image (usually) of the size of the canvas. Layers can be stacked on top of each other. above the active layer)
![]()
Add an adjustmentAdjustment layerA special, non-editable layer that works as a real-time adjustment or filter for all the underlying layers. There are various types of adjustment and filter layers.Learn more or a filter layerFilter layerA special layer that applies a filter to the layers below in the layer stack. The layers below it can be edited with the filter being updated in real time.Learn more (each adds a new special layer). Learn more in Special layers.
![]()
New layer group
Creates a layer groupLayer groupA number of layers bound in a temporary unit. Groups (a.k.a. layer folders) can be nested within other groups.Learn more containing the current (active) layer. Learn how to use layer groups in Layer grouping.
![]()
Visibility mode
indicates the current visibility mode of the layer stack
(here shown in Normal mode)
Tap to open the Rendering panel.
Learn about the visibility modes in Layer visibility modes.
Each layer’s "tile" has its own set of controls. See Basic layer controls.
See Reorganizing the layers for how to change layer order.
See Layer grouping for advanced layer operations like layer grouping.
Basic layer controls
Control the current layer
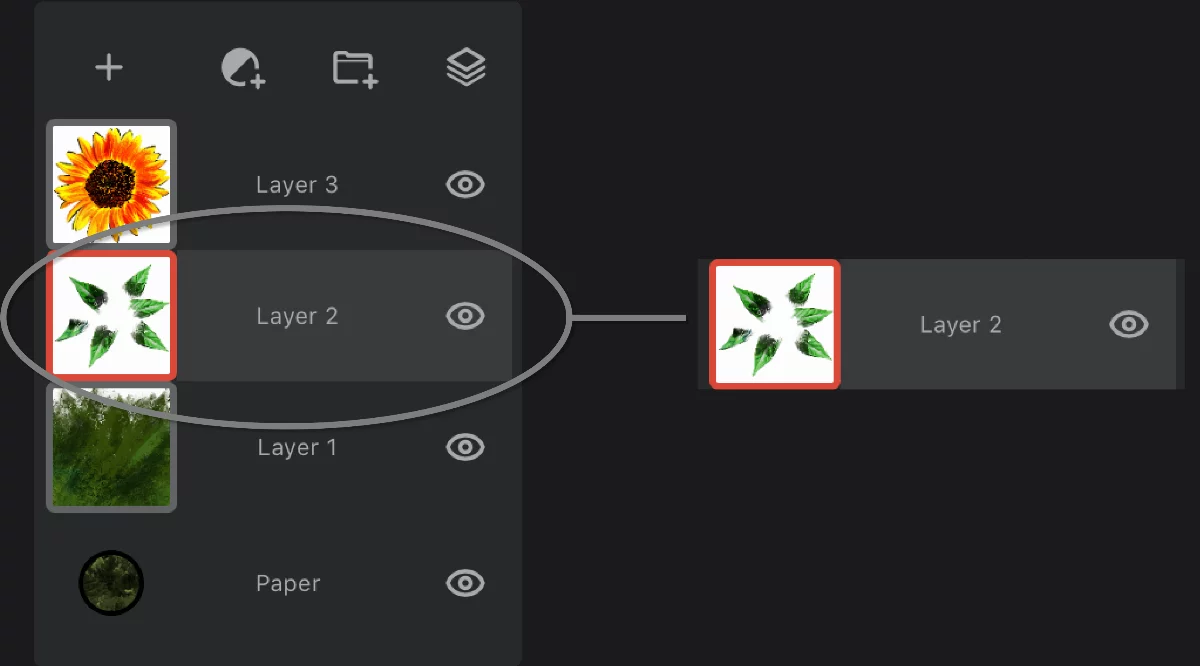
Layer representation
(layer tile)
Layer thumbnail shows a miniature preview of the layer's contents and displays information about opacity and Color blending modeColor blending modeIn digital image editing and digital art, blending modes determine how the pixels of one layer interact with the pixels of underlying layers. These modes apply mathematical operations to color values, altering how the layers combine.
Not to be confused with the brush blend mode.Learn more of the layer (more in Layer options)
![]()
Tap on the thumbnail to make the layer active. Tap again to open the Layer options popup.
Layer name
You may rename the layer in the layer options popup. Tap on the layer name to open the popup.
![]()
![]()
Layer visibility
Tap to toggle (hide or show the layer).
Layer thumbnail may display additional info:
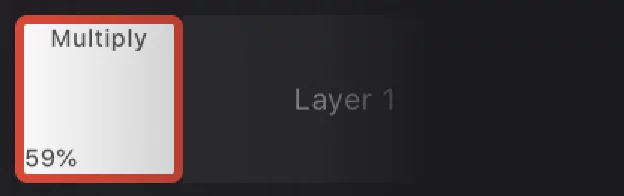
Layer blending mode
(if different than Normal). Learn about the color blending modes in Layer blending modes.
Layer opacity (if different than100%). Learn more in Layer options.
In the compact view the thumbnail also displays the layer visibility icon (the eye icon)
![]()
Tip: This is also a tiny button to toggle the layer’s visibility without the need to expand the layer panel.
Reorganizing the layers
Reshuffle your layers.
Long-press and drag the layer tile to move it up or down within the layer stack.
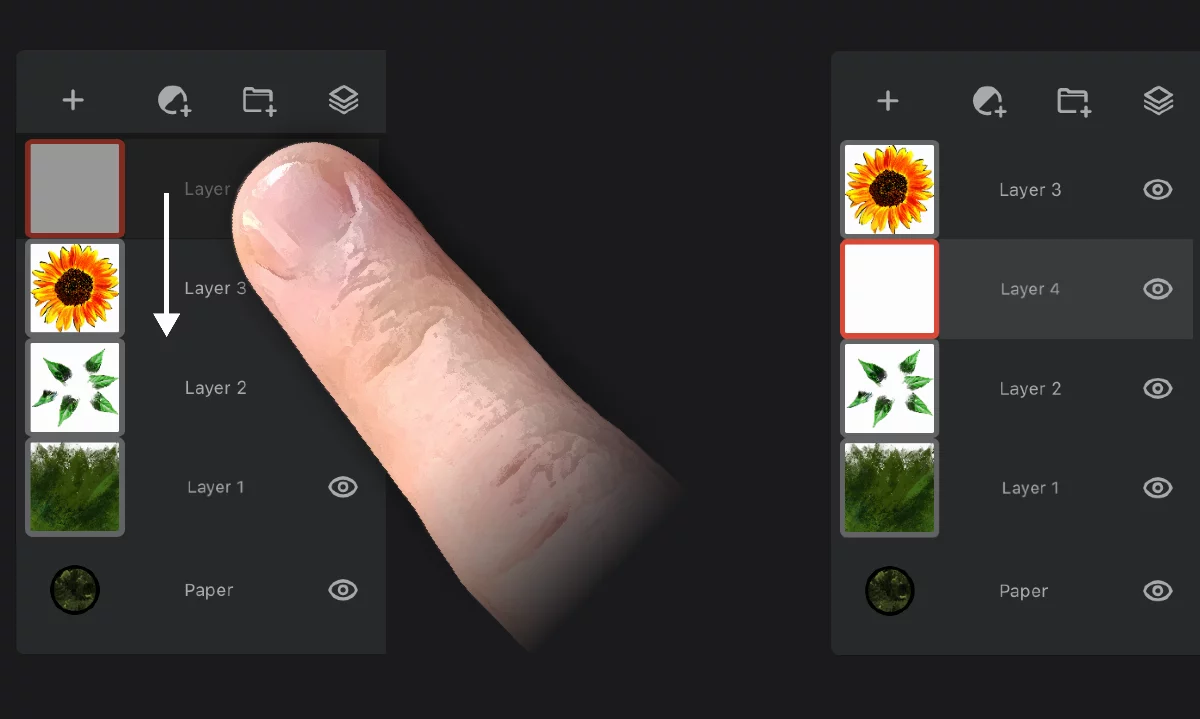
Changing a layer's position doesn't affect its content. However it may change the look of the layer (depending on contents and settings of other layers).
For obvious reasons you cannot move the paper layerPaperA special layer at the bottom of the layers’ stack: the background of the artwork. The Paper can have a solid color fill and (optionally) a texture.Learn more layer.
Layer maskLayer mask![]()
An 8-bit (grayscale) image mask attached to a layer. The white areas in the mask reveal the pixels of the host layer, the black areas mask out the layer (yield transparency).Learn more always moves with its host layer.
By dragging, you can also move a layer into (or out of) a layer groupLayer groupA number of layers bound in a temporary unit. Groups (a.k.a. layer folders) can be nested within other groups.Learn more.
Learn about grouping layers in Layer grouping.
Layer options
All controls for the current layer.
Tap on the thumbnail of the active layer to open the Layer options popup:
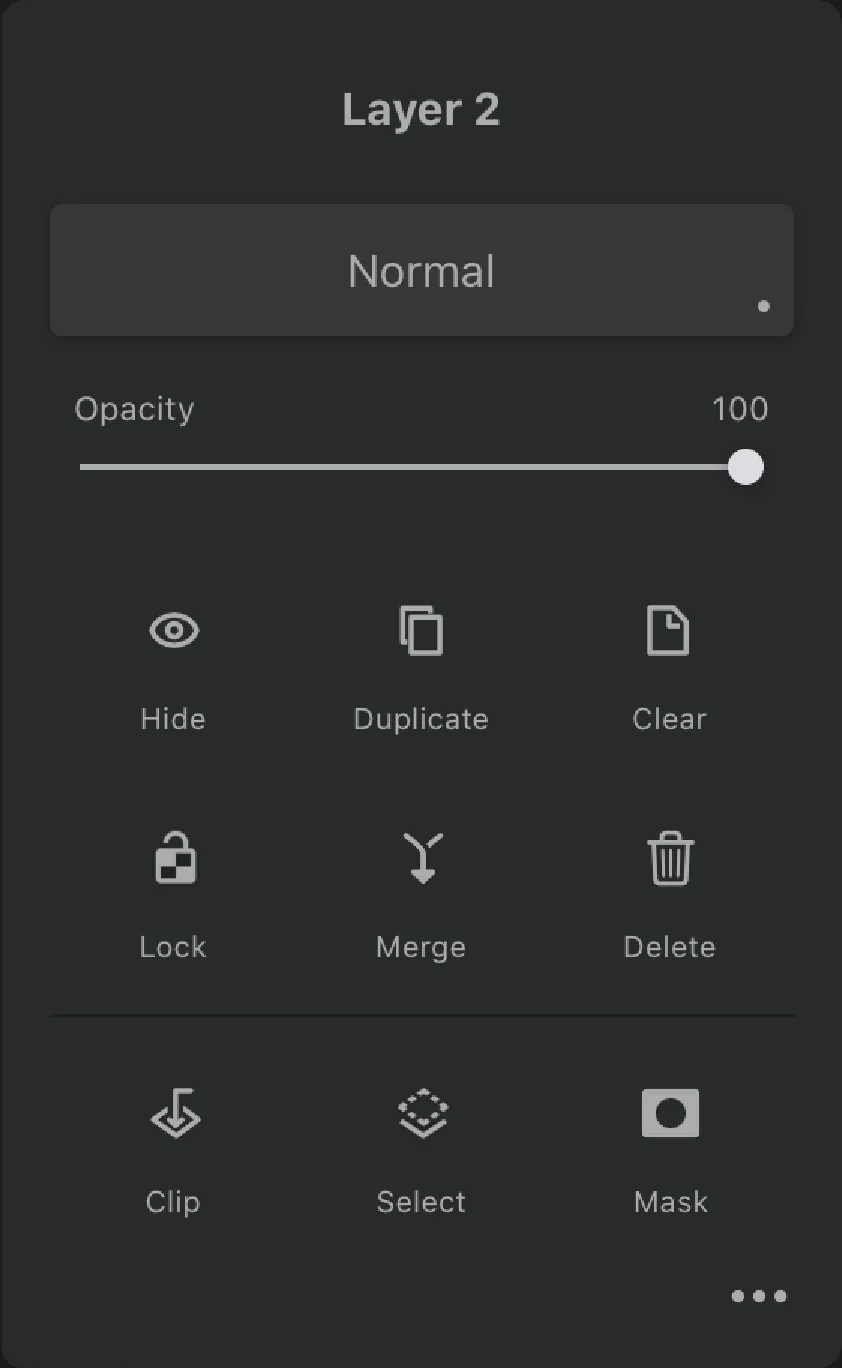
Rename the layer
Tap to edit the layer’s name. Layer names do not have to be unique. Names can contain any characters, numbers, emojis etc.
Layer blending mode
This selector displays the name of the currently active color blending modeColor blending modeIn digital image editing and digital art, blending modes determine how the pixels of one layer interact with the pixels of underlying layers. These modes apply mathematical operations to color values, altering how the layers combine.
Not to be confused with the brush blend mode.Learn more of the layer (here shown the default, “Normal”).
Tap to select a different blending mode from the list (see Layer blending modes).
Layer opacity
Use the slider to adjust the opacityOpacityMeasure of how much a layer (or a pixel on a layer) obscures the background. Zero opacity means full transparency; 100% opacity means that no background is visible. of the layer (0–100%). At zero opacity, the layer is invisible and cannot be edited.
![]()
Hide
Toggles the visibility of the current layer. Hidden layer cannot be edited.
![]()
Duplicate
Creates an exact duplicate of the active layer, placing it above the original.
Note that the duplicate will bear the same name as the original.
![]()
Clear
Removes all the contents of the current layer. This can be undone, but be careful.
![]()
Lock transparency
When active, prevents painting on transparent pixels. Note that you still can paint on existing non-transparent areas.
![]()
Merge
Merges the contents of the current layer with the one below. See Merging layers below.
![]()
Delete
Removes the entire layer and all of its content. Be very careful.
![]()
Clip
Uses the layer immediately below as a mask for the current layer
More about clipping masks in Layer clipping.
![]()
Select
Makes a SelectionSelectionA selection is a defined region of your canvas that can be used to edit its content or to limit the application of painting tools (like a stencil). Technically, a selection is an 8-bit (grayscale) mask image which defines the selected vs. masked areas of the canvas. based on the current layer's opacity. More in Selecting layers.
![]()
Mask
Adds a bitmap Layer maskLayer mask![]()
An 8-bit (grayscale) image mask attached to a layer. The white areas in the mask reveal the pixels of the host layer, the black areas mask out the layer (yield transparency).Learn more to the layer. Learn more about using layer masks in Layer masking.
![]()
More…
Expands the panel to show more options:
More options
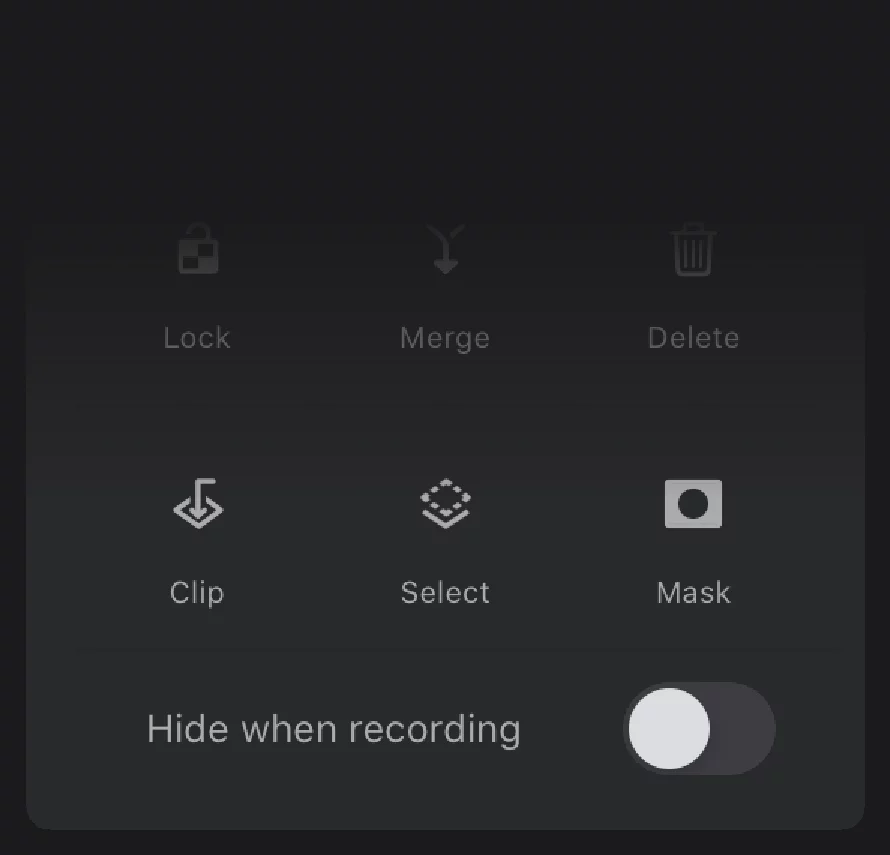
Hide when recording
Ignores the current layer in the timelapse video recordingTime-lapse recordingA video recording depicting the creative process in Infinite Painter. The video shows only the canvas (not the interface) and it is accelerated to fit all the process to a preset duration. Time-lapse recording is recorded and saved per project.Learn more.
Learn more in Hiding layers from recording.
Merging layers
Ex pluribus unum.
![]()
Merge command in the Layer options menu:
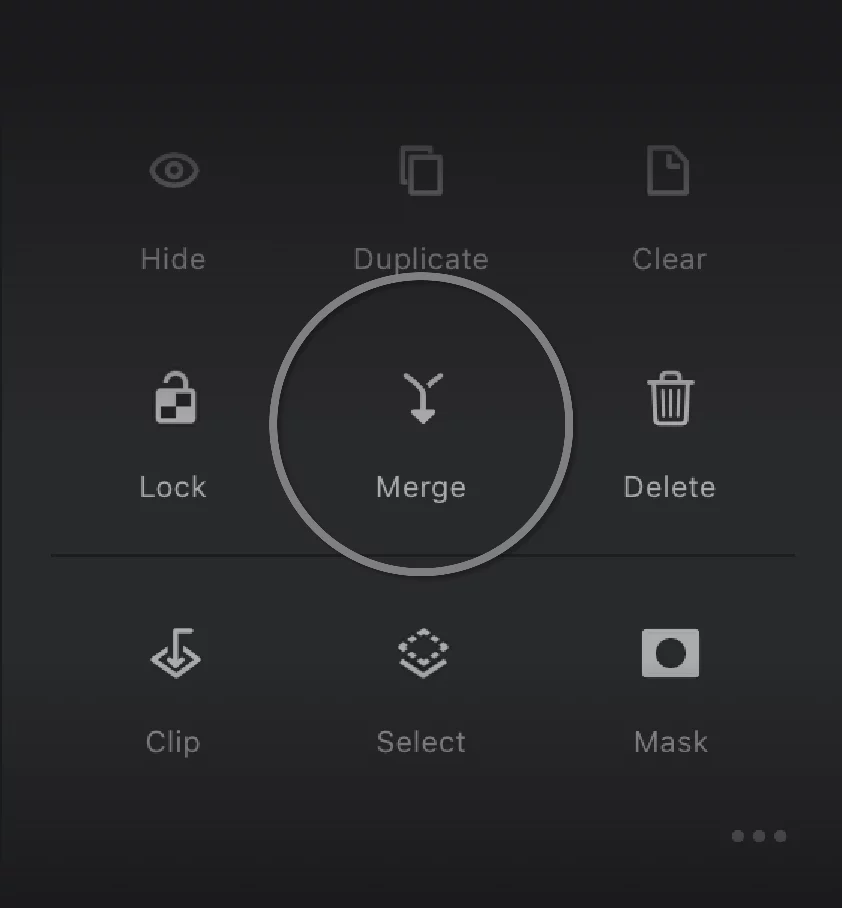
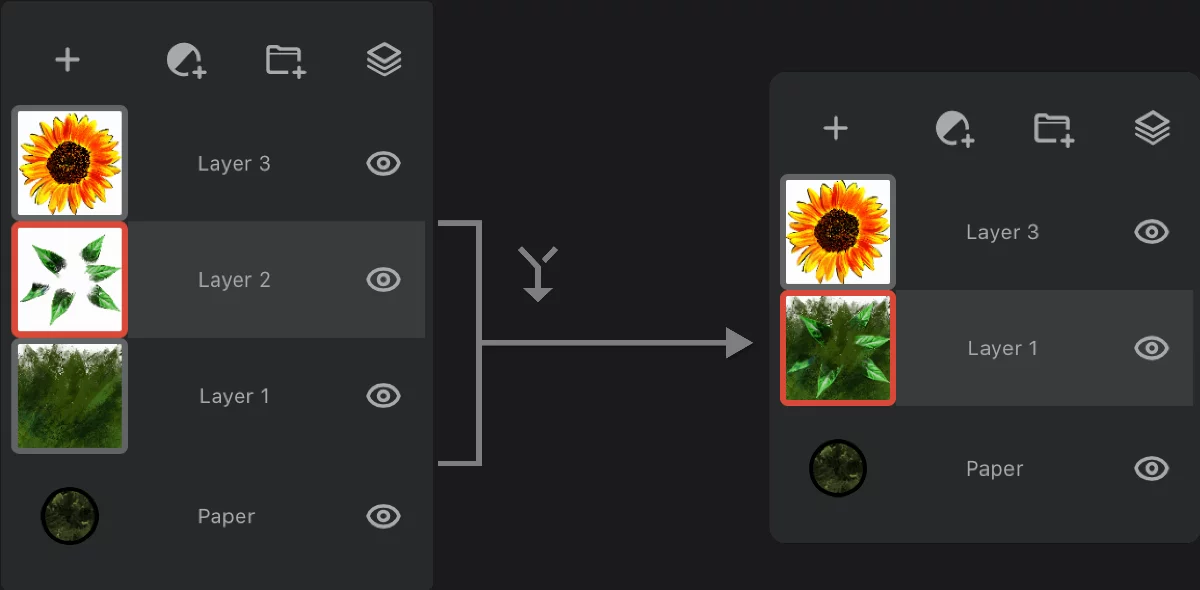
The resulting layer inherits the name from the lower layer and its blending mode (but always has 100% opacity)
You can merge only one pair of layers at a time.
If you want to quickly merge a number of layers, groupLayer groupA number of layers bound in a temporary unit. Groups (a.k.a. layer folders) can be nested within other groups.Learn more them and use the Flatten group command.
More in Layer group options.
Merging a regular layer with an adjustment layerAdjustment layerA special, non-editable layer that works as a real-time adjustment or filter for all the underlying layers. There are various types of adjustment and filter layers.Learn more may produce unexpected results.
Merging an adjustment layer with a regular layer applies the adjustment to the resulting layer, but removes it from all layers below (so the appearance of the lower layers will change).
Merging a layer with a group below produces a single layer (collapses the group and merges it with the layer).
You can merge a group of layers to a layer below using the Merge command from the group options panel. See Layer group options.
Paper layer
More than just a background
The Paper is a special layer at the bottom of the layers’ stack. It is the background of the artwork.
The Paper can have a solid color fill and (optionally) a texture.
The Paper texture is not only an image: it interacts with the brush strokes on each layer for more realistic look. Like a real rough paper or canvas.
Tap on the Paper thumbnail to access the controls in the Option popup.
Paper options popup
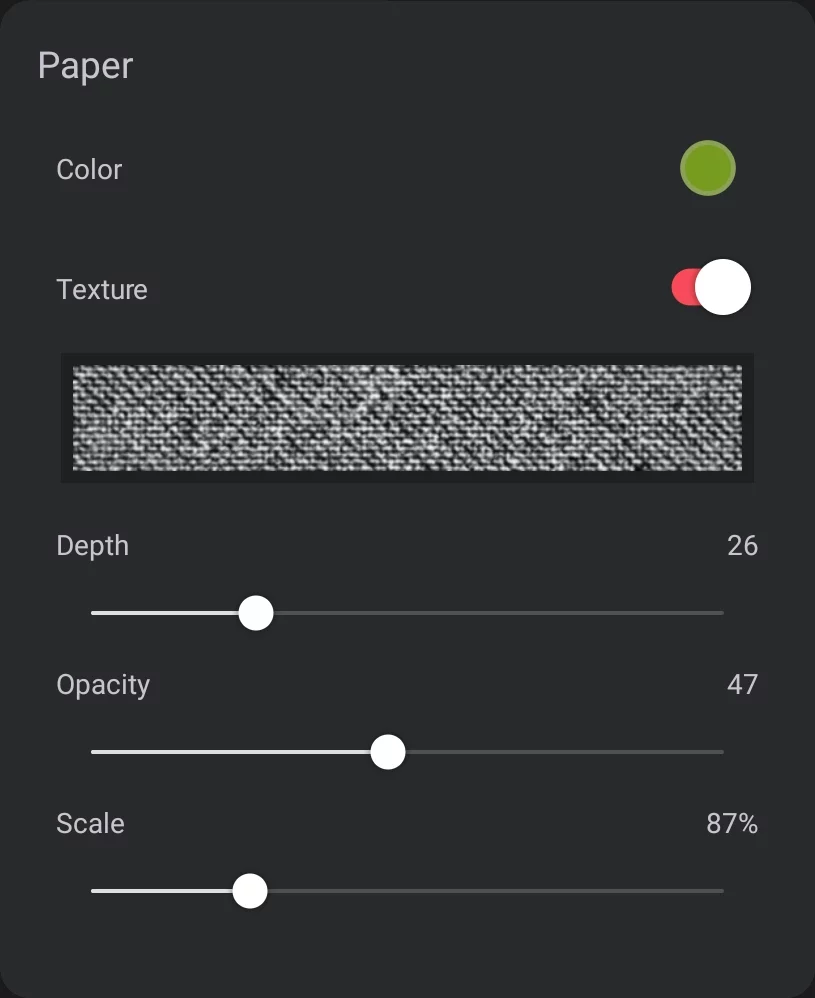
Paper color
opens a standard color picker panel (more in Color panel common controls).
The color selector offers here a special swatch palette with "paper" hues.
Paper texture switch
Switch it on if you want a texture.
Current texture thumbnail
and the texture selector – tap to select another texture. Opens the texture selector.
Texture depth
controls how much the texture affects the brush strokes. Note that too high Depth value may render certain brush strokes invisible.
Texture opacity
controls the visual appearance of the texture.
Texture scale
controls the size of the texture relative to the canvas.
![]()
When you hide the Paper layer you see a checkered background. This indicates transparency. With the Paper layer hidden, you can create and export images with transparent background. Learn more in Export as image.
With a texture applied, hiding Paper layer does not hide the texture.
Note that the Paper texture is independent from textures that may be built into certain brushes.
Both textures may interact with each other.
![]()
As Adobe Photoshop® does not feature a concept similar to the PaperPaperA special layer at the bottom of the layers’ stack: the background of the artwork. The Paper can have a solid color fill and (optionally) a texture.Learn more, export to PSD file format in certain cases may not preserve exact look of your Infinite Painter project.
Paper texture selector
Infinite Painter comes with a library of various textures that can be used as the paper textures.

Scroll and tap the chosen texture
You can import custom textures
Learn more about importing in Importing and exporting assets.
Note that even if the texture tiles may be in full RGBRGBRGB refers to a digital image in which the color of each pixel is encoded in three separate channels (for Red, Green and Blue primary colors) or to the RGB color space (the system of encoding color with these primary colors). color, only the GrayscaleGrayscaleIn computer graphics, image editing and digital art, grayscale refers to images and image encoding with only a single channel for “intensity” or “amount of light”. In other words, a monochrome image composed exclusively of shades of gray.
Commonly (but incorrectly) referred to as “black-and-white”. channel is used for the Paper texture.
Rendering panel
Controls how the entire layer stack is rendered.
![]()
Tap the visibility mode icon on top of the Layer panel to open the Rendering panel:
The Rendering panel groups options for the rendering the entire layer stack. These are non-destructive settings, so everything can be reversed.
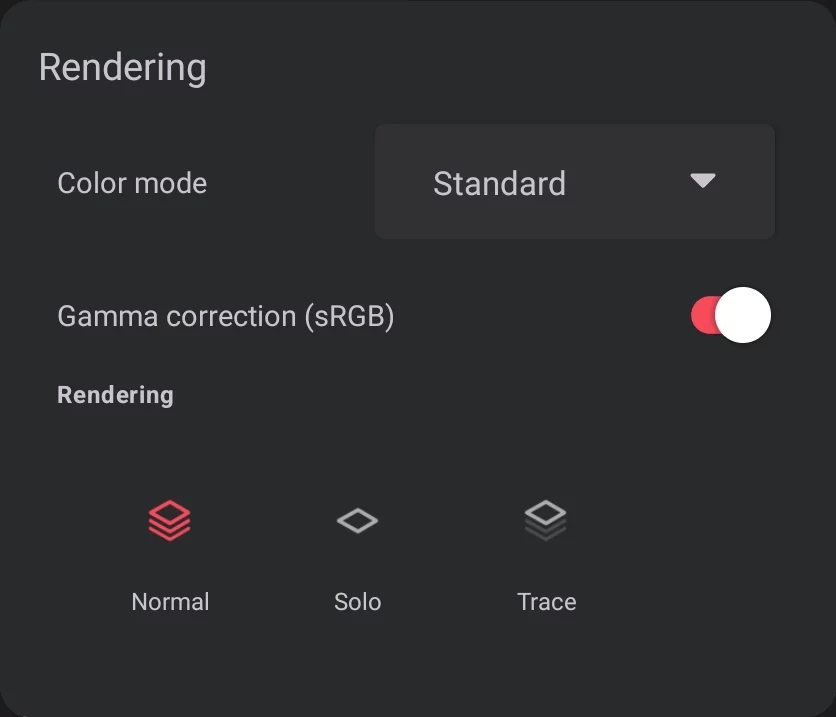
Set the color rendering options
Learn about color proofing in On-screen color proofing.
and about gamma correction in Gamma correction.
Note that these controls are accessible also from the main settings panel (and in case of the color profile — from the Color settings).
Leave as "Standard" if you do not need special color proofing.
Select the visibility modeLayer visibility modeThe way the layers are displayed:
In the Normal mode — all the layers are visible.
In the Solo mode — only the active layer is visible.
In the Trace mode — the active layer is fully visible and the rest of the layers are dimmed.Learn more of the layer:
![]()
Normal
![]()
Solo
![]()
Trace
Learn about the visibility modes in Layer visibility modes. Otherwise stick to Normal.
these options may require some professional knowledge to use.