Color blending
Use the math for art.
Color blending modes are mathematical calculations mixing current color (like current layer) with underlying colors. In case of layers it is reversible.
Normal color blending
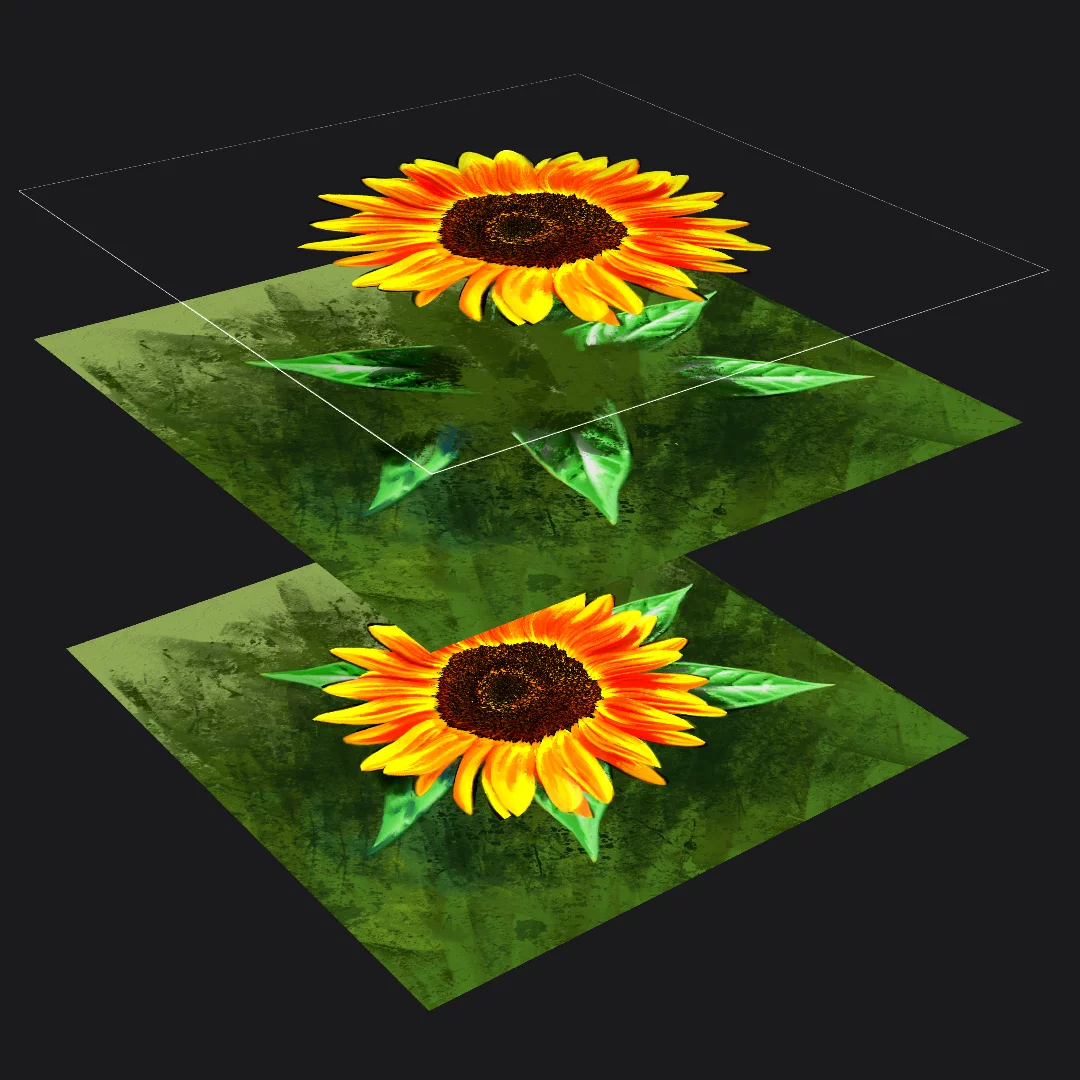
The blended layer (with Normal blending mode)
Underlying layer
The result
(visible unchanged upper color)
Linear Burn mode (as an example)
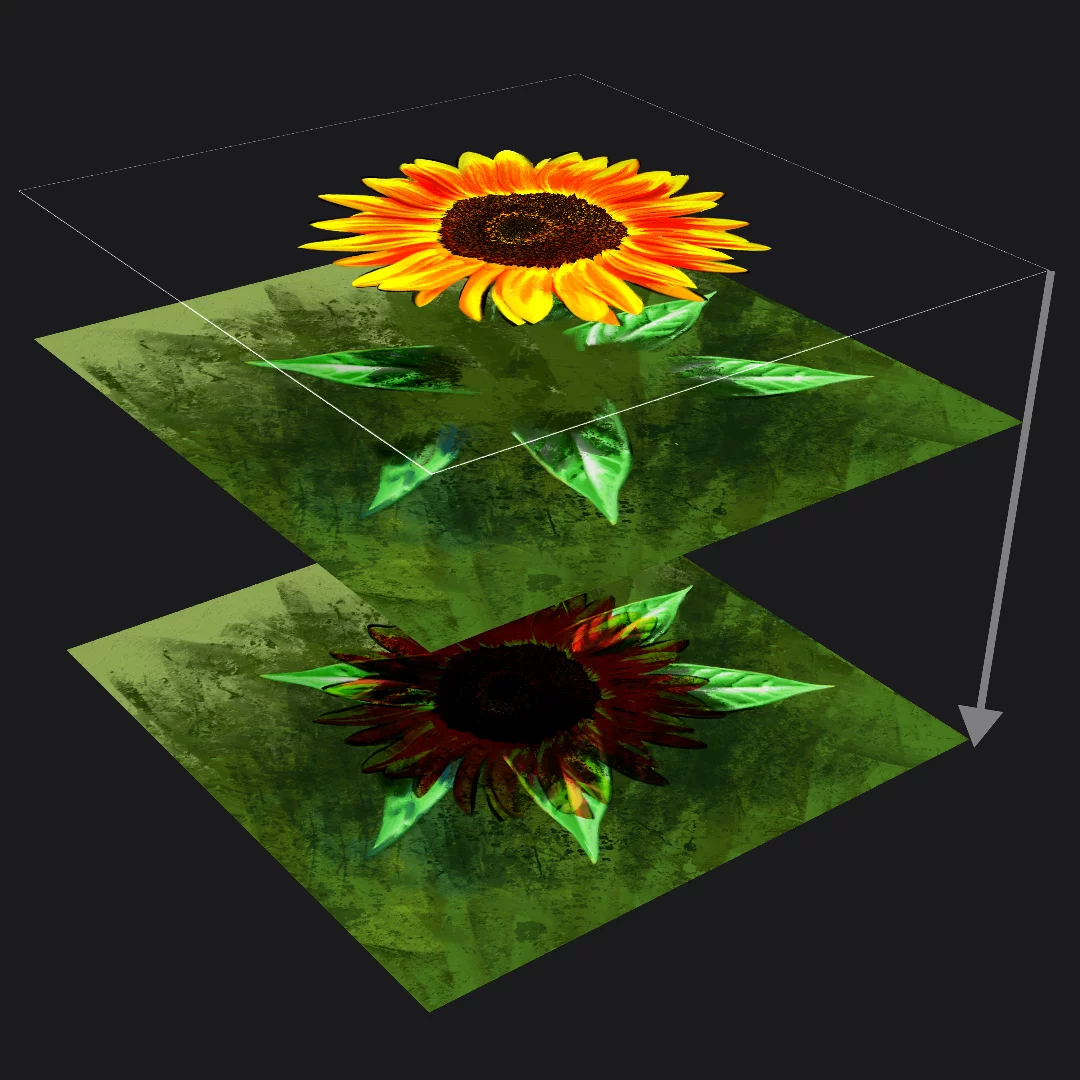
Layer “A”
(the one to which the color blending mode is applied)
Layer “B”
The result
(colors from layers A and B are mixed)
Blending calculation
(here: A+B-1 for Linear Burn effect)
Color blending modes are based on pretty complex math but it is not necessary to know it to use them. You can just select a blending mode from the list. See Color blending modes — detailed reference below.
The same color blending modes may be applied in real time to the colors applied by the brushes. All the following descriptions apply to the brush blending modes (with the difference that there is no “layer A” and “Layer B” rather “the brush stroke color” and “the active layer”).
Learn how to use color blending modes in brushes in Brush Editor — Stroke tab.
Layer blending modes selector
Also applies to layer groups.
Layer options pop-up and the blending mode selector
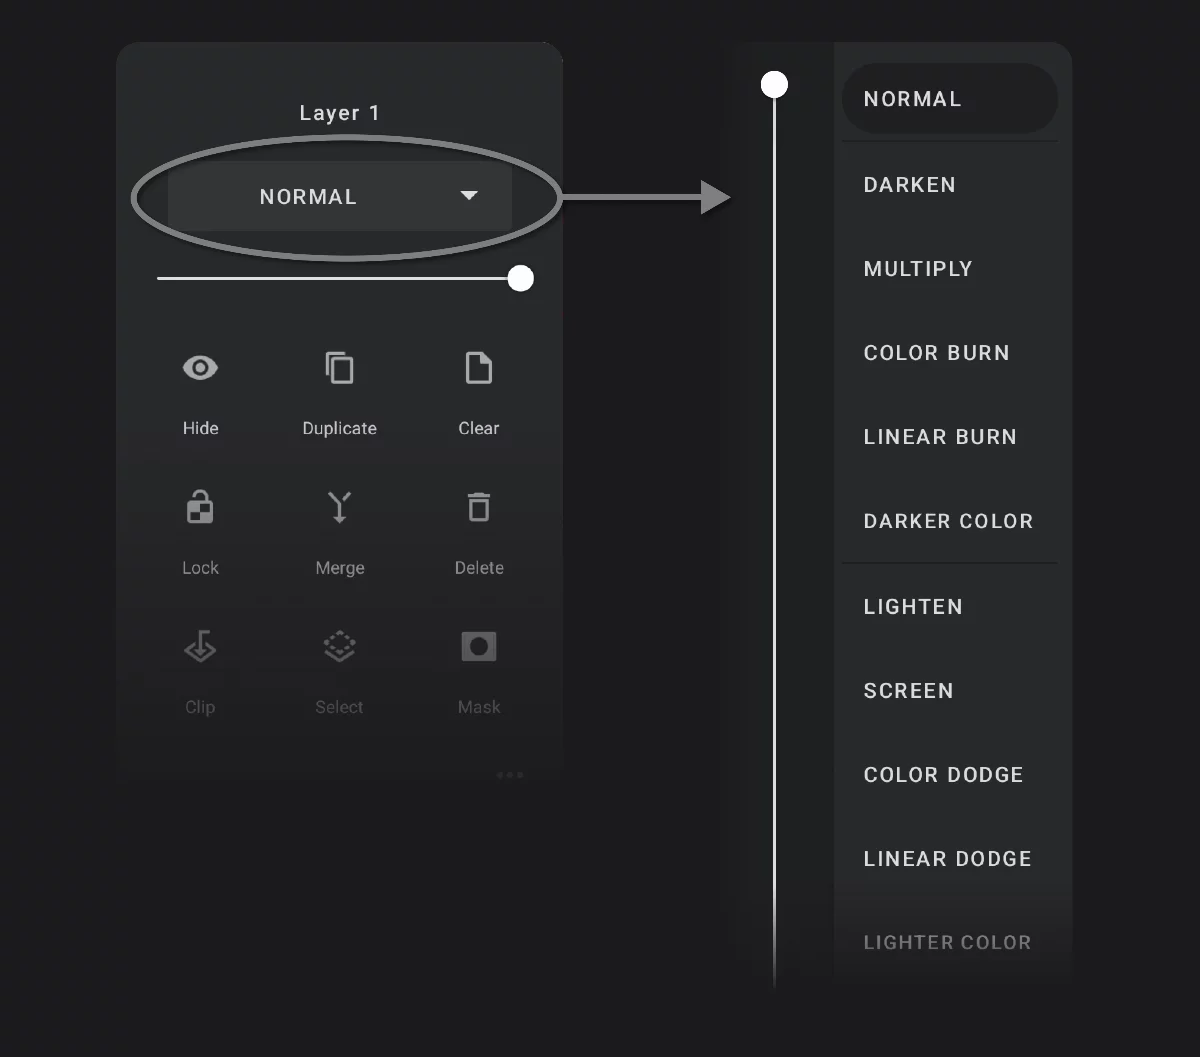
Currently active blending mode (here the default, “Normal”)
Opacity slider
You can adjust the layer opacity in real time while selecting the blending mode. This helps in adjusting the “strength” of the blending.
Color blending modes — detailed reference
There are 30 color blending modes in Infinite Painter 7
Majority of the color blending modes are standard and they work exactly like in other graphics programs, however a couple of them are unique to Infinite Painter. These are the Masking blending modes.
Color blending mode explained
Blending mode selector
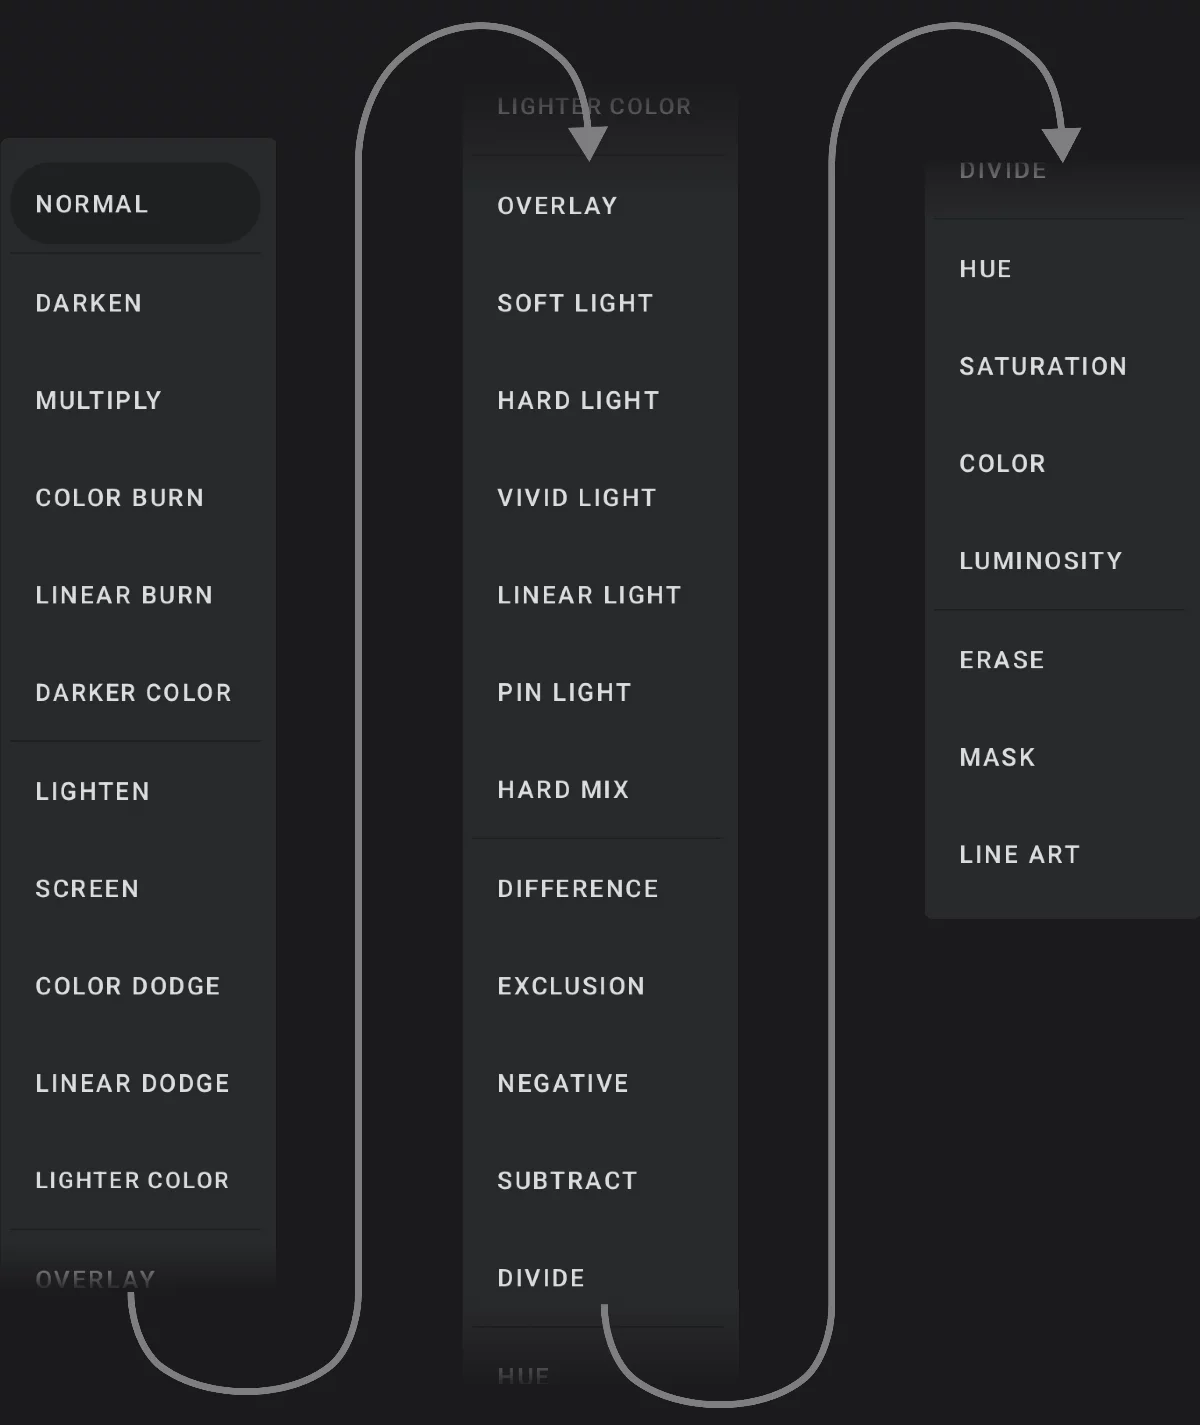
The same selector can be found in the Brush Editor — Stroke tab.
Normal blending modes
The “Normal” blending mode is, well, normal. Replaces pixels from the underlying layer with pixels of the blended layer based on their opacity. For everyday use.
The “Passthrough” blending mode is the same “Normal” mode but used in Layer groupLayer groupA number of layers bound in a temporary unit. Groups (a.k.a. layer folders) can be nested within other groups.Learn mores as the default.
Note that in Layer groupLayer groupA number of layers bound in a temporary unit. Groups (a.k.a. layer folders) can be nested within other groups.Learn mores there is a difference between “Normal” and “Passthrough” blending modes, even if they are both mathematically “normal”. Lean more in Layer grouping.
Darkening blending modes
The "darkening" blending modes refer to those that create darker results by combining the base and blend colors. These modes are commonly used in digital art and image manipulation to add depth, shading, or contrast.
Lightening blending modes
The "lightening" blending modes refer to those that create lighter results by combining the base and blend colors. These modes are useful for creating highlights, brightening images, or enhancing lighter areas.
Contrast blending modes
"Contrast" blending modes are those that combine the base and blend colors in a way that enhances the contrast between light and dark areas. These modes are used to add dramatic effects, boost contrast, and manipulate the highlights and shadows of an image.
Comparative blending modes
"Inversion" blending modes focus on creating effects by inverting or altering the colors in a way that creates contrast or negative-like results. These modes are often used for creating surreal effects, negative images, or contrast manipulation.
"Cancellation" color blending modes refer to methods that reduce or negate color values. They are mainly used for high-contrast adjustments, and special effects. May produce unexpected results.
HSL blending modes
"HSL" (or “color-related”) blending modes manipulate the hue, saturation, and luminosity of an image by separating these components. These are mainly used for color correction, artistic effects, and stylization. They allow for precise control over hue, saturation, and brightness without affecting other aspects of the image.
Masking blending modes
These blending modes are specific to Infinite Painter. They convert the layer into a smart mask for the underlying layers.
![]()
![]()
The main (”standard”) blending modes work exactly like in other graphic applications for example in Adobe Photoshop® and in Procreate®
You can find a lot of detailed descriptions and tutorials online of how to use the blending modes in Photoshop. Almost all these apply to blending modes in Infinite Painter.
This however does not apply to the "Masking" blending modes (Erase, Mask, Line Art) which are specific to Infinite Painter.
From all the 27 "standard" blending modes there are some that are more useful than others. These are:
• Normal blending mode (of course)