Brush Editor — Stroke tab
The behavior of the brush along the path of each brush stroke.
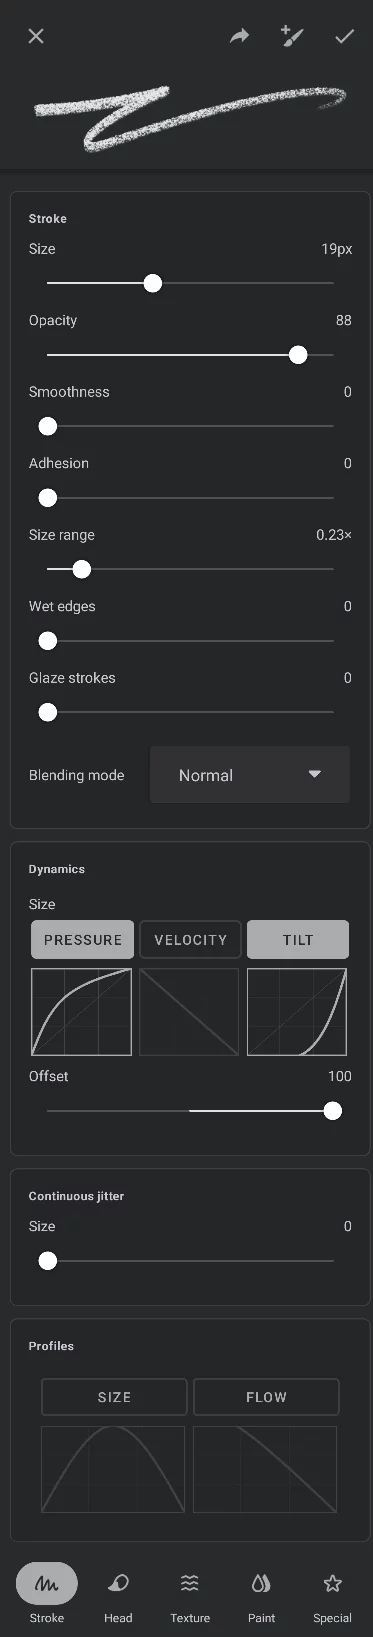
“Stroke” section
“Dynamics” section
“Jitter” section and stroke profiles
The Stroke controls section
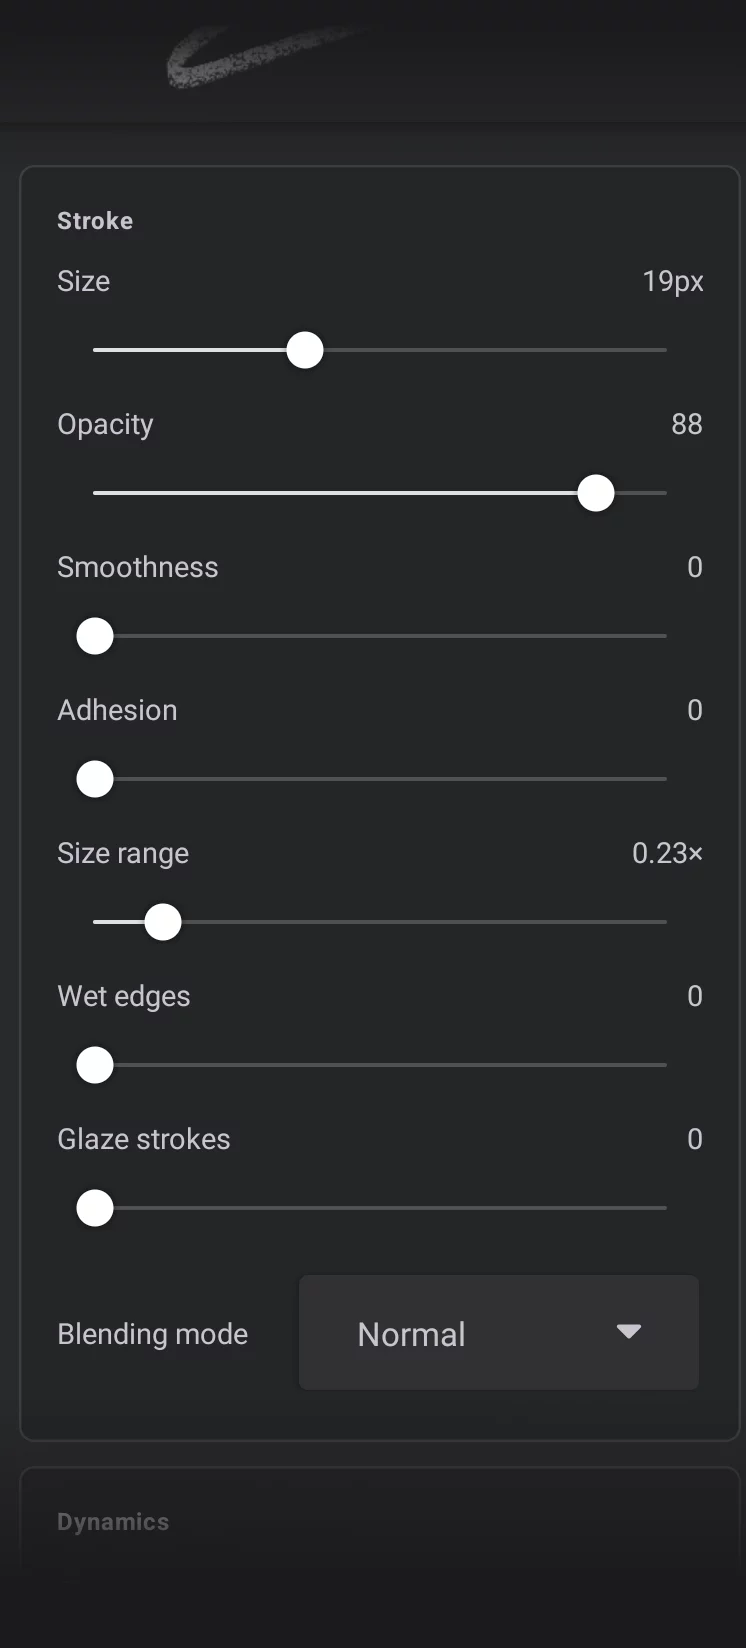
Size
Diameter of the brush head (in pixels)
Brush size is also controllable from the main toolbar and with a 3-finger drag gesture; may be affected by Dynamics controls and other settings. Maximum brush size depends on the canvas size and the Size range parameter value.
Opacity
Controls maximum opacityOpacityMeasure of how much a layer (or a pixel on a layer) obscures the background. Zero opacity means full transparency; 100% opacity means that no background is visible. of the stroke (also controllable from the main toolbar and with a 3-finger drag).
Smoothness
Smooths the path of the brush stroke.
Adhesion
Defines how much material needs to build up before it applies to the canvas. At higher ranges, this creates high-contrast (gloppy) strokes.
Size range (0.0–4.0)
This is the multiplier of the Size parameter; defines max size for Dynamics controls; affects the actual size of the brush.
Wet edges
Controls the "wet edges" effect. The edges of the stroke will be more opaque than the rest of it.
Glaze strokes
If set above zero, prevents the build-up of the color with subsequent overlapping strokes. Works only with brush opacity below 100% and only on transparent background.
Blending mode
Controls how the brush color is being applied upon existing colors on the active layer. The modes are equivalent to the layer color blending modes (30 modes; default: Normal). For each blending mode you can adjust its Strength parameter. It controls how much the effect differs from Normal blending. (see the list of blending modes).
Do not confuse this color blending mode selector with the Blend modeBlend modeOne of the main three brush modes. The brush in Blend mode blends or smears the existing colors on the current layer. Not to be confused with the color blending modes.Learn more as one of three brush modesBrush modeOne of the three main ways the brushes in Infinite Painter work: in the Paint mode the brush applies the color, in the Blend mode it blends or smears existing colors on the canvas, and in the Erase mode it removes the color. Technically, the Cloning is actually a brush mode too.Learn more controlled from the main toolbar.
The Dynamics controls section
This section binds the behavior of the brush to dynamic controls like pressure on the stylus tip, the speed of the stroke or tilt (angle) of the stylus.
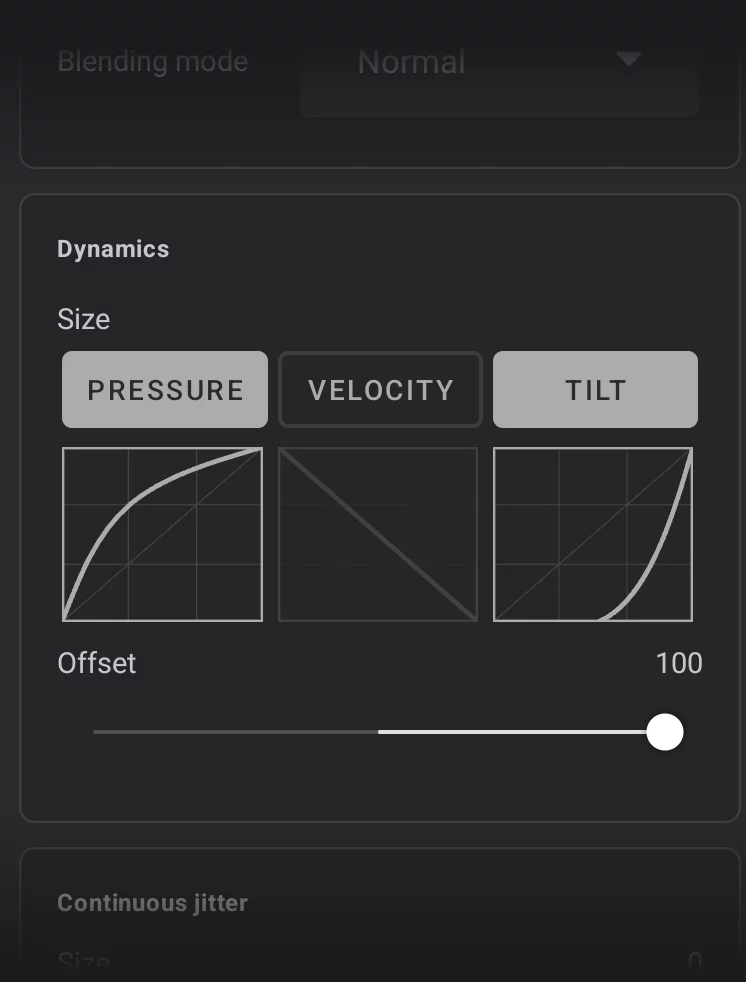
Dynamics section
Binds the behavior of the brush to dynamic controls like the pressure on the stylus tip, the speed of the stroke or the tilt (angle) of the stylus.
Pressure curve
Applies only to pressure-sensitive styluses and partially to simulated finger pressure (on selected devices only). In general, if you are using your finger or a capacitive stylus for painting, the pressure would be always “100%” and the Pressure curve be ignored.
Velocity curve
The speed of the stylus/finger along the stroke.
Tilt curve
Uses the tilt of the stylus to control given parameter. The tilt is measured from the vertical position of the stylus, so the horizontal position would be “100%”. Of course, applies only to tilt-sensitive styluses.
Tilt Offset
When using the Tilt dynamic control, this slider controls the direction of the increase in brush size, relative to the tip of the stylus:
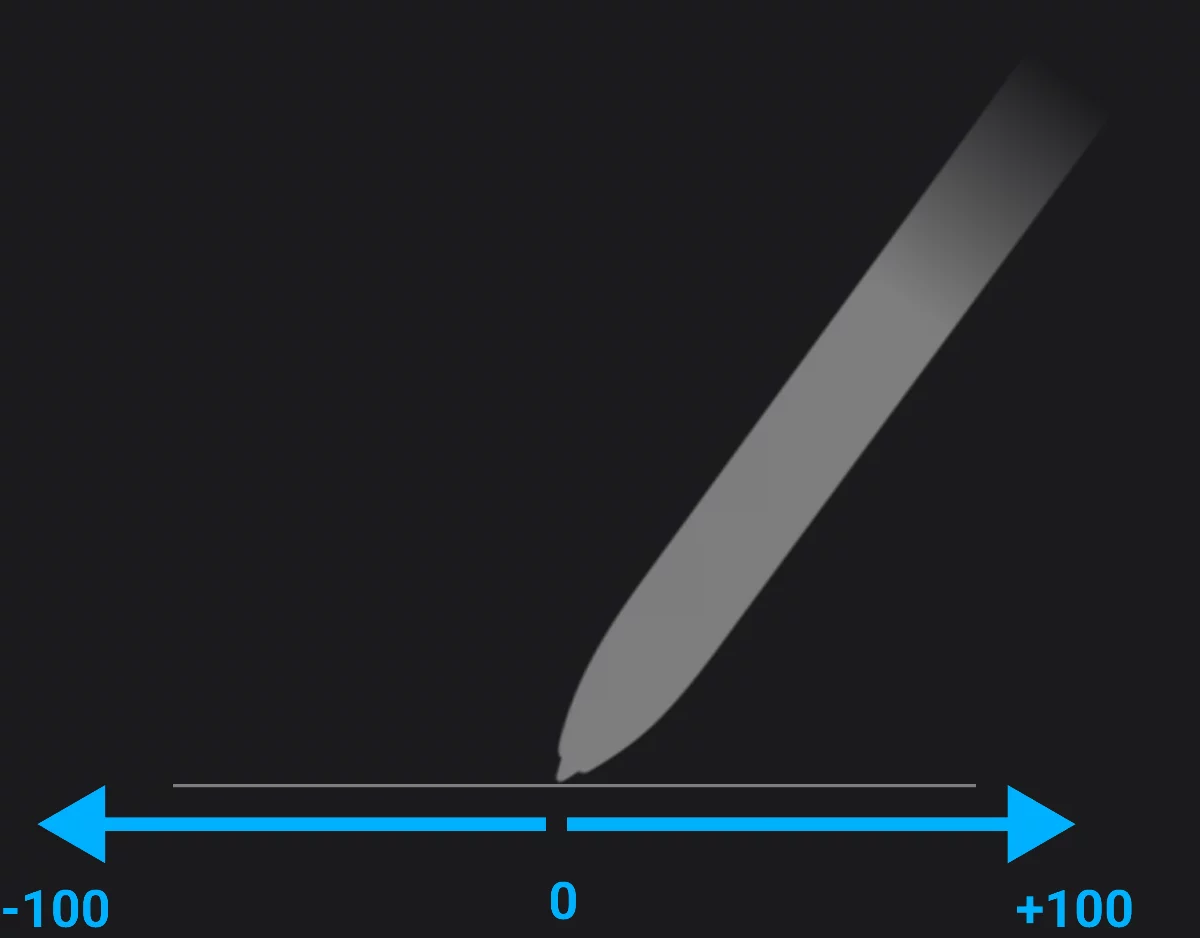
Tip: For pencil-like brushes you may want it positive, for airbrush-style brushes — negative.
The Jitter and stroke profiles sections
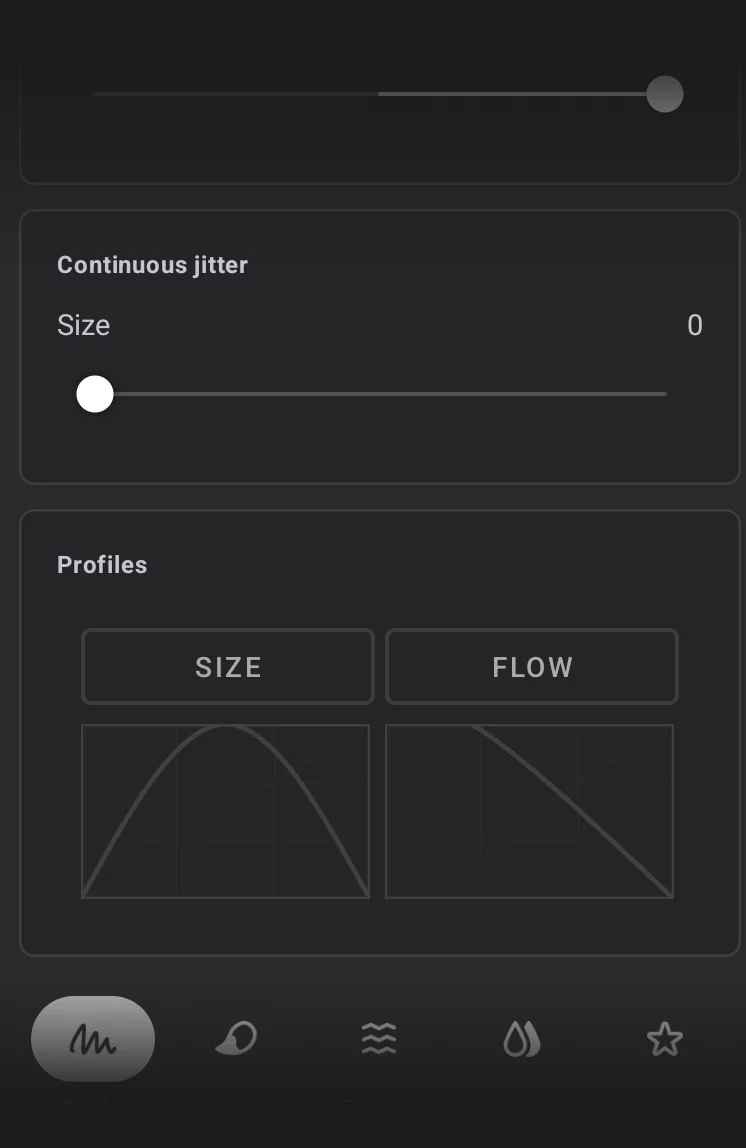
Size jitter
Adds random changes to the brush size along the brush stroke.
Size profile curve
If active, controls how the brush size changes along the brush stroke. Learn more below.
Flow profile curve
If active, controls how the brush flow changes along the stroke. Learn more below.
Fill section
Shows up only for the Fill brushes.
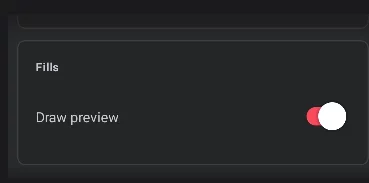
Draw preview
If active, displays the fill of the brush in real time; otherwise the stroke area will be filled only after the stroke is finished.
”Draw preview” off and on:
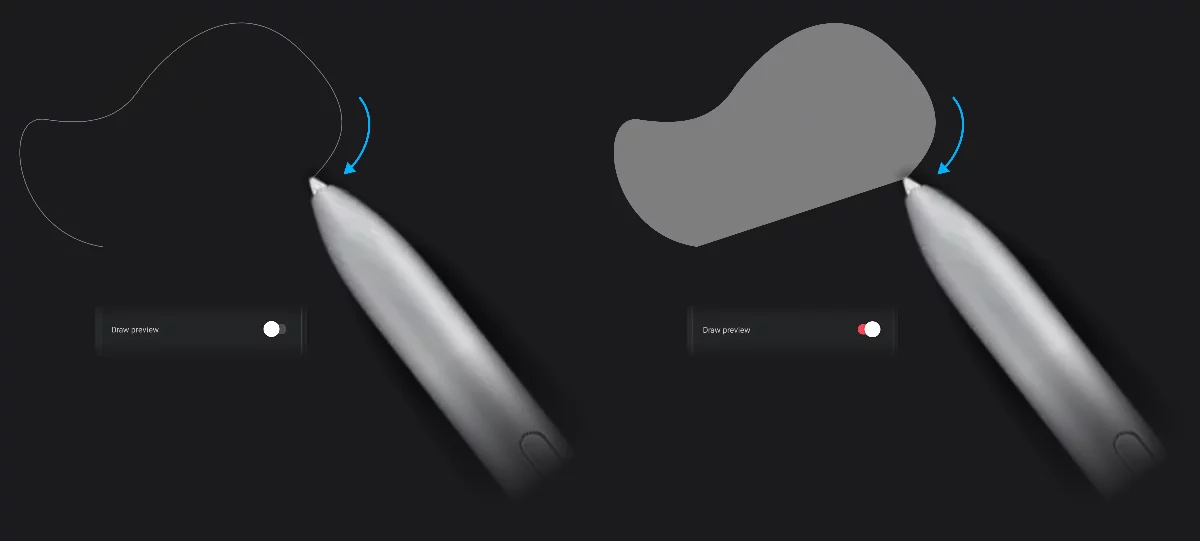
“Draw preview” is a global setting and applies to all fill brushes.
Learn more about using the fill brushes in Fill brushes.
Stroke profiles

These two graphs control how the size or flow of the brush is going to change along the brush stroke’s length. This allows you for example to define tapers on each end of the stroke.
The curve editor is similar to the curve graphs used in the dynamic controls of the brush (see Brush Editor — curve graph controls) but it is not identical.
The graph has a 3x3 grid: the leftmost third describes flow changes within the stroke start segment (of constant length), the middle third controls the main part of the stroke (may be very long), the rightmost third controls the ending of the stroke (again of constant length).
Stroke profile curve graph
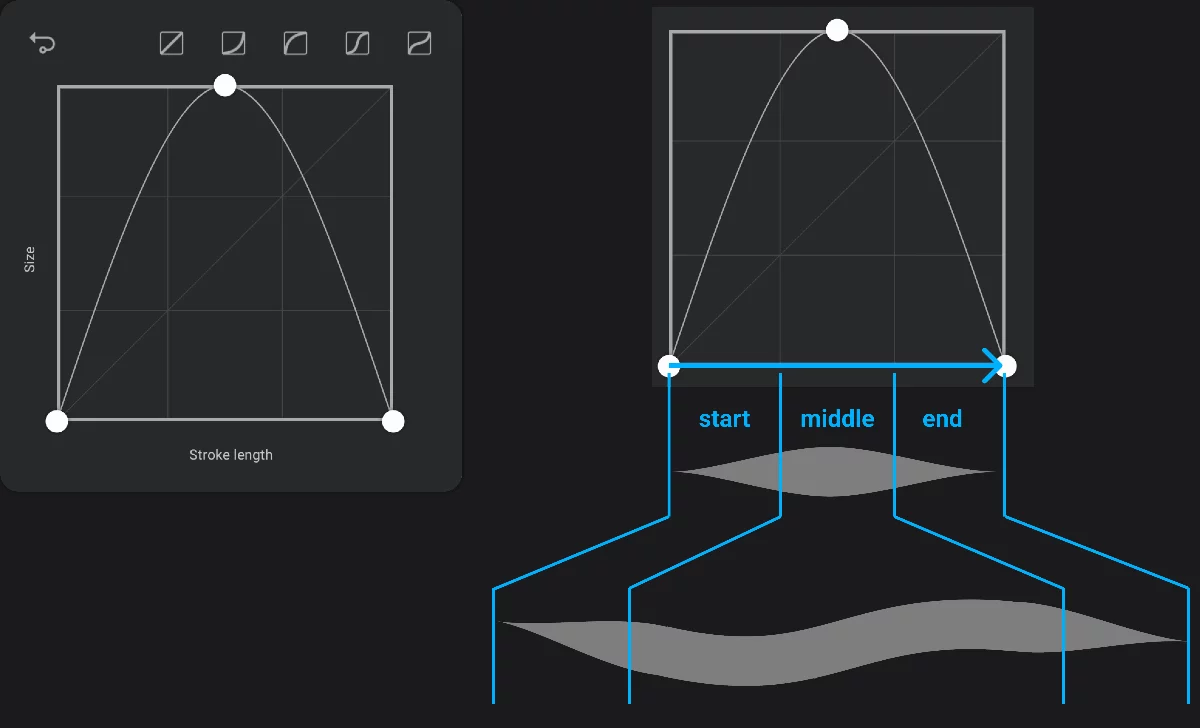
Graph controls: invert button and preset curve shapes. Identical to the controls described in the Brush Editor — curve graph controls.
Output value
Size or flow of the brush.
The horizontal axis depicts the length of the stroke. Note that this is a general difference between the profile graphs and the dynamic control graphs (in which the horizontal axis depicts the 0 – 100% range of the input parameter; see Brush Editor — curve graph controls)
Graph curve
depicts the relationship between the relative distance from the start of the stroke and the output value (size or flow) of the brush.
Starting point of the brush stroke
Endpoint of the brush stroke
Beginning of the stroke
(of constant length)
Middle part of the stroke
for longer strokes it may be the majority of the stroke length.
Ending of the stroke
(of constant length)
For a short stroke the three parts may be comparable in length.
For longer strokes, the “middle” part is stretched.
An example of the power of the profile curves: the “Flow Arrow” brush
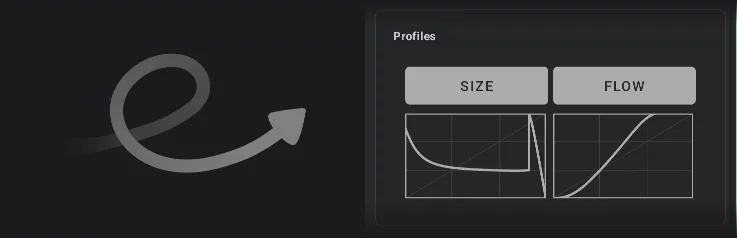
The Size stroke profile defines the shape of the arrowhead, the Flow profile defines the changes of opacity along the stroke. Have fun!