Brush Editor
The brush editor is a powerful collection of settings and controls for currently selected brush.
Brush Editor panel consists of five tabs with controls grouped by their function:
![]()
Stroke tab
Parameters that control the behavior of the brush along each brush stroke. See Stroke tab.
![]()
Head tab
Controls of the brush head. See Head tab.
![]()
Texture tab
Controls of the (optional) brush texture. More in Texture tab
![]()
Paint tab
Controls how the brush applies color and interacts with existing colors on the canvas. See Paint tab.
![]()
Special tab
All special effects that can be applied to the brush. Description in Special tab.
Certain elements of the panel are however common:
Common controls of the Brush Editor panel
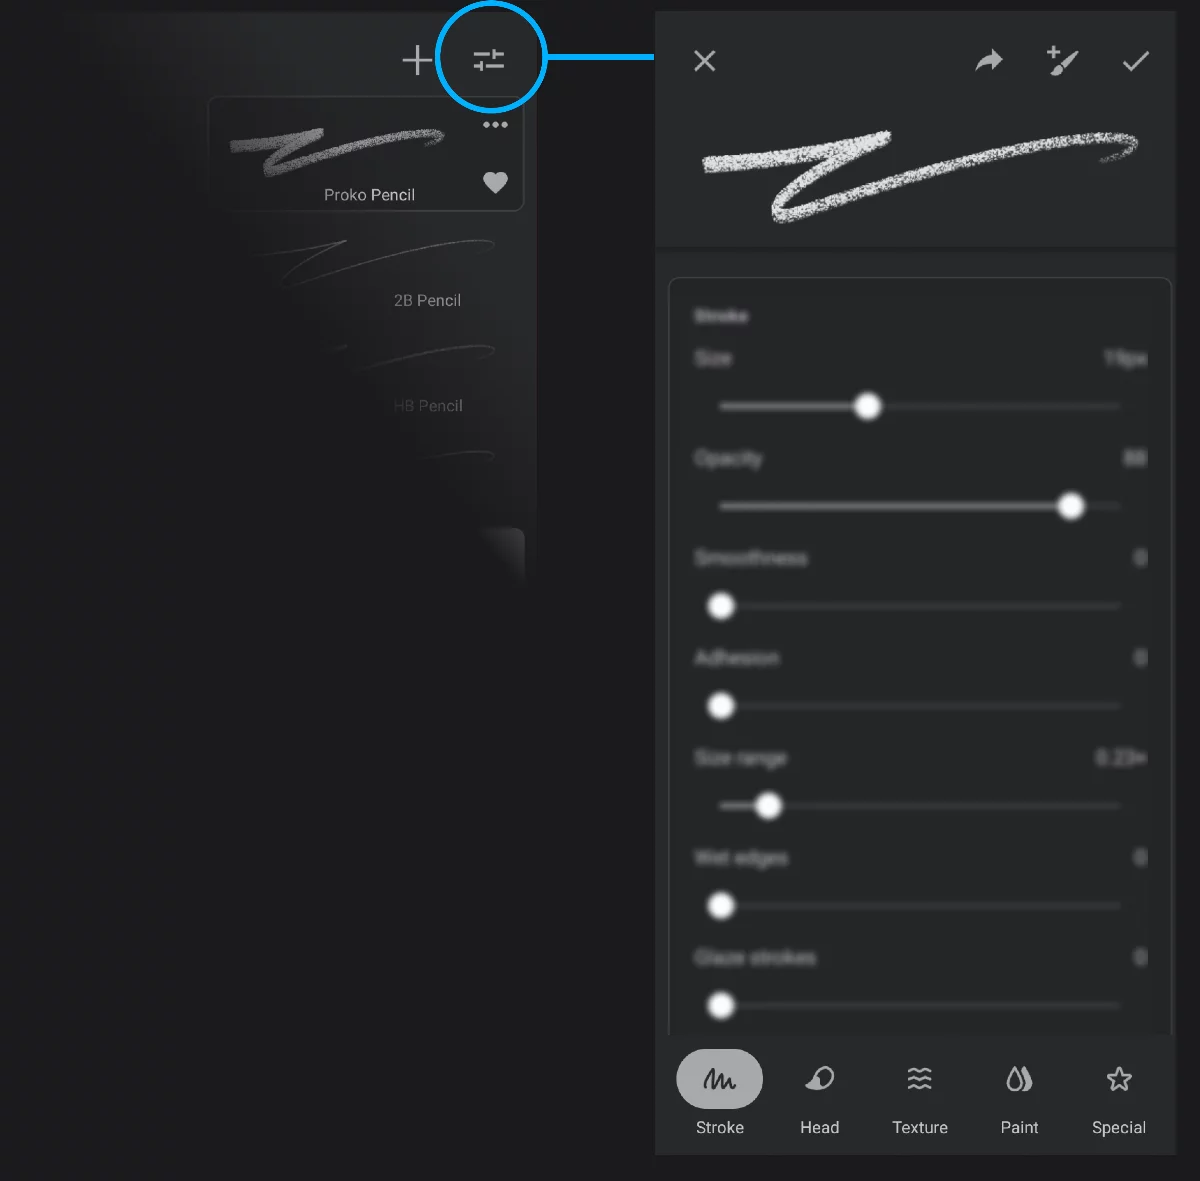
![]()
Cancel
Close the brush editor without saving changes to the brush.
![]()
Share brush
Export the current brush as a .prbr file.
![]()
Save as…
Create a copy of current brush.
![]()
Confirm
Close the editor saving the changes made.
Brush preview
Dynamically shows any changes made to the brush settings.
Note that certain properties (like color randomness or blending properties) cannot be visualized in the preview thumbnail.
Content of a tab
Brush Editor can be accessed also from the Size/Angle popup and Opacity/Flow/Softness popup. See Brush — basic adjustments for details.
![]()
If you are using a physical keyboard, press Shift+Ctrl+B combination to quickly access the Brush Editor.
Brush Editor tabs
Brush Editor consists of five tabs, each containing related controls.
Use the navigation bar at the bottom of the Brush Editor panel to open the desired tab:
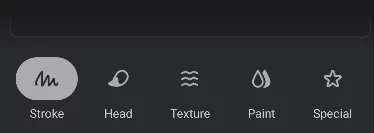
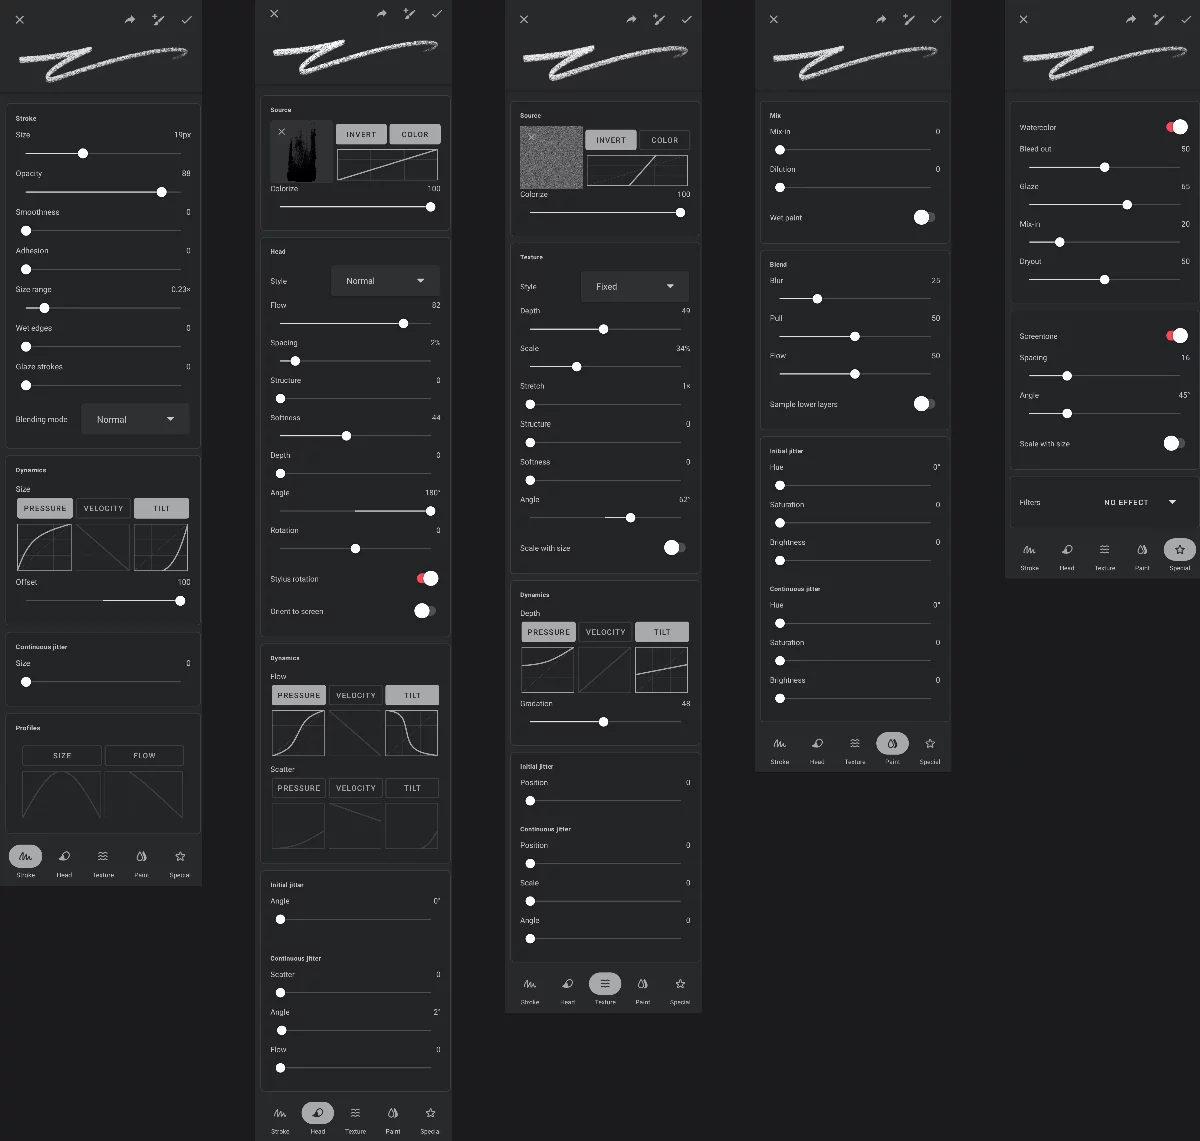
(Almost) all controls available in the Brush Editor
![]()
Stroke
– see detailed reference in Brush Editor — Stroke tab.
![]()
Head
– see Brush Editor — Head tab.
![]()
Texture
– see Brush Editor — Texture tab.
![]()
Paint
– see Brush Editor — Paint tab.
![]()
Special
– see Brush Editor — Special tab.
Currently the Brush Editor lists way over 100 controls. Some of these controls have their internal options and separate settings, in result giving nearly infinite number of combinations.
Note that certain controls depend on other settings and may or may not be available for given brush. Especially the Special tab may display different sets of controls for different brushes.
Curve graph controls
For stylus input, but not only.
In a couple of places in the Brush Editor you will find “dynamic controls”. Dynamics controls link a dynamically changing input (like your stylus pressure) to a chosen brush parameter (like the brush size). The input can be:
Stylus pressure.
Stylus/finger velocity (speed).
Stylus tilt (the angle between the axis of the stylus and the plane of the screen).
While the pressure and tilt controls are related to a stylus that technically supports such input, the velocity works with any stylus and in finger-painting too.
On certain devices you can get simulated finger pressure, so the pressure control would work with finger-painting too. The results however depend on the hardware.
The dynamic controls can be conveniently adjusted with the XY curve graphs.
Pressure curve graph
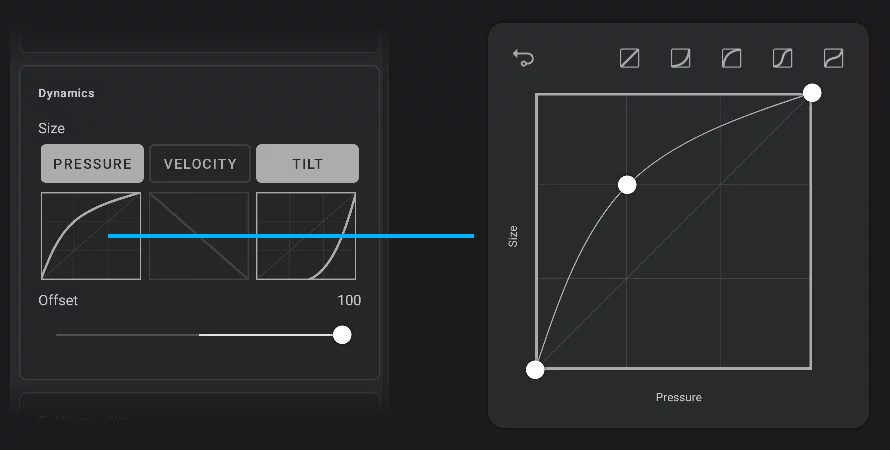
Output (the parameter that is controlled by the dynamic input)
(Here: Brush Size)
Input
(Here: the stylus pressure); tap the title to activate/deactivate this dynamic control.
The curve graph
The graph shows the relationship between the entire range of the input (on horizontal X axis) and the entire range of the output. (vertical Y axis) in form of a Cartesian plot.
(More about it below).
![]()
Invert (mirrors the curve horizontally)
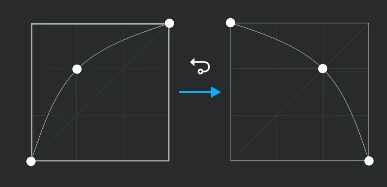
Preset curve shapes for quick application.
![]()
The leftmost icon resets the curve to the default (linear relationship).
Graph curve (editable)
Understanding the graphs
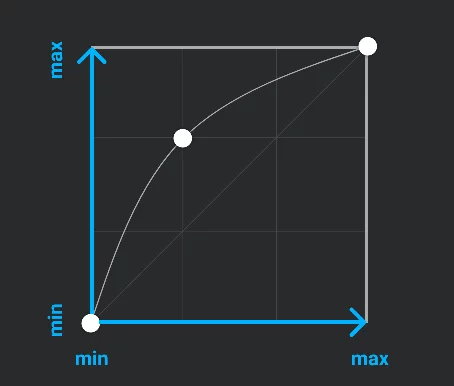
Input (e.g. stylus pressure)
Output (e.g. brush size)
Curve depicting the relationship between input and output.
A node on the curve
Drag existing nodes to reshape the curve; tap on the curve to add a new node. Drag a node over one of its neighbors to remove it.
As the mechanics of the curve editing is similar as in the Pen tool and the Path shape, refer to the Pen guide for more detailed instructions.
Basic math:
Each curve diagram shows the relationship between the input values (like the stylus pressure; on the horizontal “X” axis) and the output values (like the resulting brush size; on vertical, “Y” axis). (Cartesian coordinate system, remember?)
In case of the stylus pressure, the most obvious (and default) is linear relationship (straight line from lower-left to upper-right corner; the harder you press the stylus the more effect you get). But for Velocity-Size you would probably want it reversed (the faster you move the stylus, the thinner the line gets). The best way to learn how the curves work is to start playing with them.
The dynamic input can be: stylus pressure, velocity and tilt. Velocity can be used with finger-painting as well.
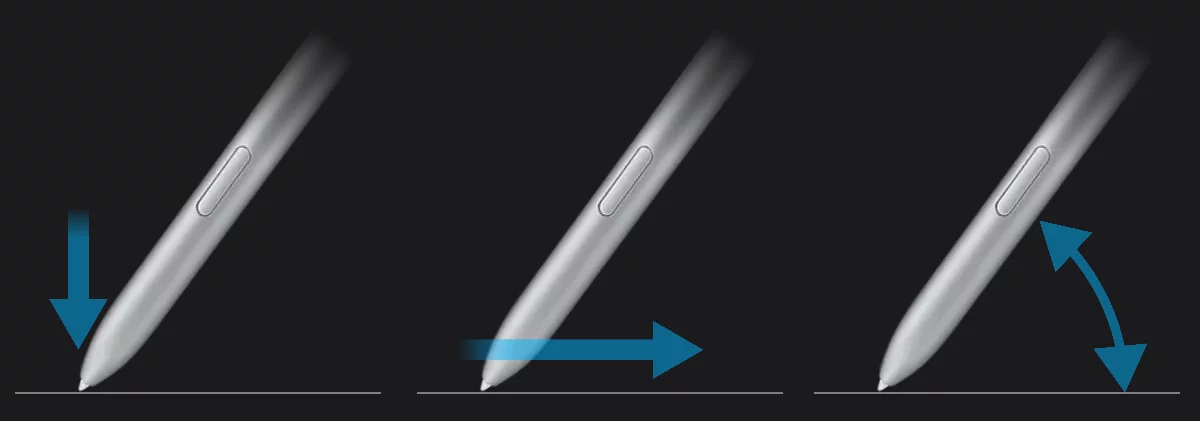
Pressure
– how hard you press your stylus down.
Velocity
– the speed of the stylus — or your finger.
Tilt
– the angle of the stylus, relative to the surface of the screen.
The zero tilt value means vertical stylus position.
Note that if you are not using a pressure-sensitive stylus, the stylus pressure will always be assumed to be 100%, and the “Pressure” dynamic control will be ignored. The same as for the “Tilt” control.
Similar curve graphs are used in stroke profiles that control how given parameter changes along the length of the brush stroke. See Stroke controls for details.
Infinite Painter has a set of global calibration graphs for Pressure, Velocity and Tilt, so you can fine-tune the response of your stylus for all brushes. This is rarely necessary, but may be useful if your stylus feels “too hard” or “too soft” regardless of the brush used.
Note that this calibration will interact with the dynamic controls in each brush. See Brush settings.
Find the detailed description of all the controls on each of the five tabs of the Brush Editor panel in: