Brush Editor — Texture tab
Add some texture.

“Source” section
“Texture” section
“Dynamics” section
“Jitter” (randomness) section
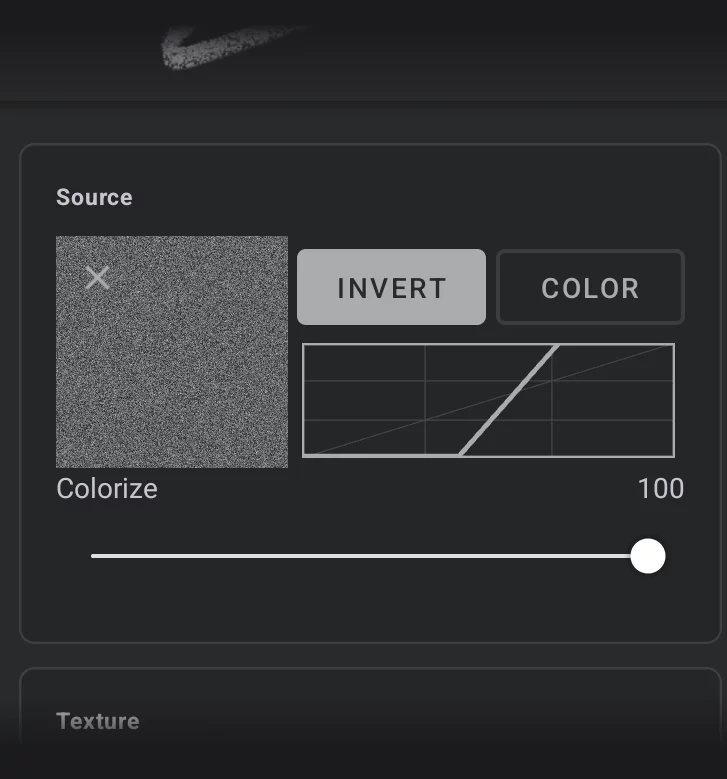
Thumbnail of current brush texture
(Tap to select another bitmap; see Brush Texture selector).
If no texture has been selected, this field will be empty.
Note that applying texture bitmap to certain special brushes will not change their appearance. See the list of brushes Built-in brushes.
Tip:
White areas in the texture reveal brush head traces, black areas block the color.
Learn more in Brush Texture selector).
![]()
icon
Removes the bitmap from the brush. The actual bitmap remains in the library.
Color
For full-color source bitmap — if on, uses full RGB (RGBARGBAEncoding of RGB color space with transparency (the “A” stands for “alpha channel”). Technically a RGBA image consists of four channels, three of them encoding the RGB color of each pixel plus the “alpha” channel encoding opacity of each pixel.) data from the source bitmap; allows for full color brush textures.
Note that the source bitmap color interacts with current color used for painting, color blending modes and other settings. Color information is also ignored when the brush is used in Blend, Erase or Clone modes.
Invert (switch)
— uses a negative of the bitmap.
Colorize
The amount of color to be used from the head bitmap (shows up only when Color option is active).
Tonal curve for the source bitmap
— affects the way color luminance of the source bitmap is used in the brush texture. Allows for tonal adjustments without editing the source bitmap.
Note that this curve is active regardless of the state of the Color switch above it (works for grayscale as well).
Texture controls section
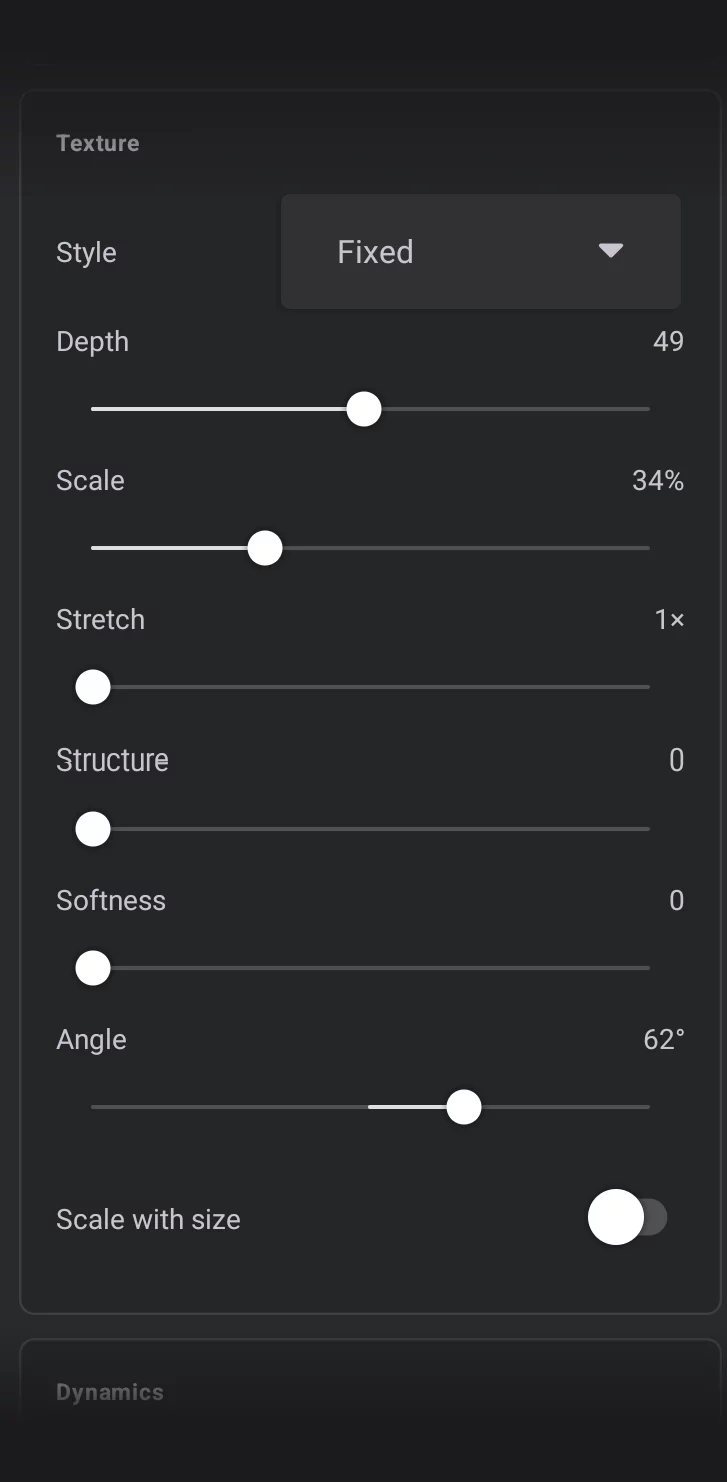
Style (Fixed, Rotate, Warp)
— controls the placement of the texture:
Fixed – places copies of the texture tile side by side along the stroke.
Rotate – places them aligned with the direction of the stroke.
Warp – aligns the tiles to the direction of the stroke, but also deforms them to smooth resulting texture.
Depth
Controls how much the texture affects the color application. Zero means (almost) no visible texture, high values allow the color to only be applied on the brightest areas in the texture. May be affected by dynamic Depth controls (described below).
Scale 0–2.0 (default = 1)
— uniform size of the texture tile. “1” means the original size of the source bitmap.
Stretch
(1× to 50×) Allows you to stretch the texture along the axis of the stroke. “1×” means that the texture has its original proportions.
Structure
Adds an impasto effect, but for brush texture only. Do not confuse with the “Structure” parameter in the Head tab of the Editor.
Softness
Applies Gaussian blur to the texture bitmap. Do not confuse with the “Softness” parameter in the Head tab of the Editor.
Angle
Rotates the texture relative to the brush head. Do not confuse with the similar parameter in the Head tab of the Editor.
Scale with size
Scales the texture to current brush size at each point of the stroke (dynamically, if the size is controlled by any dynamic control).
Dynamics controls section
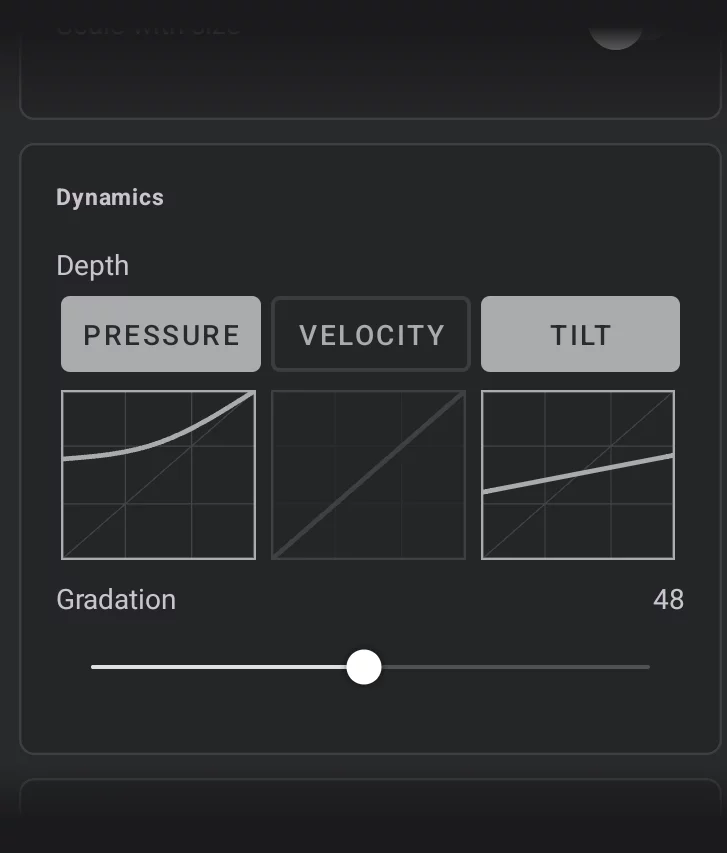
Depth
Curves controlling dynamic behavior for the brush texture Depth parameter. These may be considered controls for separate “flow” parameter of the texture.
Gradation
Defines a falloff of the texture effect from the brush’s tip to the back of the brush when tilting. For example, when tilting a pencil, the shaded line will typically be darker at the tip of the pencil’s head and fade out further down the barrel because the pressure is different. This simulates that effect. Higher values create a sharper falloff. At 0, the texture effect is uniform.
Jitter section
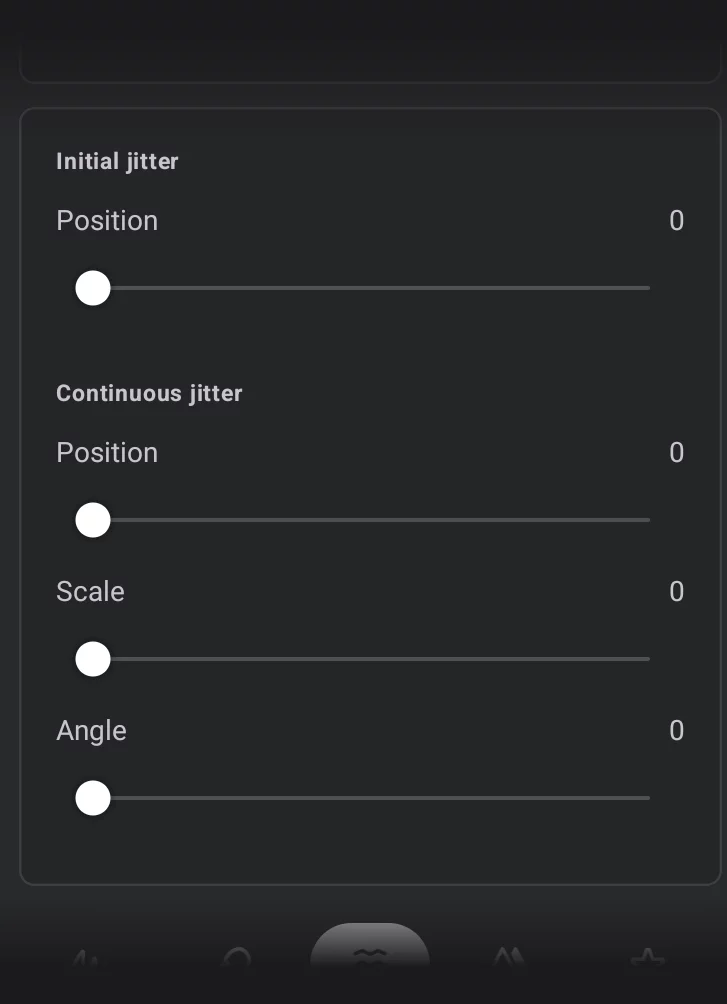
Initial jitter
Adds randomness at the beginning of the stroke.
Position
Places the brush texture in a random position at the beginning of the stroke.
Continuous jitter
Adds randomness along the stroke.
Position
Places the brush texture in random positions at each point of the stroke.
Scale
Changes the brush texture size randomly along the stroke.
Angle
Rotates the brush texture randomly along the stroke.