Grouping layers
For serious jobs.
Grouping layers allows for easier manipulation of complex projects, but also for some special tricks.
![]()
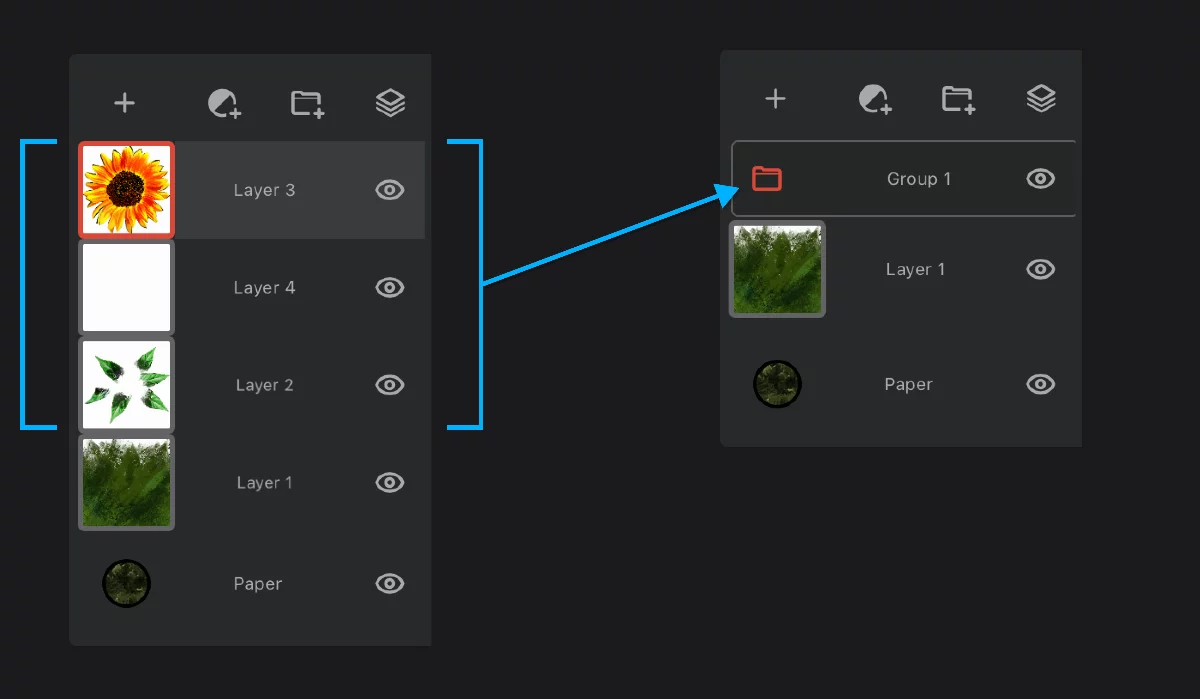
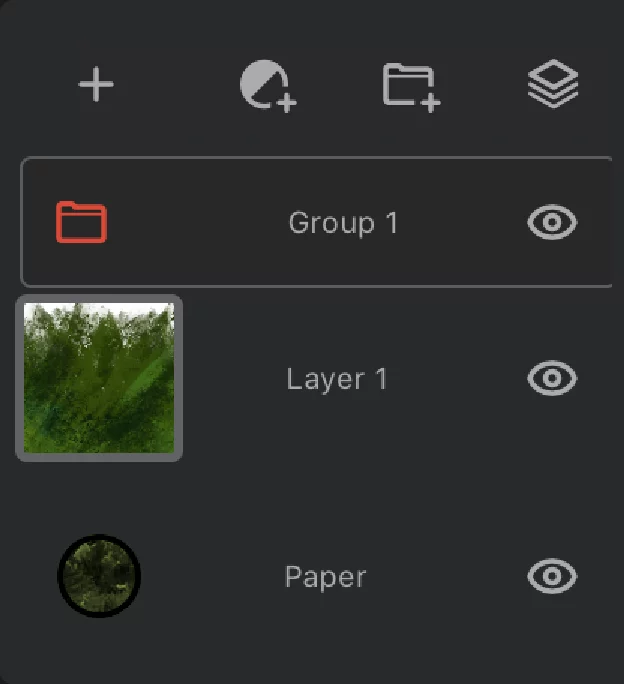
Layer group is marked with the folder icon. Learn more in Using layer groups below.
Layer groups may be manipulated in the same way as single layers.
You can move layers into or out of a group by dragging their thumbnails.
You can rename a group of layers.
You can turn off its visibility (hide it).
You can adjust its opacity.
You can have groups within groups.
And much more.
Learn details in Layer group options.
Layer grouping is of course reversible. Learn how to ungroup layers in Using layer groups.
In Infinite Painter you can group layers in two ways: with a pinch gesture or by using the Group button.
Grouping layers with a gesture
That's instant.
Pinch any number of subsequent layers to group them.
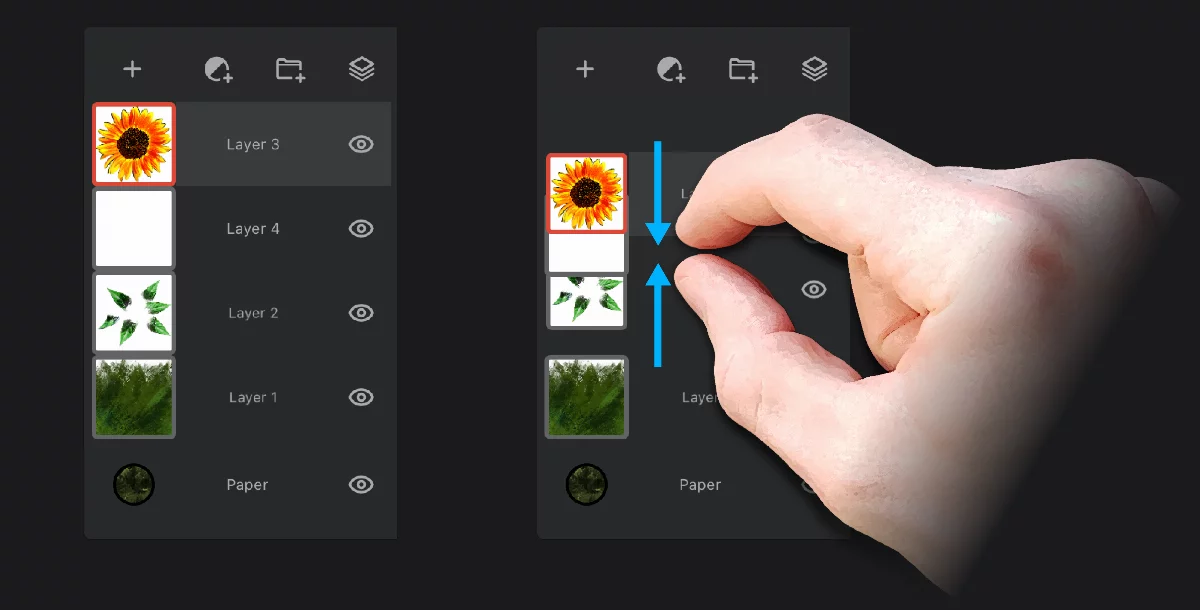
Grouping with a pinch gesture is way faster but requires some dexterity.
![]()
Procreate® users:
Note that the pinch gesture in Infinite Painter does not merge layers, only groups them. To merge the grouped layers you may use Flatten command from the group options pop-up. A step more, a step safer.
Grouping layers with the button
Step by step.
As there is no way to select multiple layers, grouping with the button takes place in two steps:
Step 1: create a group with one layer
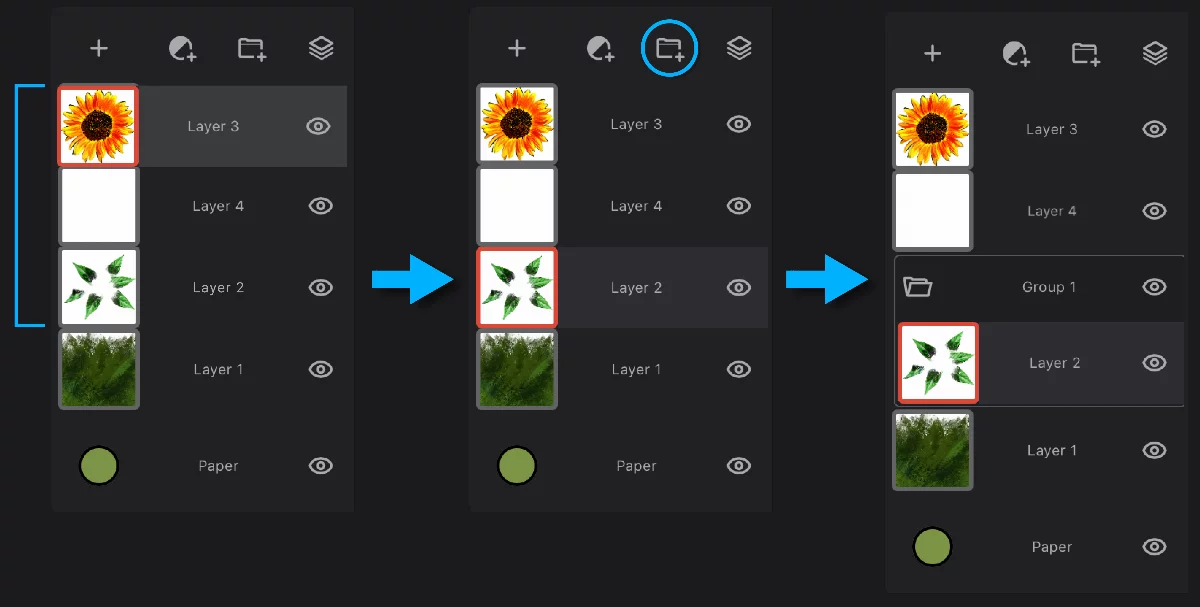
Step 2: adding more layers to the group
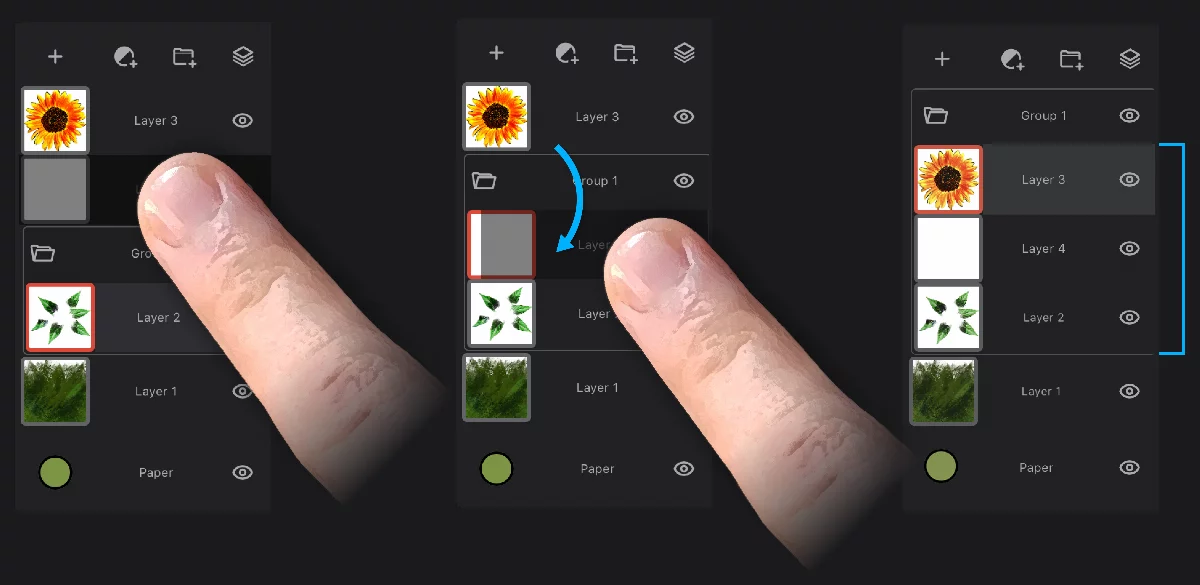
You may of course reshuffle the layers within the group.
You may prefer Grouping layers with a gesture (described above) which is way faster and less tedious.
Using layer groups
Like in Photoshop.
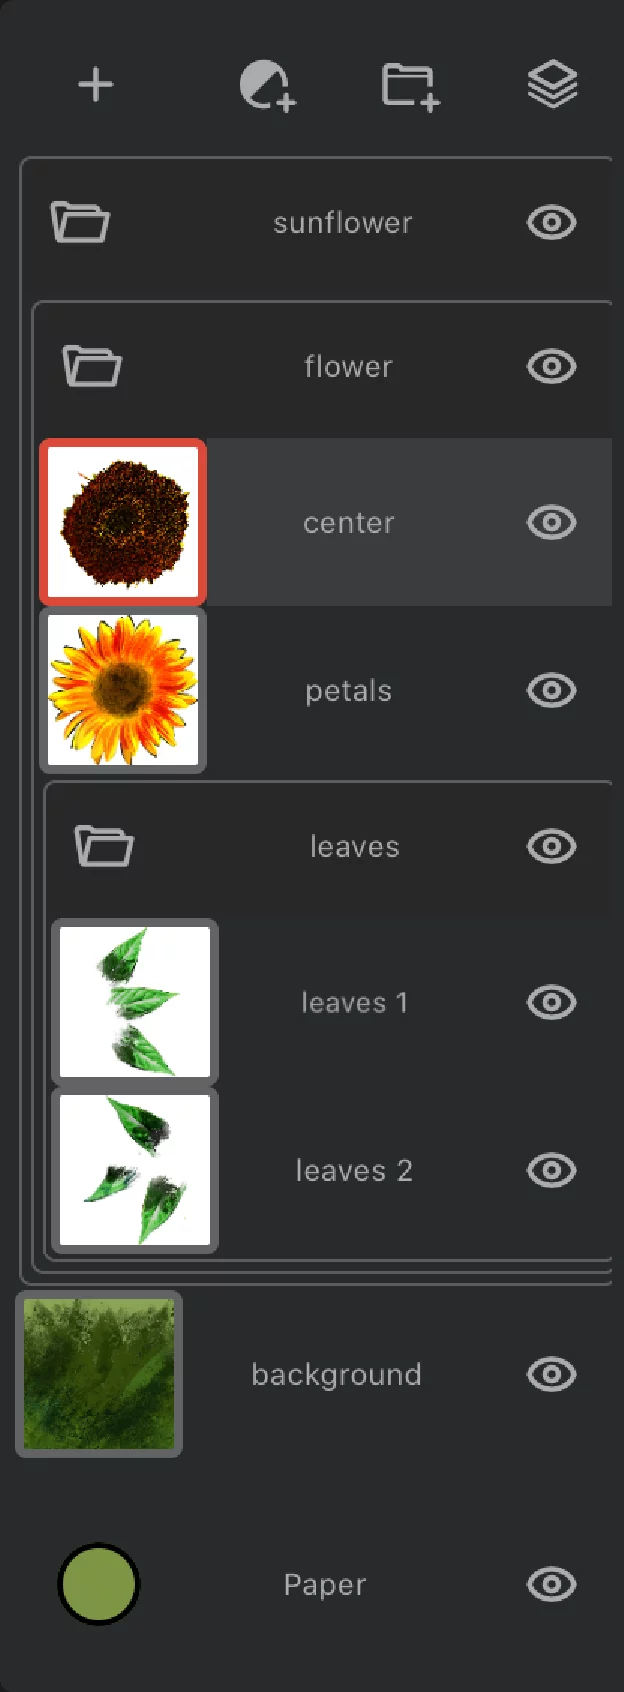
Tap the group icon to open/collapse the group
Tap the group name to access the group options panel (see Layer group options)
Tap to toggle group visibility
Long-press and drag
the collapsed group to move it up or down in the layer stack
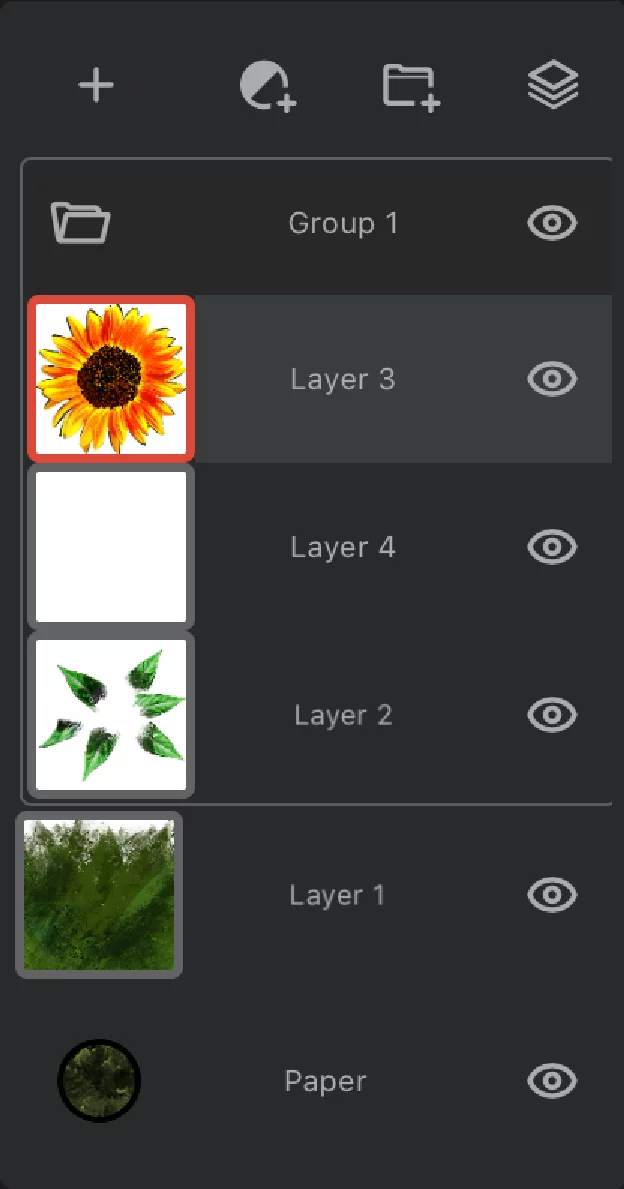
In the open view you can drag layers in and out of the group.
Tap to toggle visibility of each layer within group.
![]()
The red group icon indicates only that the active layer is within the group.
You still work on single active layer.
Group options pop-up
Tap to rename the group
Delete the group
This deletes all the layers within the group with their content. Be extremely careful.
Ungroup (the layers remain intact).
(Detailed description of this panel is below).
Nesting layer groups
Pro stuff.
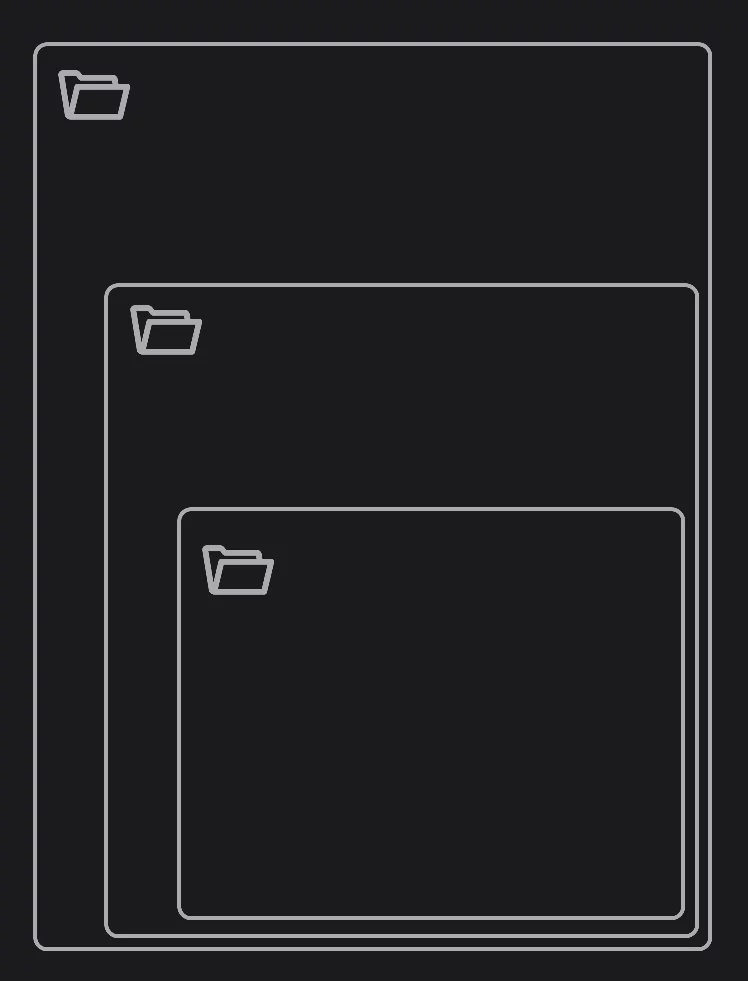
In Infinite Painter you can make groups of groups of layers; within other groups…
...and you probably will never have opportunity to check how many levels of group nesting the app offers... (spoiler alert: there is no technical limit, however more than 5 nesting levels seems impractical)
Nested groups logical structure
Nested groups in expanded view
Nested groups in the collapsed view: the structure still makes sense

See Layer panel — collapsed view to learn more about the collapsed view of the Layer panel.
Layer group options
Similar to the layer options
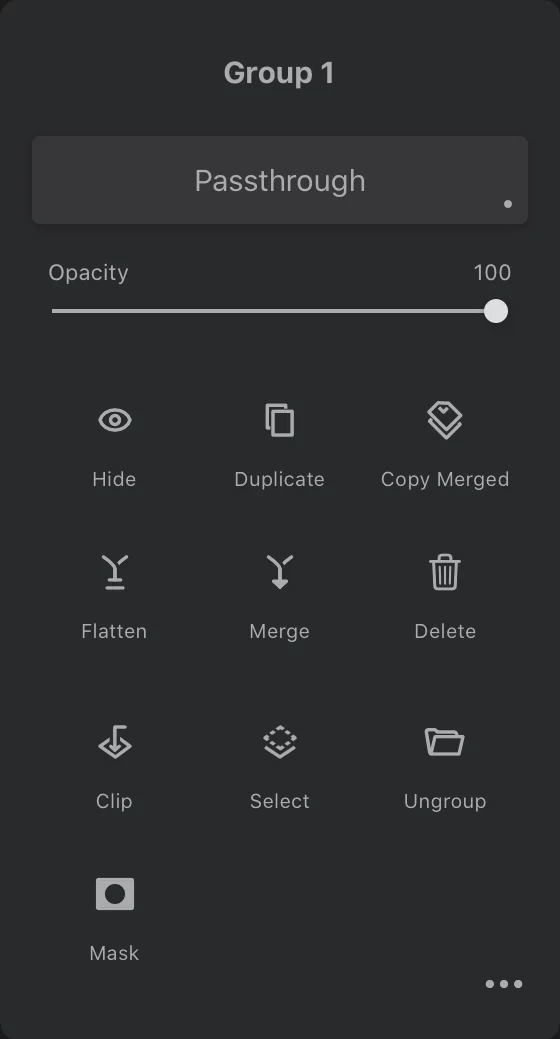
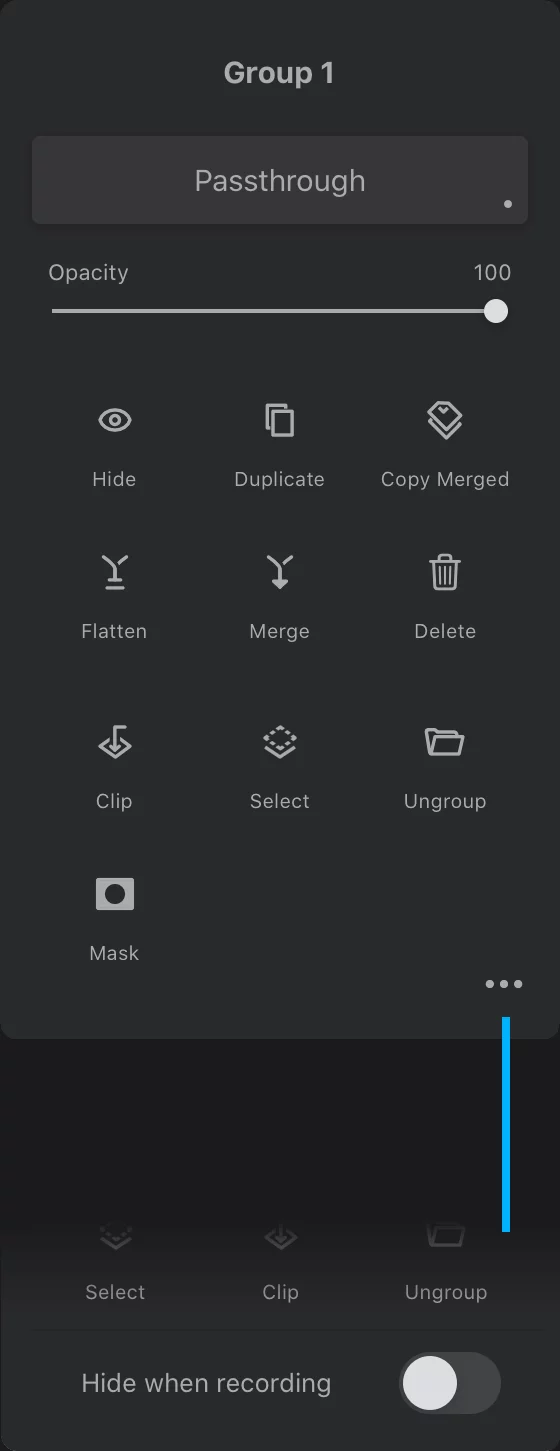
Tap on the name of the layer group to open the Layer group options popup panel.
(This panel is similar to the Layer options panel, but has a couple of different functions)
Rename the group
Tap to edit the name.
Group’s blending mode
shows the current Color blending modeColor blending modeIn digital image editing and digital art, blending modes determine how the pixels of one layer interact with the pixels of underlying layers. These modes apply mathematical operations to color values, altering how the layers combine.
Not to be confused with the brush blend mode.Learn more of the group; opens the Blending mode selector.
Please note that the default blending mode for groups is Passthrough, not Normal. Learn more in Passthrough vs. Normal group blending.
Group’s OpacityOpacityMeasure of how much a layer (or a pixel on a layer) obscures the background. Zero opacity means full transparency; 100% opacity means that no background is visible.
Independent from the opacity of each layer in the group.
Hide/show
Toggles visibility of the layer group.
Duplicate
Creates an exact duplicate group above the current group. All layers from the group are duplicated.
Copy Merged
Creates a composite of the group contents on a new layer; leaves the original group intact. More about the Copy Merged function in Copy Merged function.
Flatten
Merges all the layers of the group into a single layer.
Merge
Merges the contents of current group with the layer or group below. The result is always a single layer.
If you merge a group with another group, both groups will be merged into a single layer.
If you merge the group with an adjustment/filter layer, the group will be flattened into a single layer and the effect of the adjustment/filter will be lost.
Delete
Removes the entire layer group and all of its content.
All the layers in the group and the artwork on them will be gone. For more complex groups this may be impossible to undo. Be careful.
Clip
Uses the layer immediately below the group as a Clipping maskClipping maskClipping mask (or clipping layer) is a regular RGBA layer used to mask another layer (or multiple layers).Learn more for the group. More about clipping masks in Layer clipping.
Select
Makes a SelectionSelectionA selection is a defined region of your canvas that can be used to edit its content or to limit the application of painting tools (like a stencil). Technically, a selection is an 8-bit (grayscale) mask image which defines the selected vs. masked areas of the canvas. based on the combined OpacityOpacityMeasure of how much a layer (or a pixel on a layer) obscures the background. Zero opacity means full transparency; 100% opacity means that no background is visible. of all the layers within the group. More in Selecting layers.
Ungroup
Well, ungroups the layers. All returns to the original state. If the group had a special blending mode or reduced opacity, the appearance of the artwork will change.
Adds a Layer maskLayer mask![]()
An 8-bit (grayscale) image mask attached to a layer. The white areas in the mask reveal the pixels of the host layer, the black areas mask out the layer (yield transparency).Learn more to the group
Learn about using layer masks in Layer masking. Note that the layers inside the group may have their own masks.
Shows hidden controls:
Hide when recording
Ignores the current layer group in the Time-lapse recordingTime-lapse recordingA video recording depicting the creative process in Infinite Painter. The video shows only the canvas (not the interface) and it is accelerated to fit all the process to a preset duration. Time-lapse recording is recorded and saved per project.Learn more. Learn more in Hiding layers from recording.
Note that hiding the entire group may affect the appearance of the project in the recording in unexpected ways. Test before using for serious jobs.
Passthrough vs. Normal group blending
The difference is mainly how the adjustment layers work.

The default Color blending modeColor blending modeIn digital image editing and digital art, blending modes determine how the pixels of one layer interact with the pixels of underlying layers. These modes apply mathematical operations to color values, altering how the layers combine.
Not to be confused with the brush blend mode.Learn more for new layer groups is Passthrough.
"Passthrough" is actually not a separate blending mode.
It controls how the color blending of the layers in the group is applied to the layers below the group; it also makes the group "transparent" for the Adjustment layerAdjustment layerA special, non-editable layer that works as a real-time adjustment or filter for all the underlying layers. There are various types of adjustment and filter layers.Learn mores .
For all other purposes it equals "Normal".
Passthrough mode
In the Passthrough mode the color blending ignores the group boundaries; all adjustment layers within the group apply to all layers below.
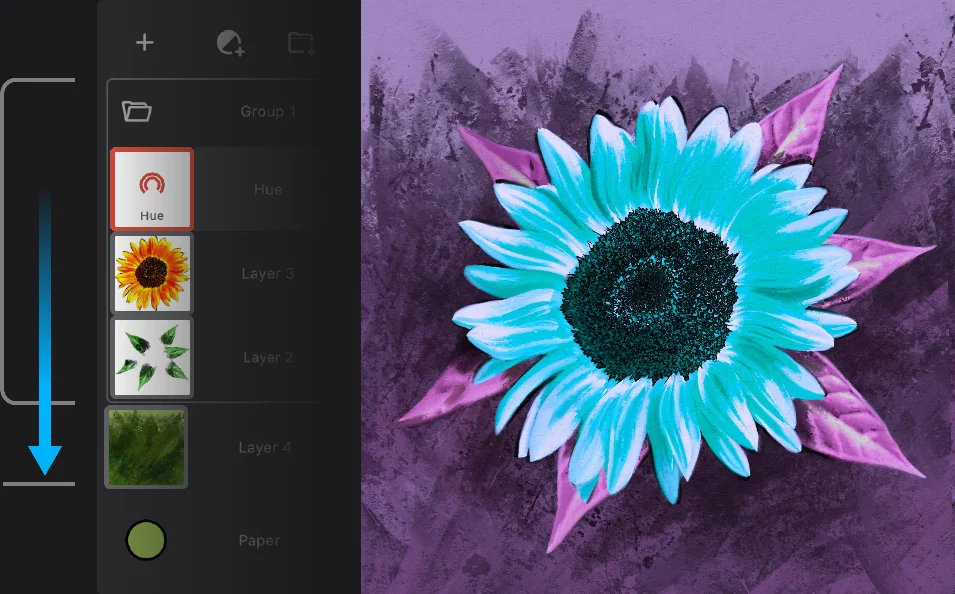
The effect "passes through" the group.
Normal mode
In “Normal” (and all other modes) all adjustment layers within the group apply only to the layers of the group.
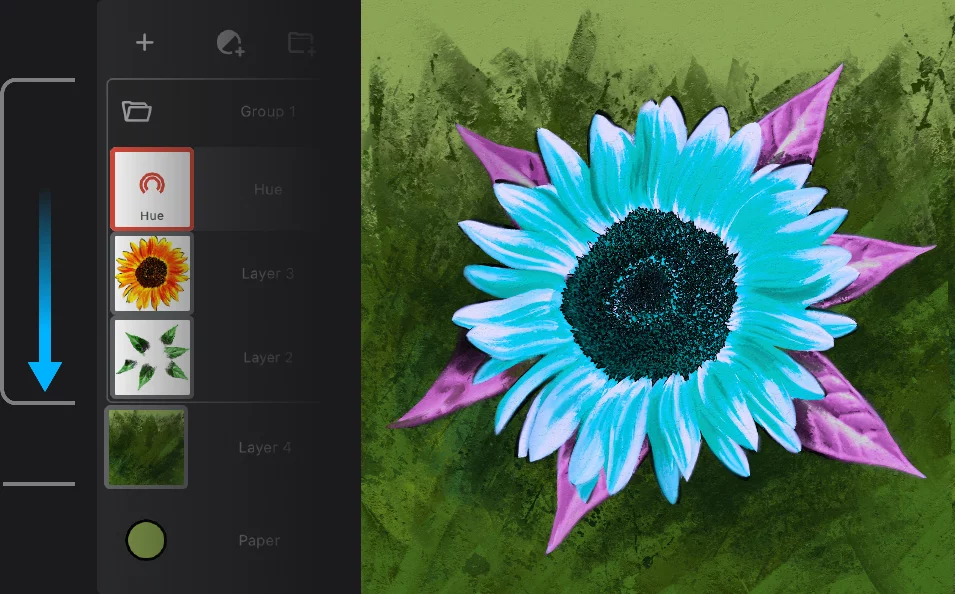
The effect is confined to the group only. The lowest layer is left intact.
![]()
Adobe Photoshop® users:
The Passthrough mode in Infinite Painter works exactly like the Pass Through mode in Photoshop.
You can easily apply an adjustment or a filter layer to a single layer using this method. Group the adjustment layer with the layer you want and set the group to Normal blending.
(However you can achieve the same result with layer clipping; see Layer clipping).