Shapes-in-perspective
No need to invest in the 3D stuff.
With Shapes-in-perspective you can create geometrically correct 3D illustrations with ease.
Shapes-in-perspective follow consistent geometry (within the same perspective grid setup).
Note that certain basic knowledge of the perspective constructions is required to create correct and convincing 3D imagery. Still the tools will help much.
Shapes-in-perspective are the Rectangle shape and Circle shape used in a perspective grid. They follow the perspective geometry in a simulated 3D space. You can draw a rectangle or a circle on any virtual 3D plane within the perspective construction. (Learn how to in Rectangle-in-perspective: select the right plane).
Shapes-in-perspective work in all perspective grids with exception of the flat Rectangular grid where they just snap to the grid points. Still useful.
Rectangle-in-perspective
Create basic building blocks of a 3D scene.
Rectangle shape in any perspective grid allows you to build a consistent 3D geometry in no time.
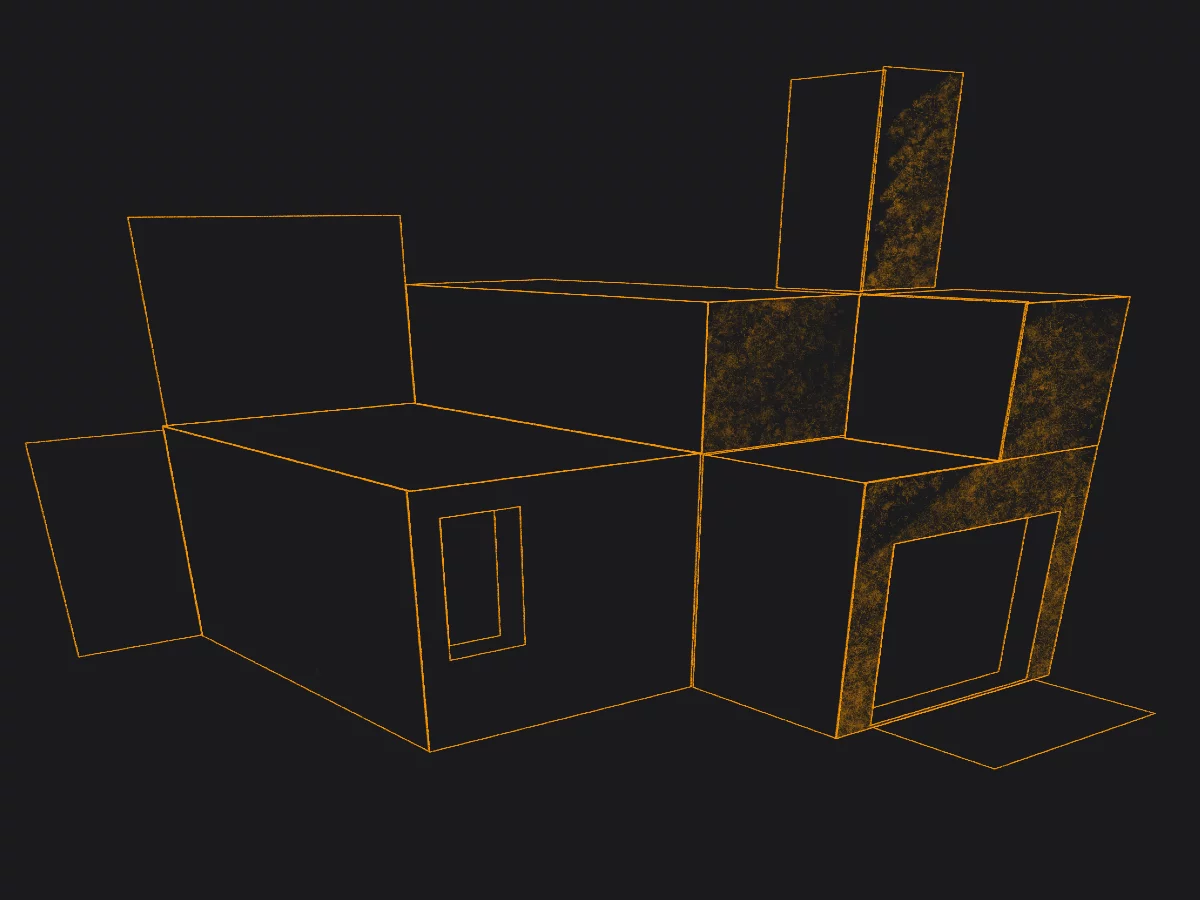
Rectangle-in-perspective follows the geometry of the 3D 'plane' on which it is drawn even when you edit the shape.
Learn how to select the virtual 3D plane for the rectangle in Rectangle-in-perspective: select the right plane.
Learn how to edit a rectangle in perspective in Rectangle-in-perspective: editing the shape.
Learn how to use the Rectangle shape in general in Rectangle shape.
Note that the Rectangle in the Curvilinear perspective does not follow the curvature of the grid, only the perspective foreshortenings.
Rectangle-in-perspective: select the right plane
Boarding a wrong plane could be a nightmare; but not in Painter.
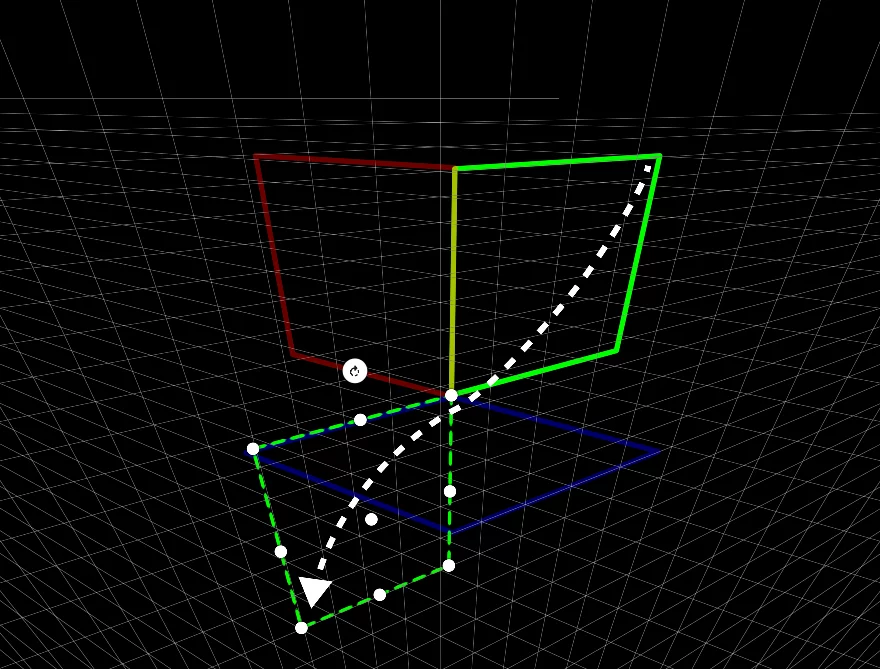
From each point of the canvas you can draw rectangles on three different perspective 'planes'.
Start drawing the rectangle in direction towards one of the vanishing points
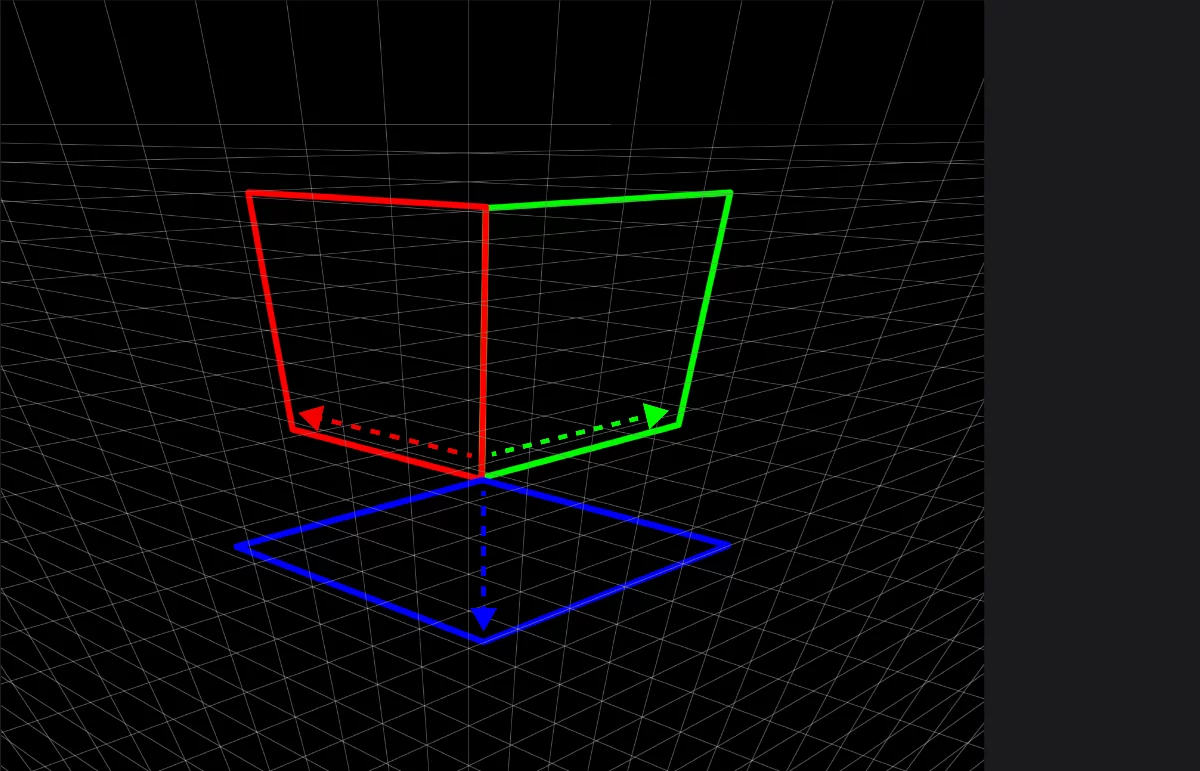
Drawing in opposite direction will work as well. Just draw along the grid lines.
Once you've determined the plane, draw your shape
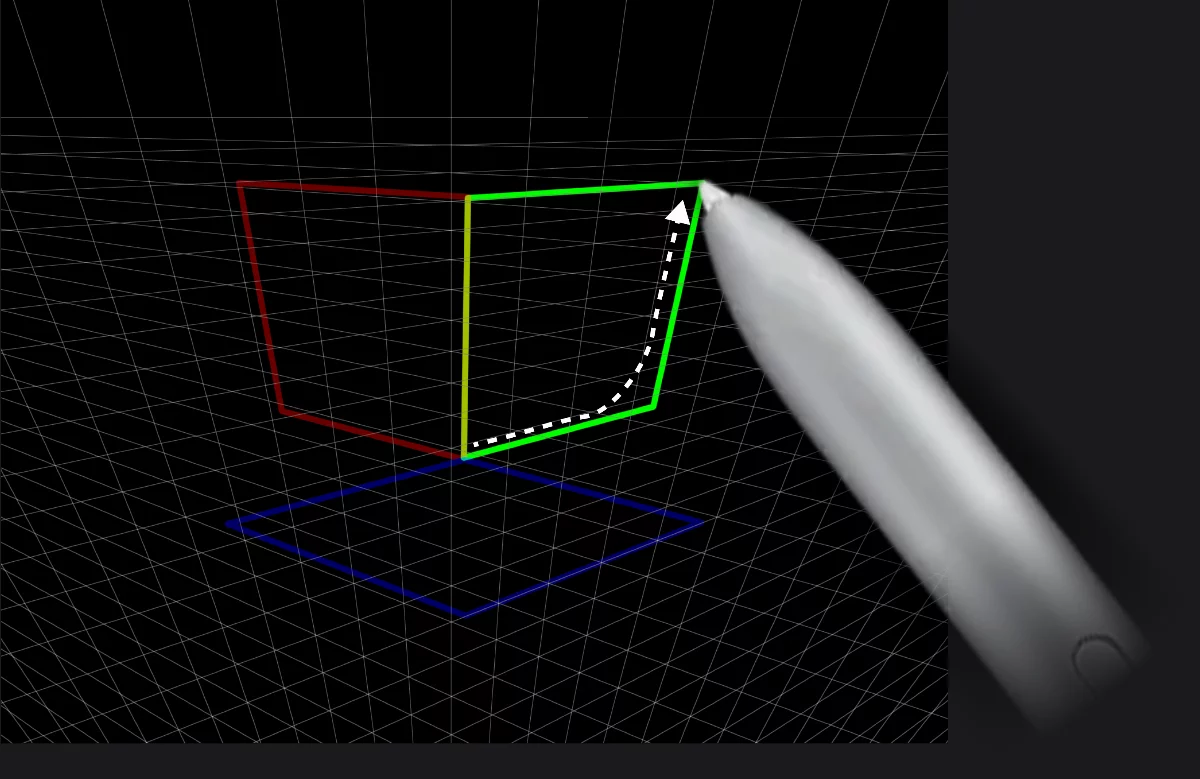
In reality, the distance required to determine the plane is very small.
If you happen to choose a wrong plane, just return your stylus to the starting point and start over in new direction.
Shapes-in-perspective are editable, but you cannot change their original plane. More in Rectangle-in-perspective: editing the shape.
Learn more about using Shapes in general in Shape tools .
Rectangle-in-perspective: editing the shape
Watch the magic.
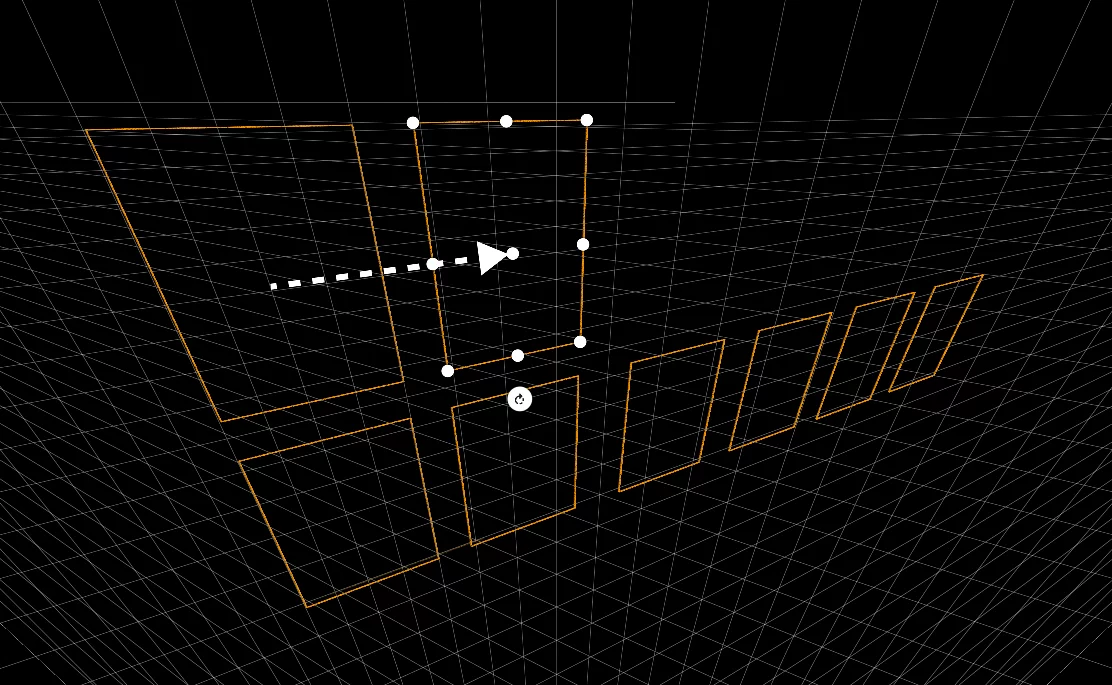
Rectangle-in-perspective can be manipulated within its original perspective plane.
You can reverse the direction while editing the shape
You can move the rectangle within its perspective plane and resize it, of course, too.
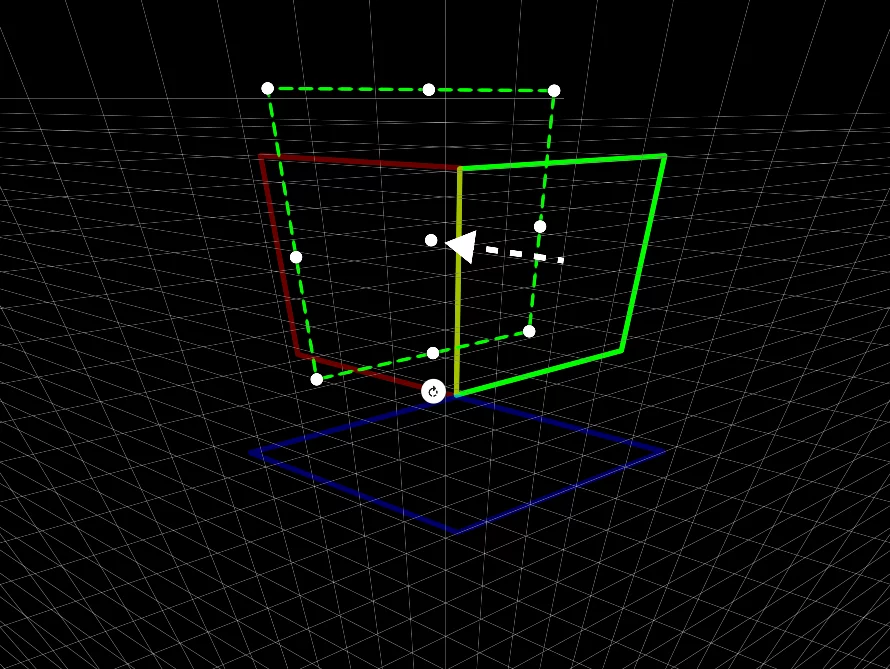
You can move, resize and rotate the rectangle: all the transformations are being projected onto the original perspective 'plane'. You can also create multiple copies of the shape being edited; see Shapes-in-perspective: multiplication.
Circle-in-perspective
Add some roundness to your scene.
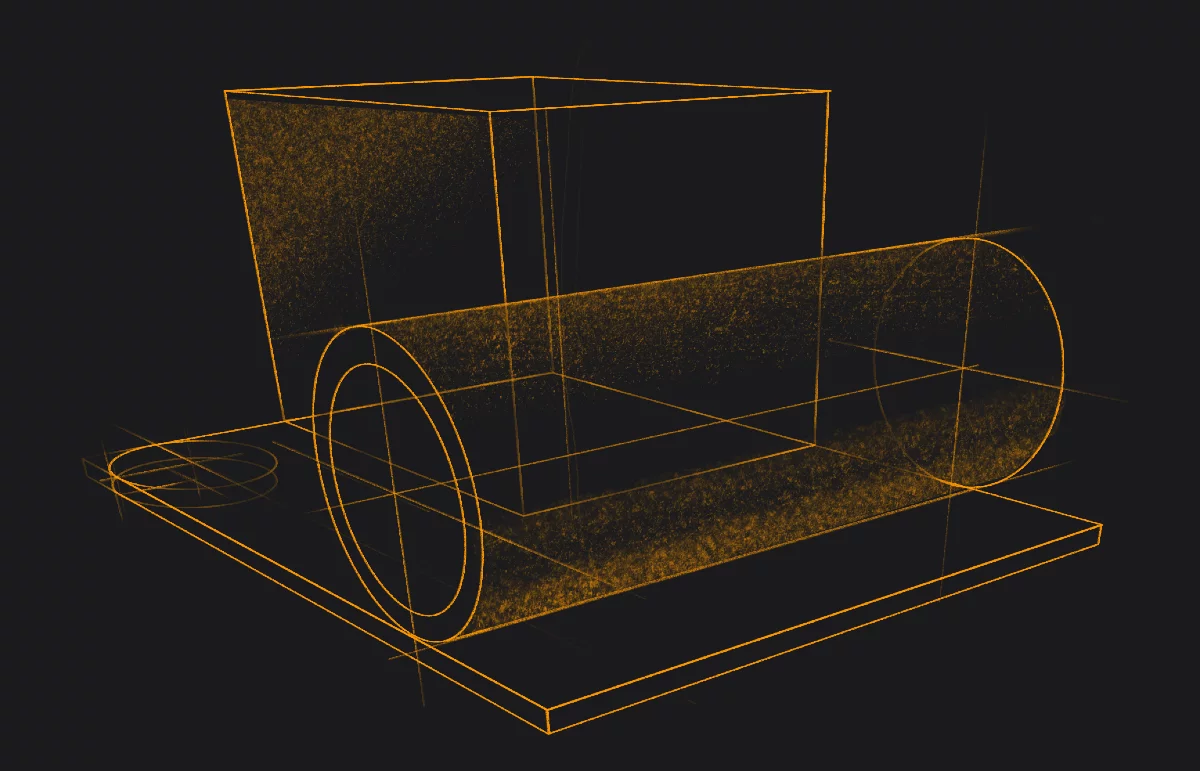
Circle shape in any perspective grid allows you to add geometrically correct 3D cylinders and pipes to a scene.
Note that certain basic knowledge of the perspective constructions is required to create correct and convincing 3D imagery.
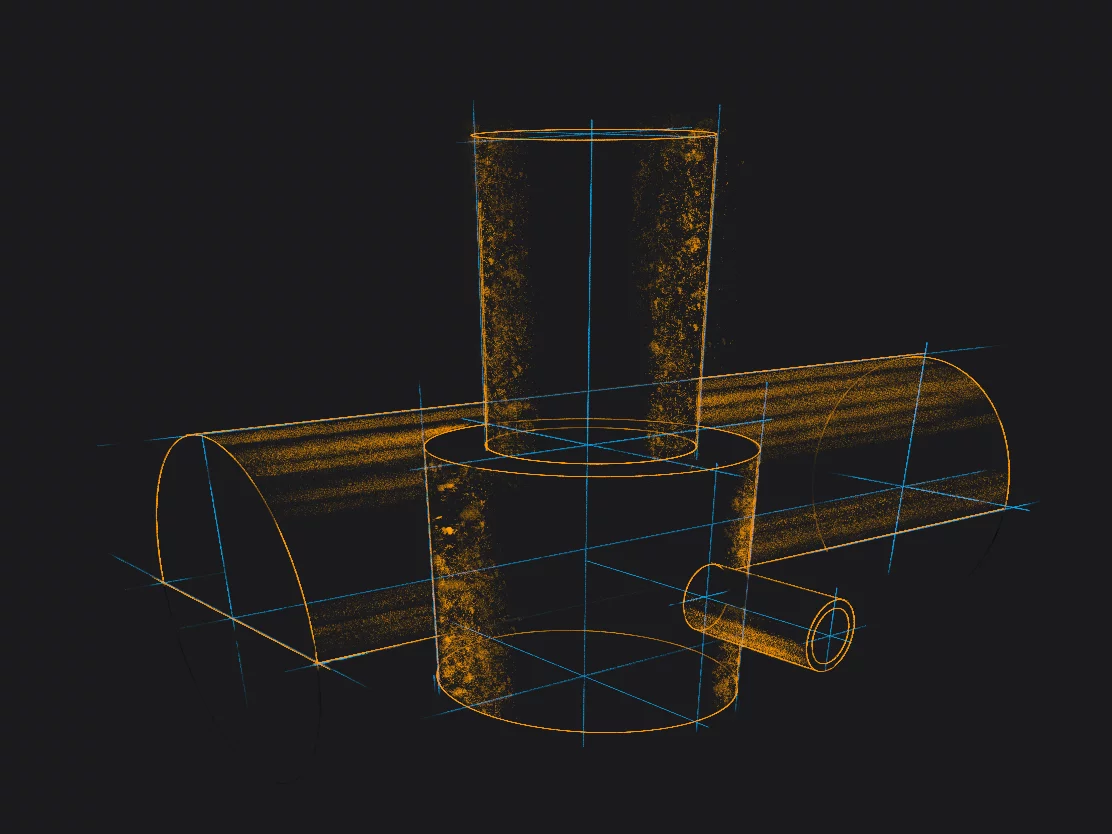
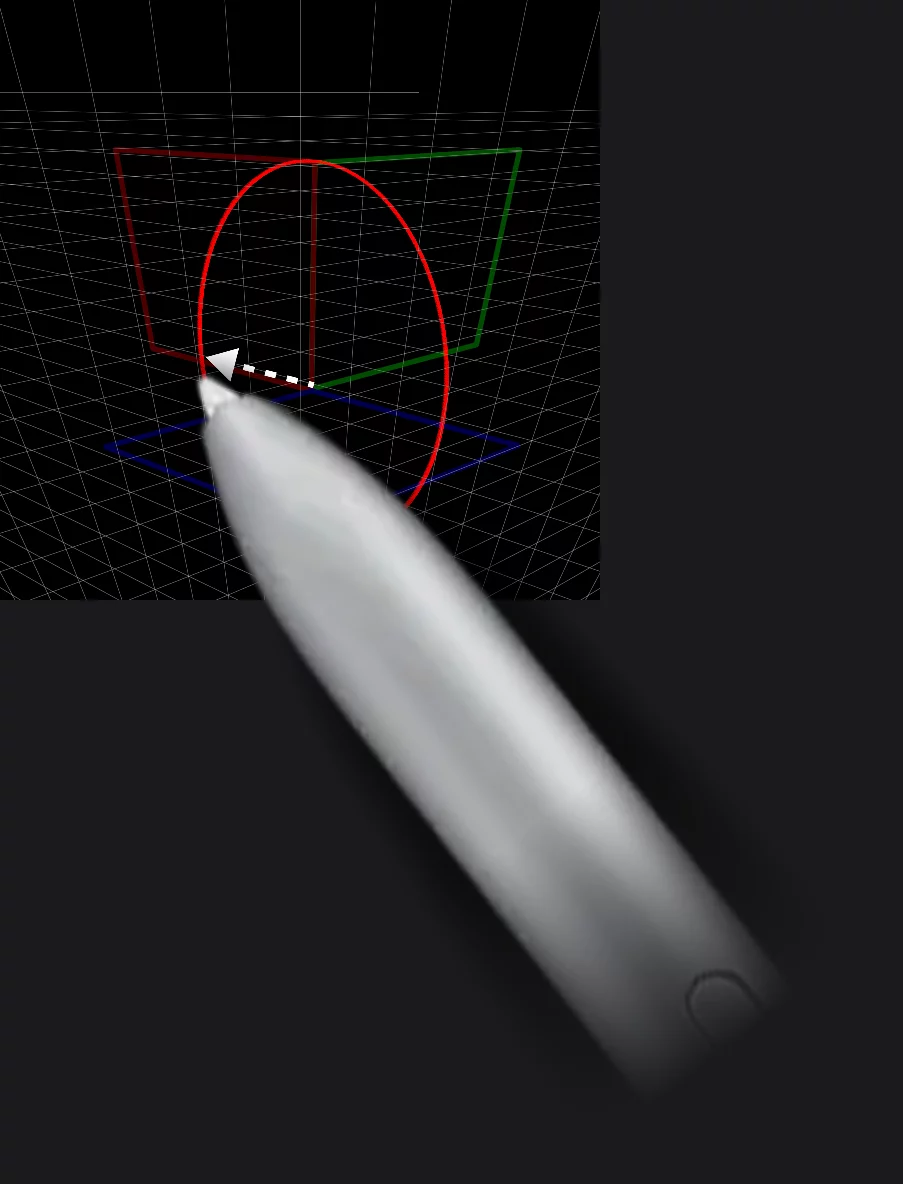
Creating correct cylinder shapes may require using some additional temporary geometry (here shown in blue)
Use layers to separate temporary geometry from your final illustration. Learn about layers in Using layers.
Circle-in-perspective follows the geometry of the 3D 'plane' on which it is drawn even when you edit the shape.
Learn how to select the virtual 3D plane for the circle in Rectangle-in-perspective: select the right plane.
Learn how to edit a circle in perspective:
Circle-in-perspective: select the right plane
Any plane.
From each point of the canvas you can draw circles on three different perspective 'planes'.
Start drawing the circle in direction towards one of the vanishing points. This is similar to selecting the plane of the Rectangle-in-perspective, only that the circle is drawn from its center.
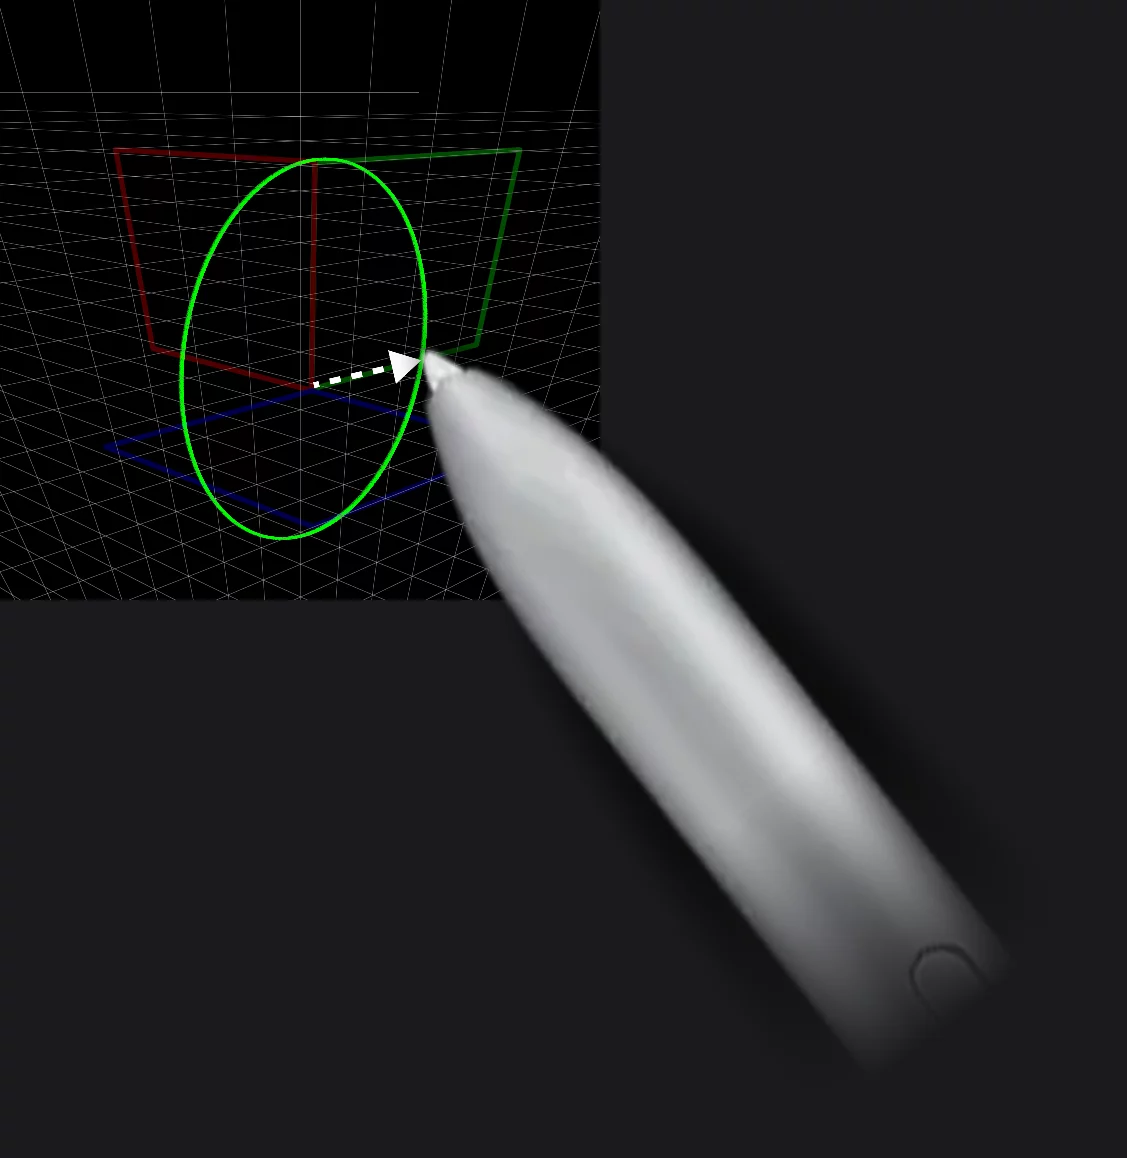
In fact, drawing in opposite direction will work as well. Just draw along the grid lines.
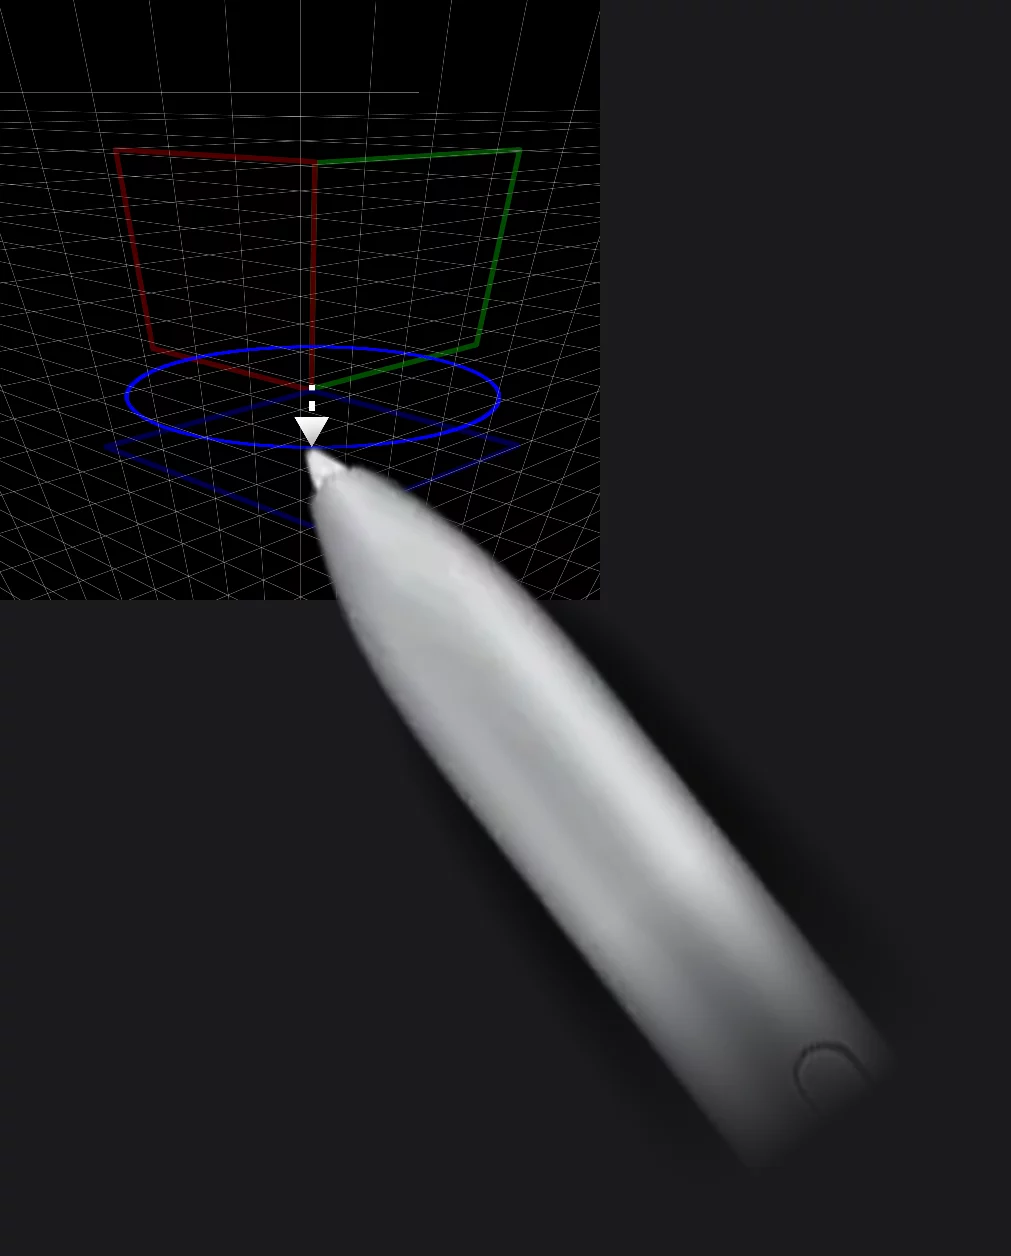
If you happen to choose a wrong plane, just return your stylus to the starting point and start over in new direction.
Shapes-in-perspective are editable, but you cannot change their original plane. More Rectangle-in-perspective: select the right plane. Learn more about using Shapes in general in Shapes — overview.
Shapes-in-perspective: multiplication
Create complex 3D scenes in no time.
Using the Stamp function (built-in into the Shapes) you can quickly multiply the shapes within the perspective plane.
Rectangle shape Mini-toolbarMini-toolbarIn Infinite Painter’s interface, a small toolbar displayed in the upper-right part of the screen when certain tool is active. This toolbar may consist of one or more buttons; the main, leftmost icon indicates the tool in use. Learn more

Stamp button: tap to leave a copy
You can adjust brush size, opacity, color and any other parameter for each copy of the shape separately. Of course you can resize and rotate each copy too, if needed.
Using Line shape in perspective
Sometimes you don't need everything follow the rules.
Line shape doesn't snap to perspective grids by design. You can use it to add geometry that doesn't follow the main perspective construction like diagonals or construct a separate geometry sets like rotated vanishing points or drop shadows.
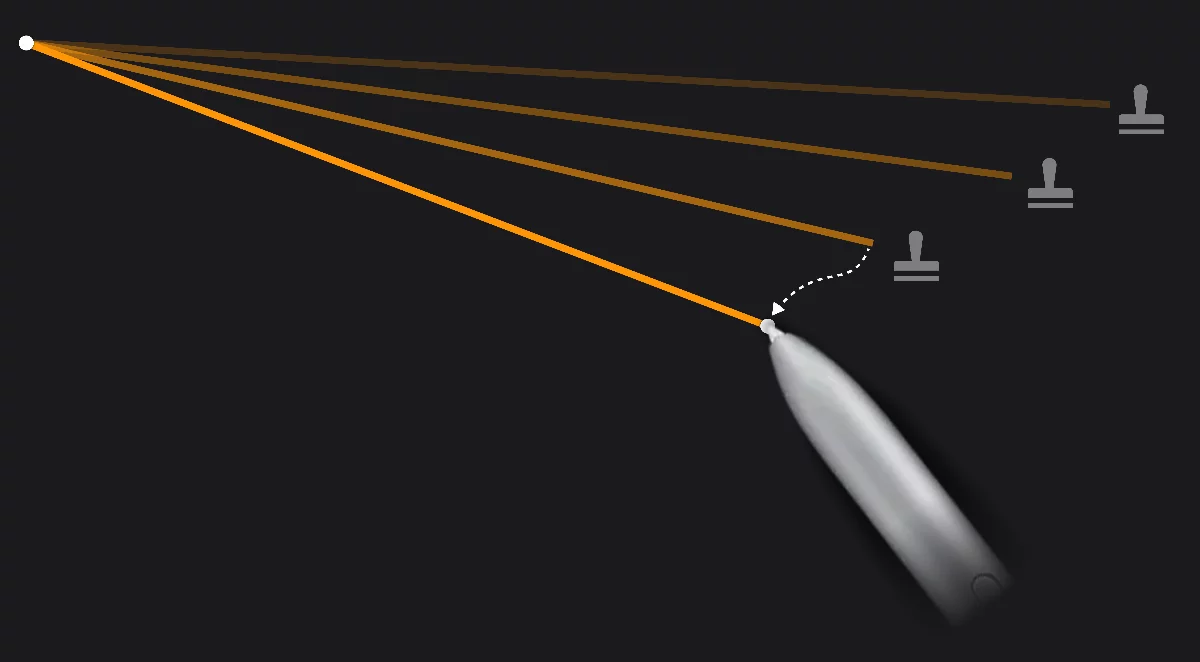
Having anchored one end of the Line at an arbitrarily chosen vanishing point, you can move the other end, and with use of the Stamp function leave a number of lines converging to the new VP.
An example of use of the Line shape to build a local rotated perspective without altering the main grid setup. Note that this method is not especially precise and relies heavily on the user's knowledge and skills. Learn how to use the Line shape in general in Line shape .
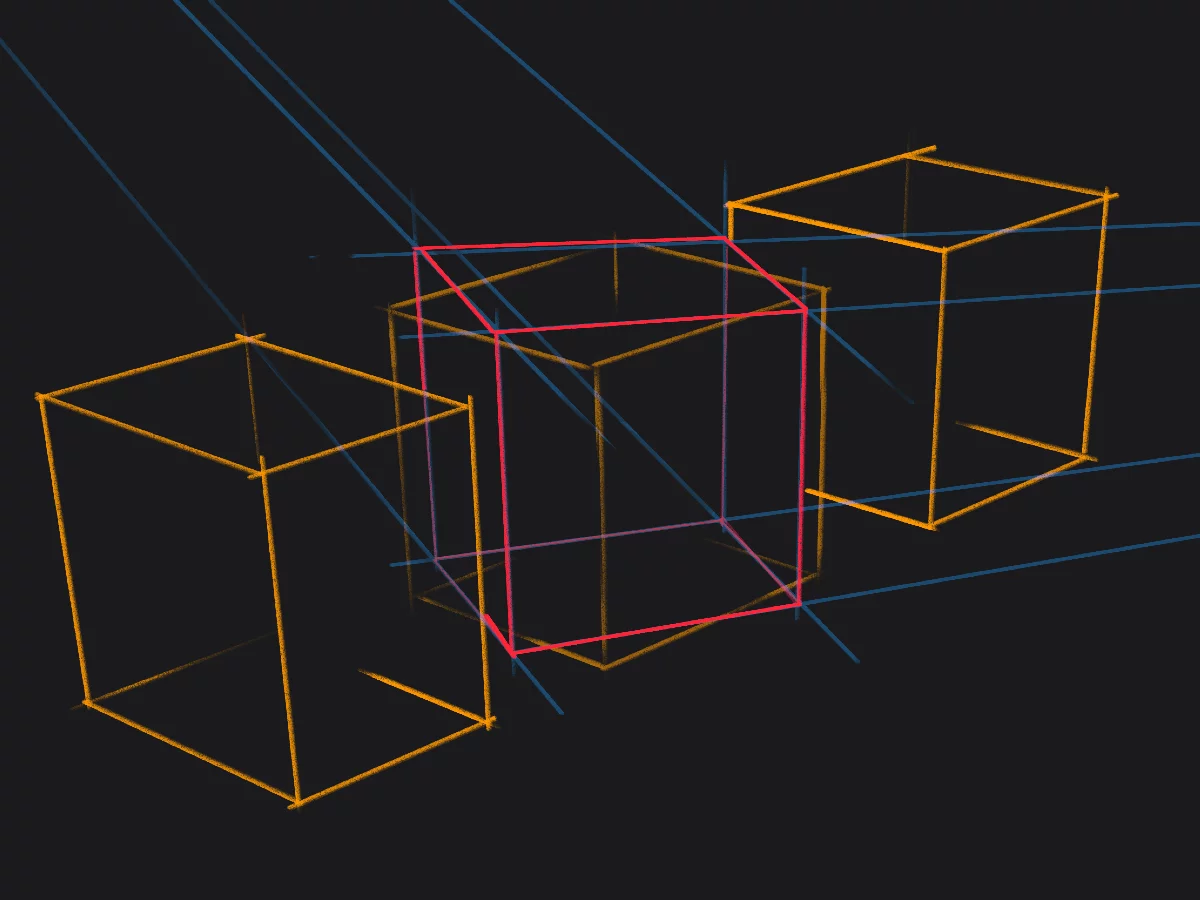
The blue lines converge to the added vanishing points.
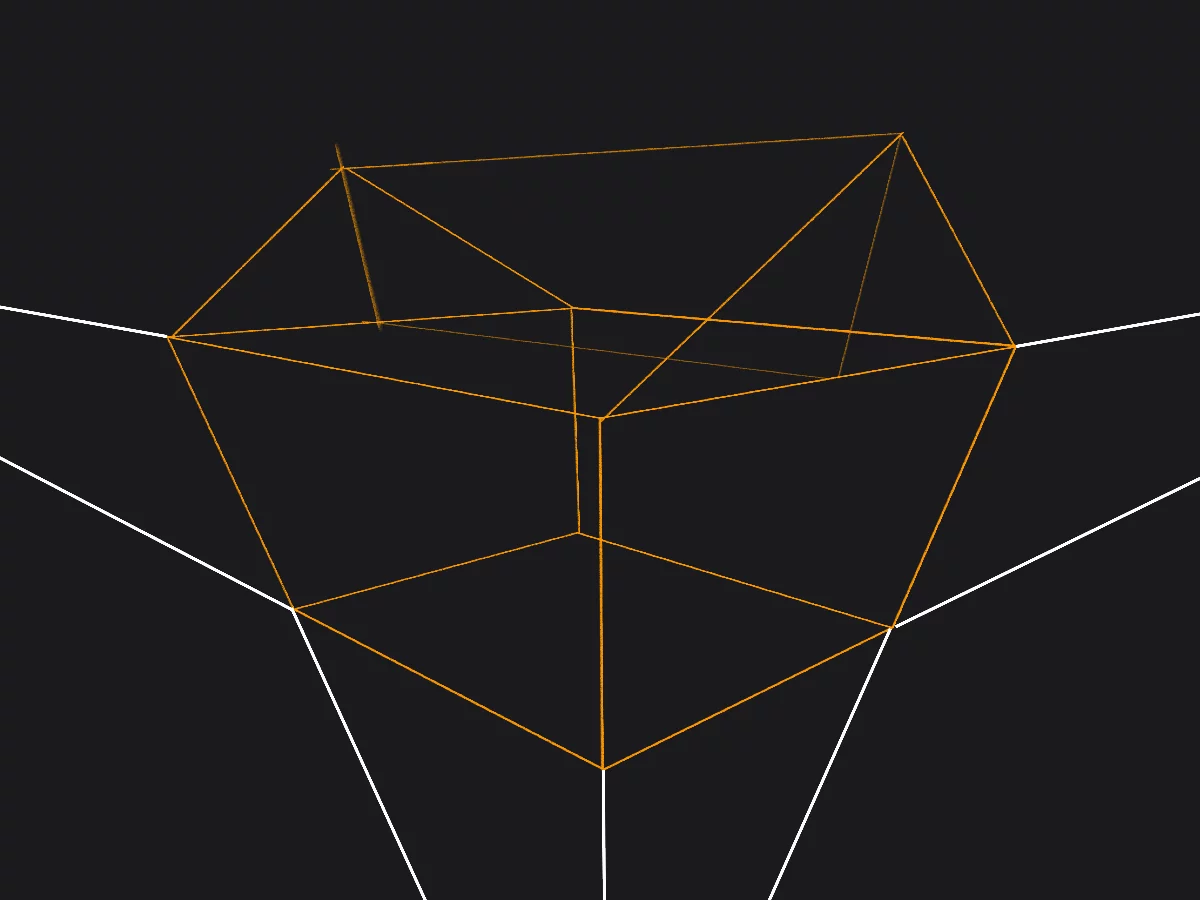
Setting up the perspective grid
Zoom your painting camera with the VPs.
Location of the vanishing points determines the "focal length" of the resulting perspective. The farther away the VPs are from the canvas, the longer the “focal length” is.
Vanishing points close to the canvas
– “wide angle” or “fish-eye” perspective. Usually yields too-exaggerated perspective.
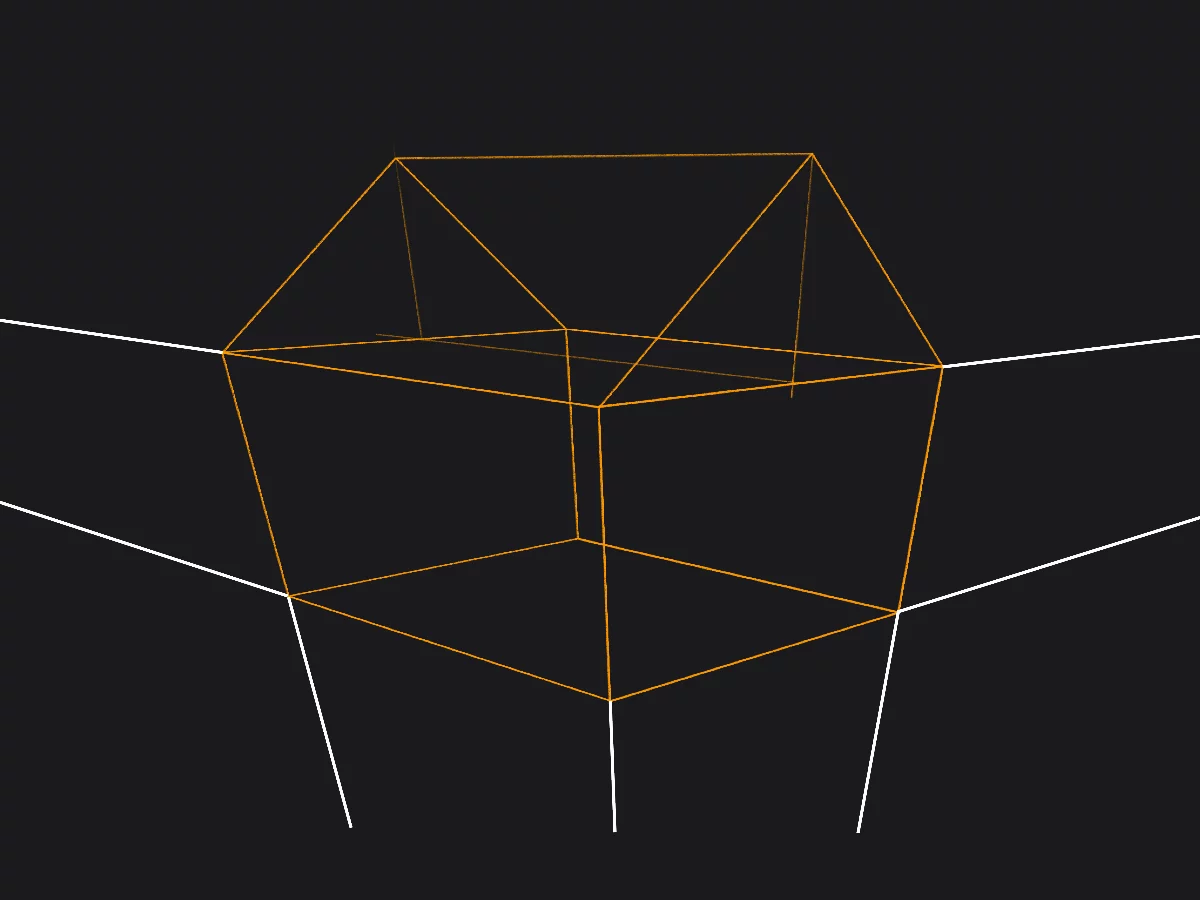
Vanishing points farther from the canvas
– “normal lens” perspective. Suitable for architectural scale.
Vanishing points very far from the canvas
– "telephoto" perspective. Better for depicting smaller objects.
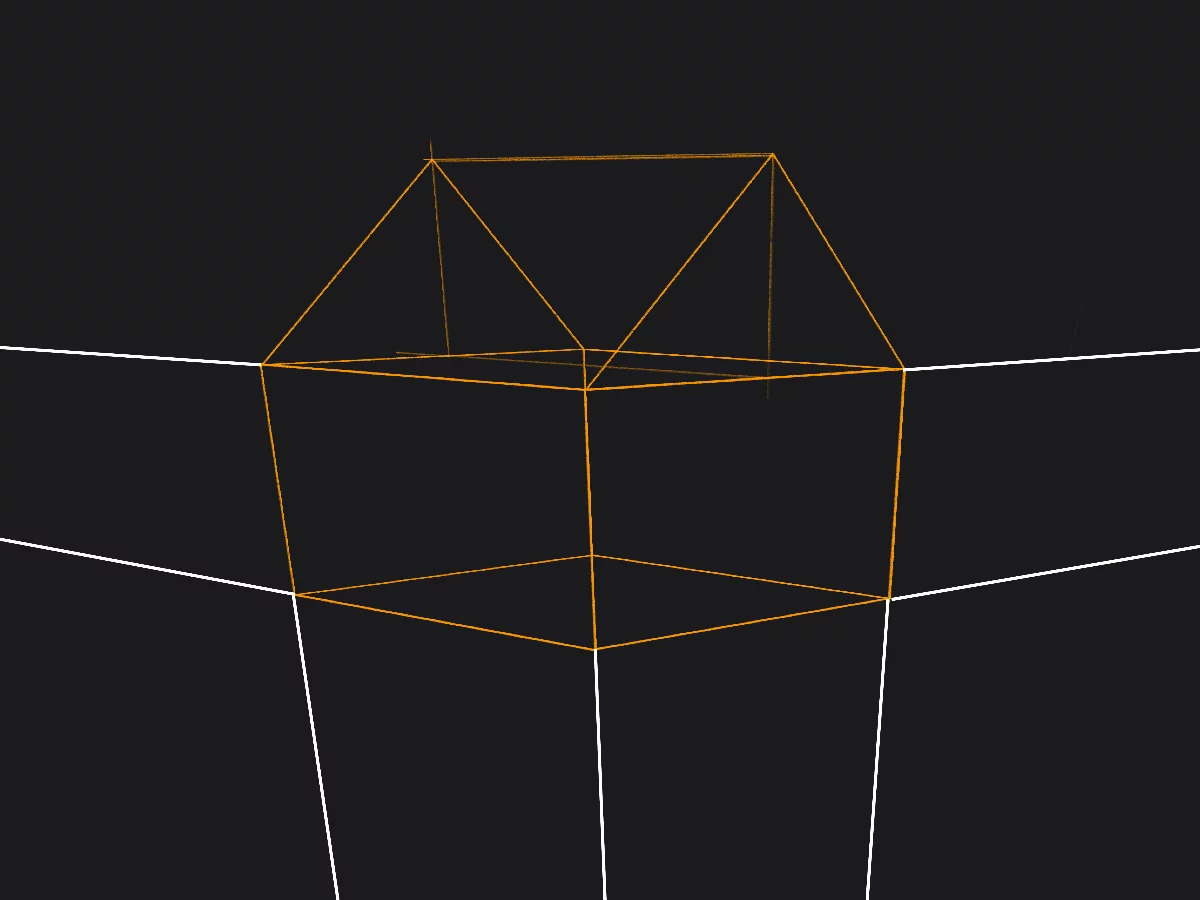
The examples shown are in the 3pt perspective , but these rules apply to 2pt perspective and Curvilinear perspective too.
In most cases it is good to keep the horizon line horizontal and the bottom vanishing point vertically below the middle point of the canvas. However the rules are here to be broken of course.
Note that in Infinite Painter there are no numerical settings for the grid setups: it is not a CAD application anyway.