Overview
Manage your projects.
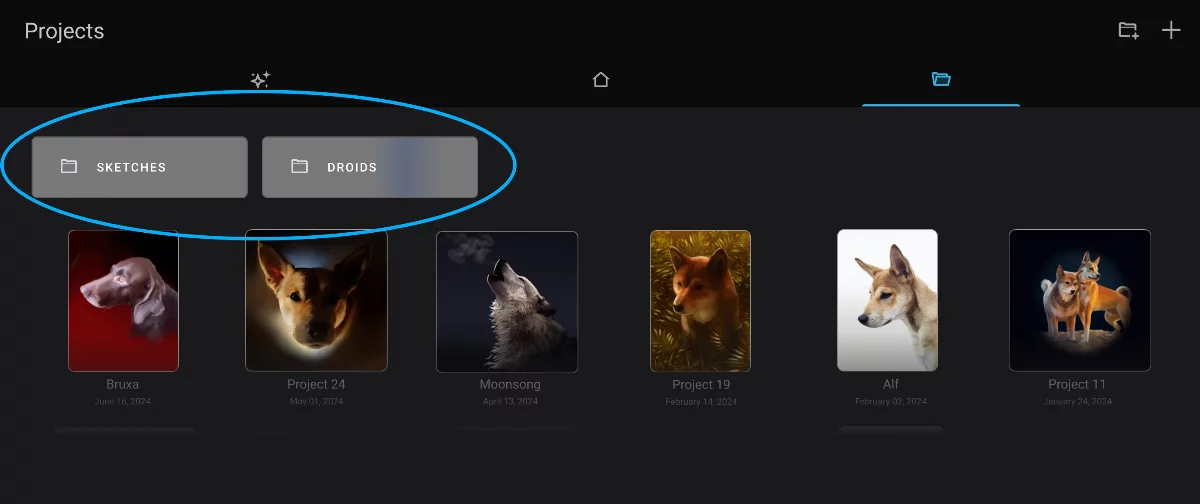
Project gallery tab lets you view and organize your projects; it is in fact a simple file manager.
”Projects” tab:
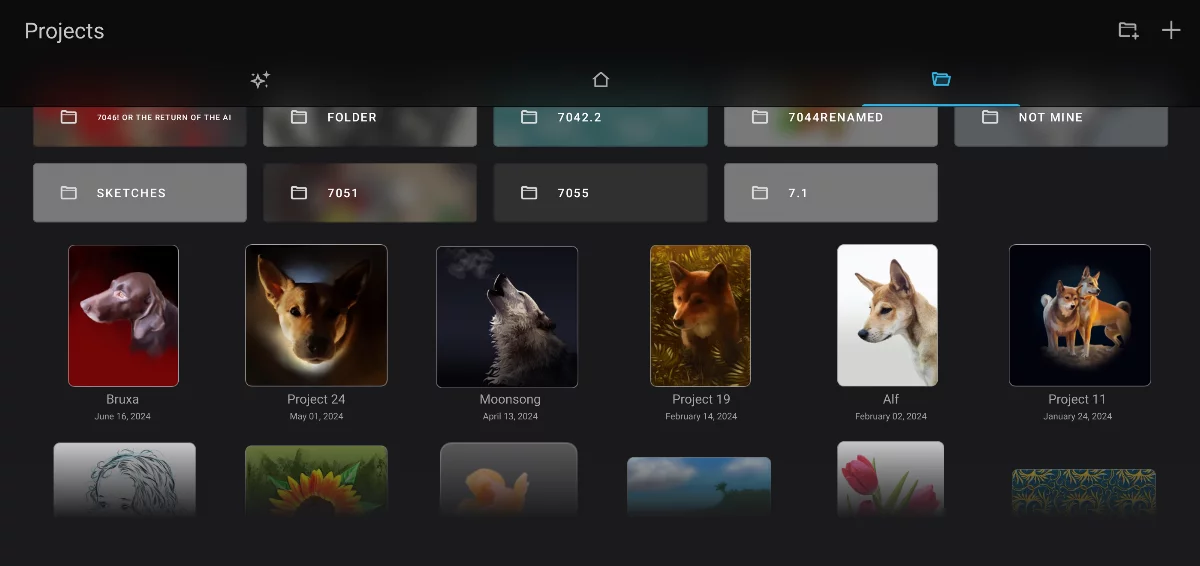
Folder section
If you create folders to organize your projects, they will be grouped on top of the gallery.
Thumbnails of your projects (those not placed in folders)
‘New folder’ button
Add a new, empty folder.
A folder of projects
Tap to open the folder, long-press for options or to reorganize (move around)
Learn how to group projects in folders below.
Project thumbnail
Tap on it to open the project.
Long-press to move or display the context menu with project options. (More in Reorganize thumbnails in the gallery).
Project thumbnails are updated every time you save the project.
Project name
You can rename the project from here (long-press on the project thumbnail to open the options menu and use the Rename command. See below.
Date of the last update of the project.
Tap on the icon to return to the Home workspace (or swipe right across the screen).
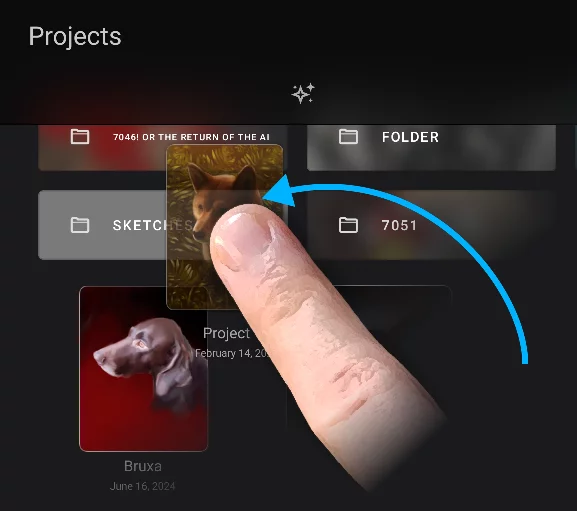
You can reorganize your projects: sort them manually, group them in folders, duplicate, rename, delete. Learn more below.
Reorganize thumbnails in the gallery
Just drag them where you want them.
Long-press-and-drag a thumbnail to reposition it; other thumbnails will move out of the way to make room for the one dragged.
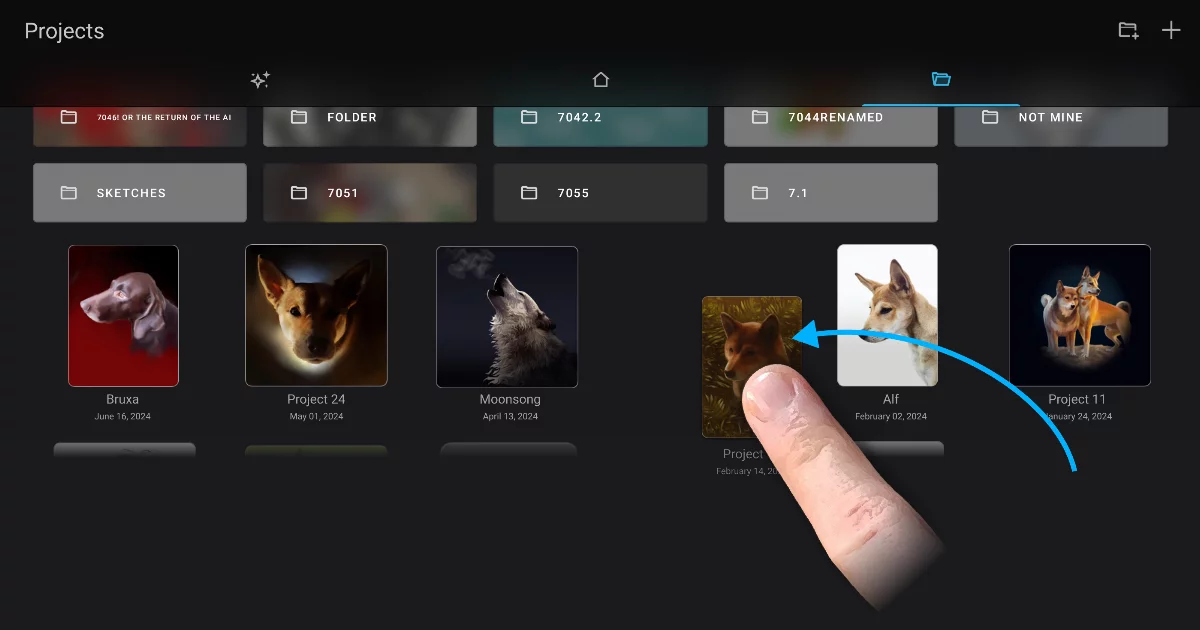
If you want to group a number of projects in a folder, create a folder (with the button on top of the screen) and then drag a project thumbnail over the folder.
Note that the long-press gesture also displays a context menu for given project (if you hold down your finger a little longer).
Managing projects in gallery
Like in a file manager.
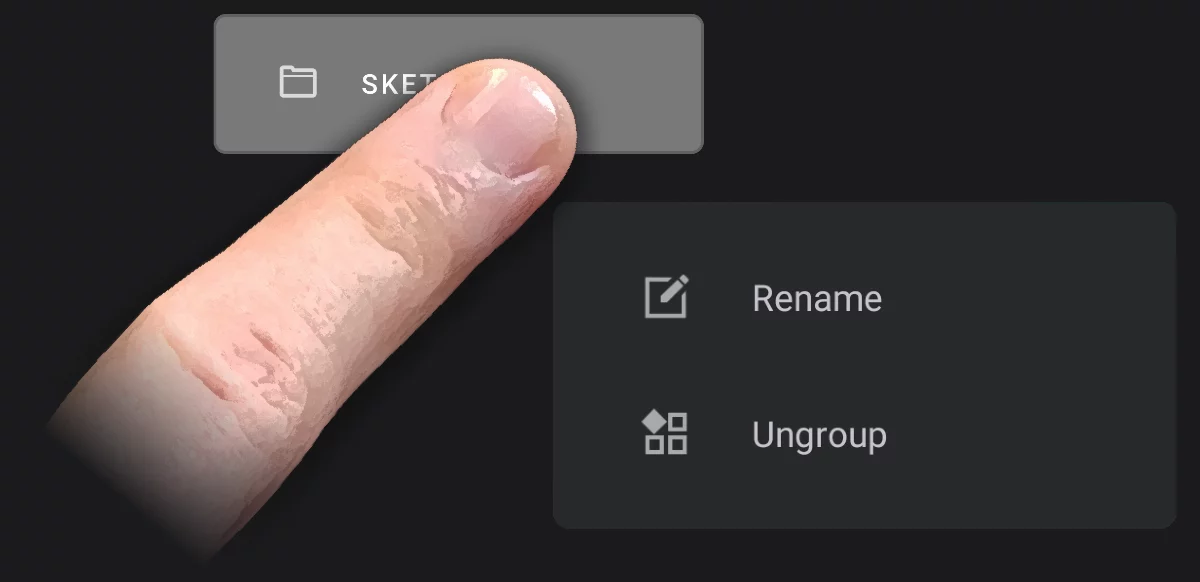
Long-press on a thumbnail to display its options menu
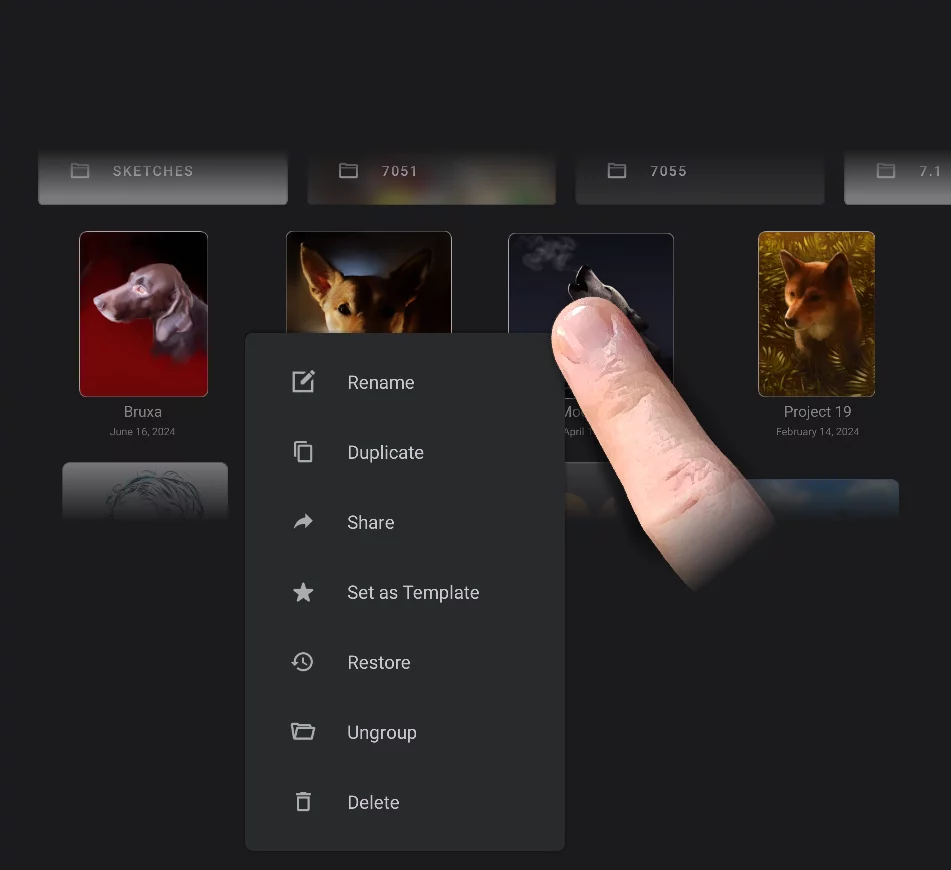
Long-press on a thumbnail.
![]()
Rename
Lets you change the name of the project.
![]()
Duplicate
Creates a copy (copies) of selected projects
![]()
Share
Export the project as PNTRPNTRPNTR ("Painter Project Transfer File") is a special proprietary file format for transferring Infinite Painter projects between devices or for backup.Learn more. See Export formats for details.
![]()
Set as Template
Turns the project into a template. Learn more in Project templates.
![]()
Restore
Opens project version history panel. This lets you restore earlier versions of your project. Learn about version history in Project version history.
![]()
Ungroup
(this option shows up only for items within a folder)
Removes selected projects from the folder (ungrouped projects return to the “main” level of the gallery).
![]()
Delete
– deletes the selected project permanently.
This deletes the actual project file from your device's storage. Be extremely careful, this is irreversible.
Similar context menu appears if you long-press on a project folder thumbnail.
Note that if you long-press and immediately drag the thumbnail, the context menu will not appear, rather you will be able to move the thumbnail around. See Project gallery.
Project folders
Group your projects.
Use folders to organize your projects.
Folders appear in the upper part of the Projects tab.
You can change their order by dragging.
![]()
Add new empty folder with this button.
Long press on the folder for the context menu
![]()
Rename
Lets you change the name of the folder
![]()
Ungroup
For nested folder: moves the entire folder one level up
Drag project thumbnail onto the folder to place it inside. See Reorganize thumbnails in the gallery.
You can create folders within folders too:
Nesting folders
When you need a structure.
You can create folders within folders within other folders too.
Use the “add folder” button in the upper-right corner to make a sub-folder. In current version of the gallery you cannot drag a folder into another folder.
Example structure of nested folders:
(Projects > droids > Unfinished sketches)

Tap the arrow in the upper-left corner of the screen to jump one level up in the nesting structure.
Saving projects
Make sure your work is safe.
In Infinite Painter 7 you don't have to save your projects manually but you can.
In fact, saving the project manually does not overwrite the previously saved state of the project, rather adds a state to the project’s version history.
The open project is being saved automatically each time you leave the Studio – with Home button, New or Open commands, or when leaving the application. – each time a new version history state is added (learn more about project version history in Project version history)
Save command (see Options menu)
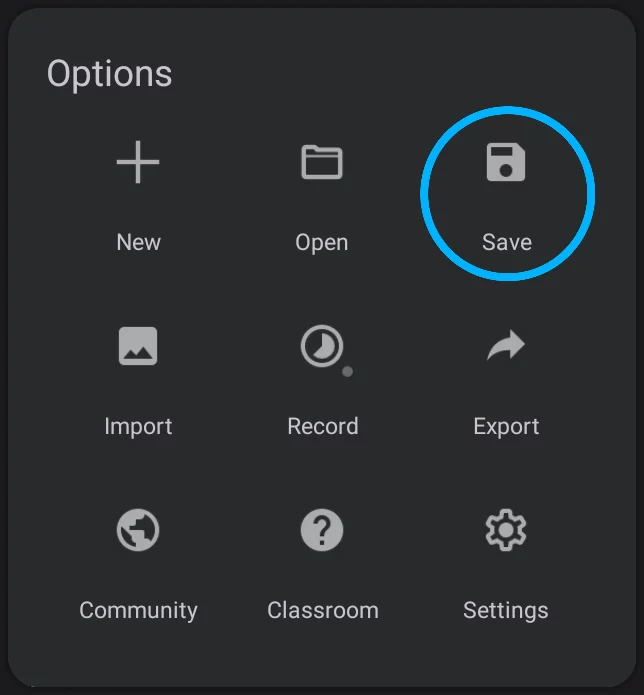
Save command
Saves the project in current state. Previous saved states are preserved.
You cannot save current project as a duplicate (like Save as... on a desktop system). Instead, close the project and duplicate it in the Project Gallery.
With the "Save changes prompt" option active, you will be asked to confirm saving the project.

“Save changes prompt” toggle in the Application settings.
By default this option is "off" and the changes are being saved without your confirmation.
Discard changes
The changes that you have made to the project in the current session will be lost. The last saved version will be kept.
Save
Confirm saving changes. Current changes will be added as new history state. Previous version(s) will be preserved too.
Note that saving the project in Infinite Painter does not overwrite previous versions like in most other applications. So you can eat the cake and still have it. Learn more about version history in Project version history.
![]()
Your projects are stored only in the local storage on your device. Note that in version 7, unlike in earlier versions of Infinite Painter, you have no direct access to your projects as PNTR files. The projects are stored as open directories, and cannot be manipulated outside the application. You may wish to export your project to the PNTRPNTRPNTR ("Painter Project Transfer File") is a special proprietary file format for transferring Infinite Painter projects between devices or for backup.Learn more file format for backup or to transfer the project to another device. Learn about exporting projects in Import — export.
Project templates
Reuse your projects.
You can turn any project in Project Gallery into a template Opening such template will simply open a copy of it.
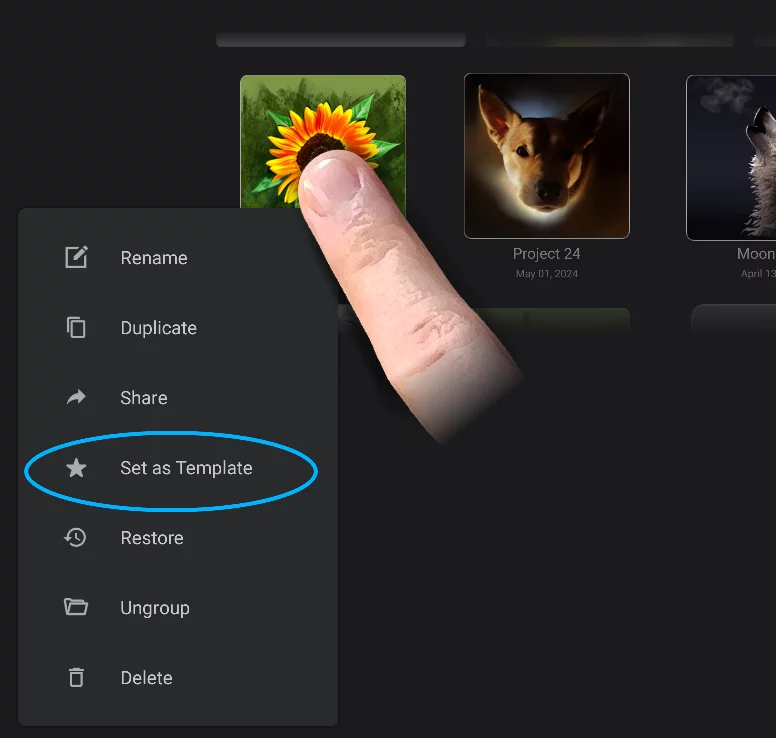
Long-press on the thumbnail to display the context menu.
Tap "Set as Template" from the context menu to turn the project into a template.
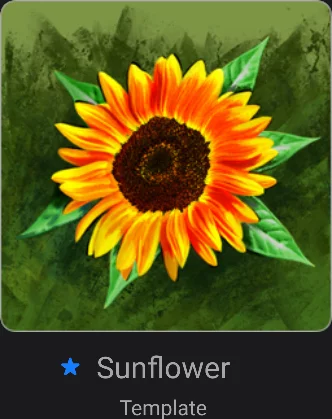
The thumbnail of a template is marked with a blue star icon:
You can use templates for reusing project dimensions and settings (like paper color and texture) but also for reusing artwork layers. Project template may contain as many layers as you wish. Decorative borders, vignettes, backgrounds, panel layouts — use templates for anything.
Note that certain settings like the last-used brushes or the custom swatch palettes are also stored in the project. With the templates, these can be utilized for your convenience too.
Note that the templates do not appear in the Recent section (on the Home tab).
You can turn the template back into a regular project. Use the same context menu — “Set as Project” command.