Overview
Manga?
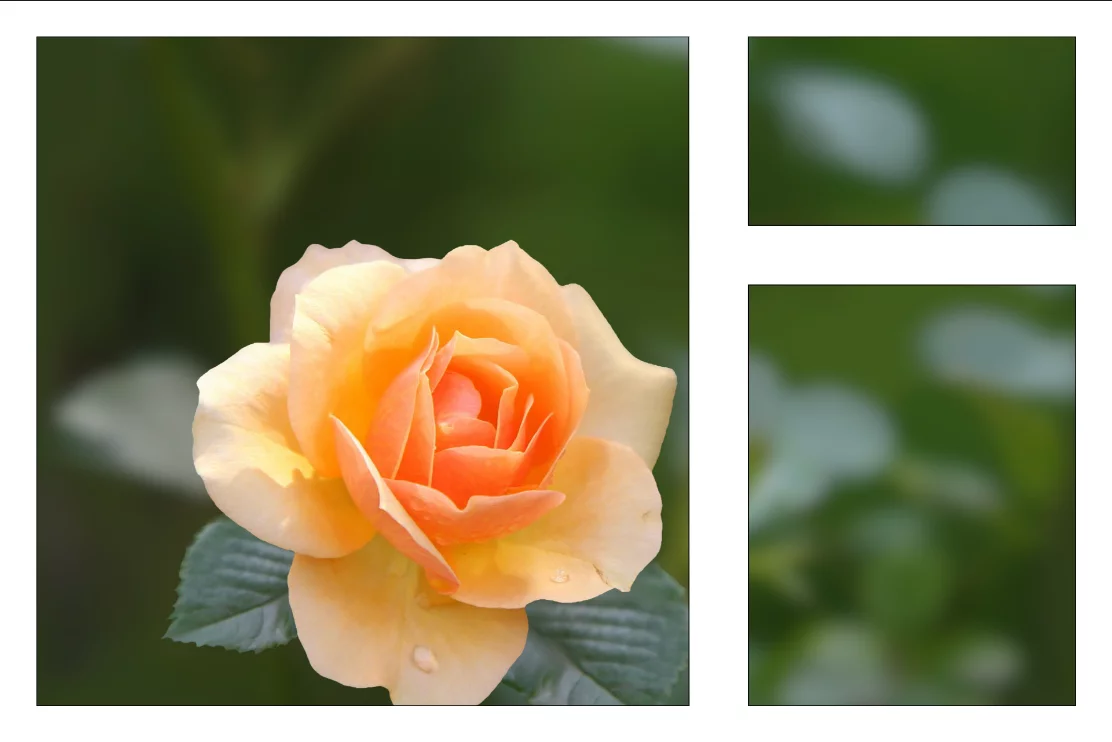
Create a comics-style grid of panels with neat dividers between them and a frame around.
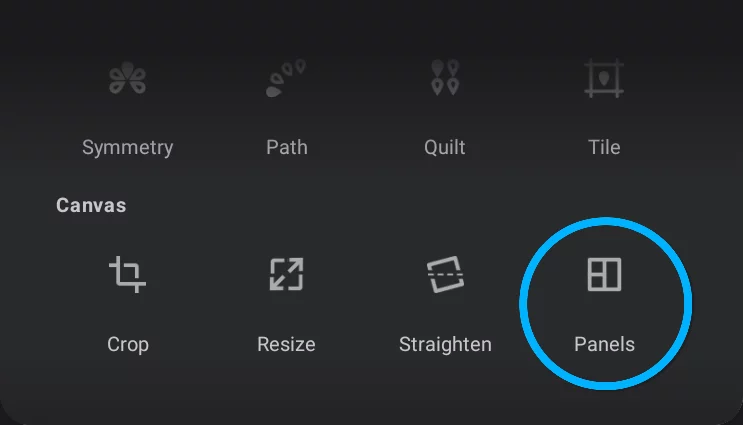
The Panels tool in the Editing Tools menu.
Panels tool toolbar

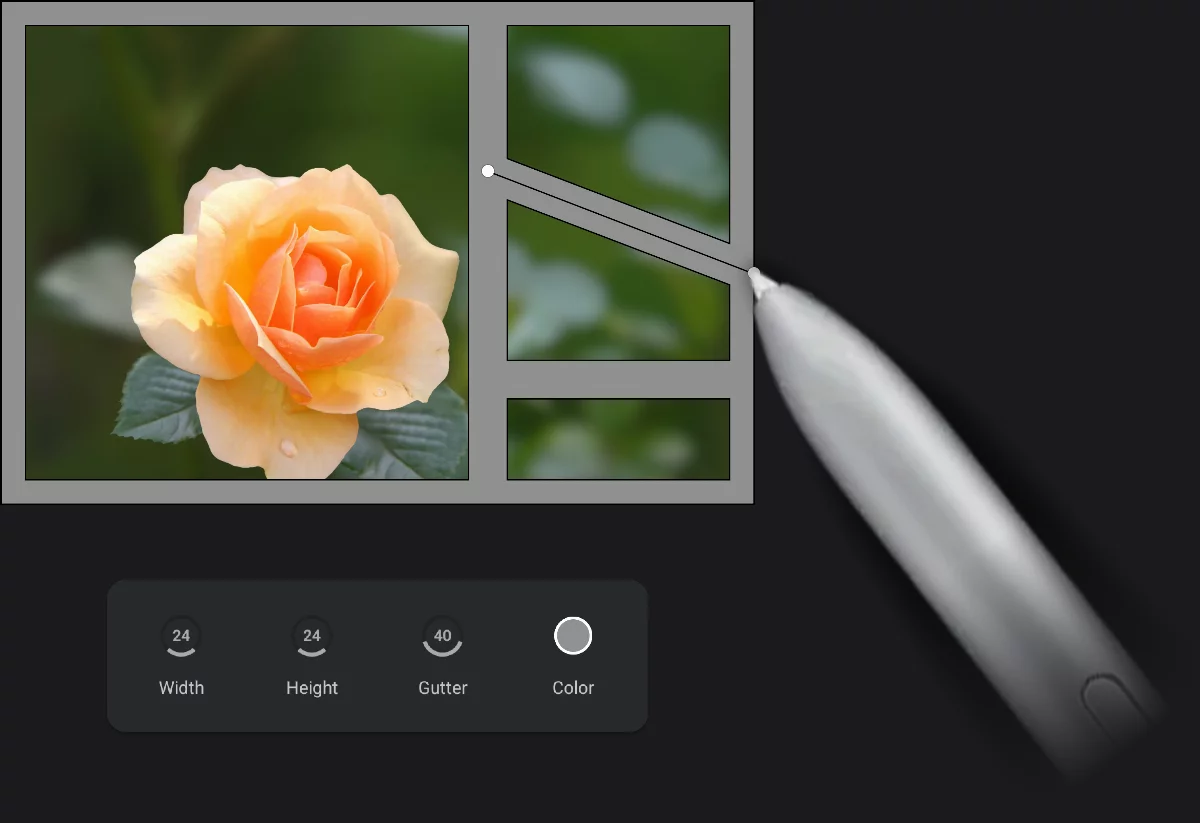
Frame and gutter width controls
Learn more below.
Gutter color
Tap to display color selector panel.
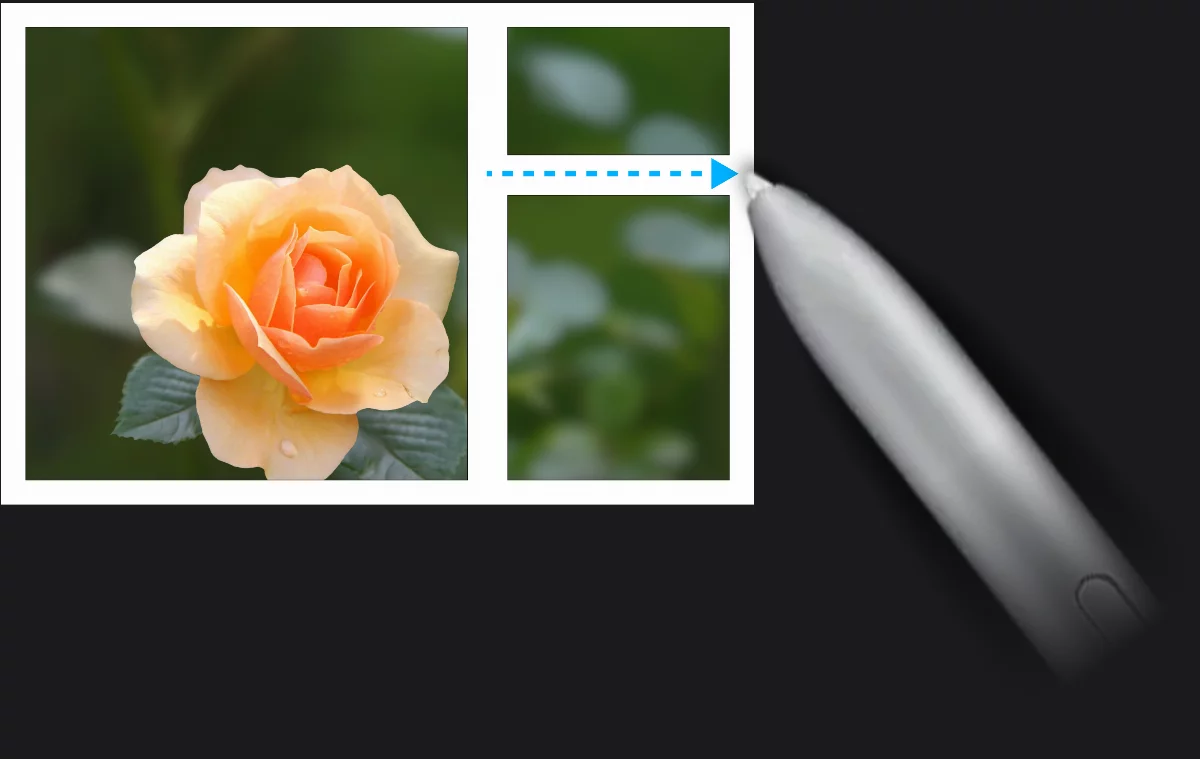
Draw the dividers
Each gutter line has to start and end on the outer frame or on another divider.
Gutter (divider)
Dividers are editable: tap on one to display control handles, drag handles)
Panel
Outer frame
![]()
After drawing all the dividers, hit the confirm button; this will create a special “Panels” layer, visible in the Layers panel.
Note that you have to draw at least one divider in order to have the Panels layer created. If you want the frame only, just delete the divider afterwards.
Panel layers are editable; see below.
The Panels have their hidden magic: any brush stroke you start in given "window" is restricted to this window only. This way you do not risk damaging other parts of the artwork for example by using large diameter brushes.
Editing the panels
Divide and conquer.

Cancel
closes the tool without applying changes.
Confirm
Creates a new Panels layer (and returns to the previous regular layer).
Outer frame width
Outer frame height
Gutter width (width of the panel dividers)
New Panels layer created

Editing a Panels layer
Outer frame width
Outer frame height
Gutter width
(width of the panel dividers)
Edit the dividers
Tap on a line to display controls; drag handles to desired position. Gutter lines do not need to be perpendicular to each other.
When a panels layer is edited, a toolbar with controls is displayed. Note that it has no Cancel and Confirm buttons; all changes are applied to the Panels layer in real time.
[ Icon mention not found: icon/Delete ]
To delete a divider line, drag one of its ends out of any other line.
Panels layer may be edited at any time.
You can control how the Panels layer is rendered: adjust its opacity, change its Color blending modeColor blending modeIn digital image editing and digital art, blending modes determine how the pixels of one layer interact with the pixels of underlying layers. These modes apply mathematical operations to color values, altering how the layers combine.
Not to be confused with the brush blend mode.Learn more, add a mask to it. You can also select opaque areas of the panels as with any regular layer (see Selecting layers and use this selection on other layers in a creative way.
You can create multiple Panels layers, with different settings and separate sets of dividers.
You can use a Panels layer as a Clipping maskClipping maskClipping mask (or clipping layer) is a regular RGBA layer used to mask another layer (or multiple layers).Learn more for another regular layer. This way you can add texture or special effects to the dividers, while keeping the panels fully editable.
to convert a panels layer into a regular layer, merge it with an empty layer. Learn how to merge layers in Using layers.